Showing posts with label Home made. Show all posts

Friday, May 6, 2011

Cinco De Mayo Fiesta

I have been looking up recipes, reading through recipes, and coming up with my own ideas about what to make for Cinco de Mayo this week.  Excitement has been rising yet the other day while planning and shopping for my Cinco de Mayo dinner I became so frustrated.  First I was happy to find tomatillos in the produce section but then I was ticked that they were all soft and as I peeled back some of the paper husks I found mould and bruises (ewwwwww).  Needless to say, I did not get any fresh tomatillos for dinner.  It is kind of hit or miss at my grocery store when it comes to tomatillos.  If they have them, there's never too many and you have to get there early to get the good ones.  I also couldn't find poblano peppers to save my life!!  Lucky there is a small section of Mexican products in the 'international' aisle, if you can call it that.  I did manage to find a bottle of green enchilada sauce and a bottle of red sauce there.  I will have to wait and see how they both taste but I really did want to make my own.


Wednesday evening I spent some time prepping for Cinco de Mayo.
I put together my tortilla soup so it was a quick re heat and serve item for dinner.

Tortilla soup (adapted from Food Network)
Printable versions of both recipes

1 large white onion
2 jalapenos
1 28 oz jar whole tomatoes (roast the tomatoes but save the liquid for the soup)
3 or 4 cloves garlic
1 tbsp coriander seeds
1 tsp cumin
4 cups chicken stock (or more, depends on how thick you like your soup)
1/2 cup ancho chile pepper puree (3 or 4 dried anchos softened with hot water to cover and purred: freeze   the leftover)
2 bay leaves
First I pre heated the oven to 400F and chopped some onions, 2 jalapenos, 3 cloves garlic, and some whole canned tomatoes and put them on a baking sheet.  These tasty tidbits were then coated with olive oil, kosher salt, and fresh ground black pepper.

Then whole works then went into the pre heated oven for 10 minutes.

Pull the whole works out and sprinkle with 1 tbsp coriander seeds and 1 tsp cumin.

Pop it back into the oven for another 10 minutes or until everything is nice and toasty!

I let the roasted veggies cool while I made dinner for Wednesday (scrambled egg night). After the Boy washed the dinner dishes, I plunked everything into my blender and whirred it up until smooth.

(I have made this recipe before but without the roasting and I made a huge mess blending the hot soup so I thought I would try it this way.)

The last time I made a tortilla soup, I had tons of left over ancho chili puree so I froze it.  Wednesday evening I thawed it and tossed 1/2 cup of it into the blender with the cooled roasted veggies. The whole works then goes into a pot and heats up with 2 bay leaves, 1 28 0z can of crushed tomatoes and 4 cups of chicken stock....mmmmm.....

Serve topped with things such as:
  • dollop of sour cream
  • cilantro
  • chicken
  • avocado
  • cheese
  • green onions, onions, tomato
The other item I prepped ahead was the shredded chicken for the enchiladas!!

Chicken Enchiladas

6 chicken breasts (boneless, skinless)
1 large white onion, chopped
4 cloves garlic, smashed and roughly chopped
1 tsp cumin
1 tbsp oregano
salt and pepper to taste
red or green enchilada sauce of your choice ( I REALLY wanted to make my own green tomatillo sauce and red poblano sauce but I couldn't find either item....sigh)


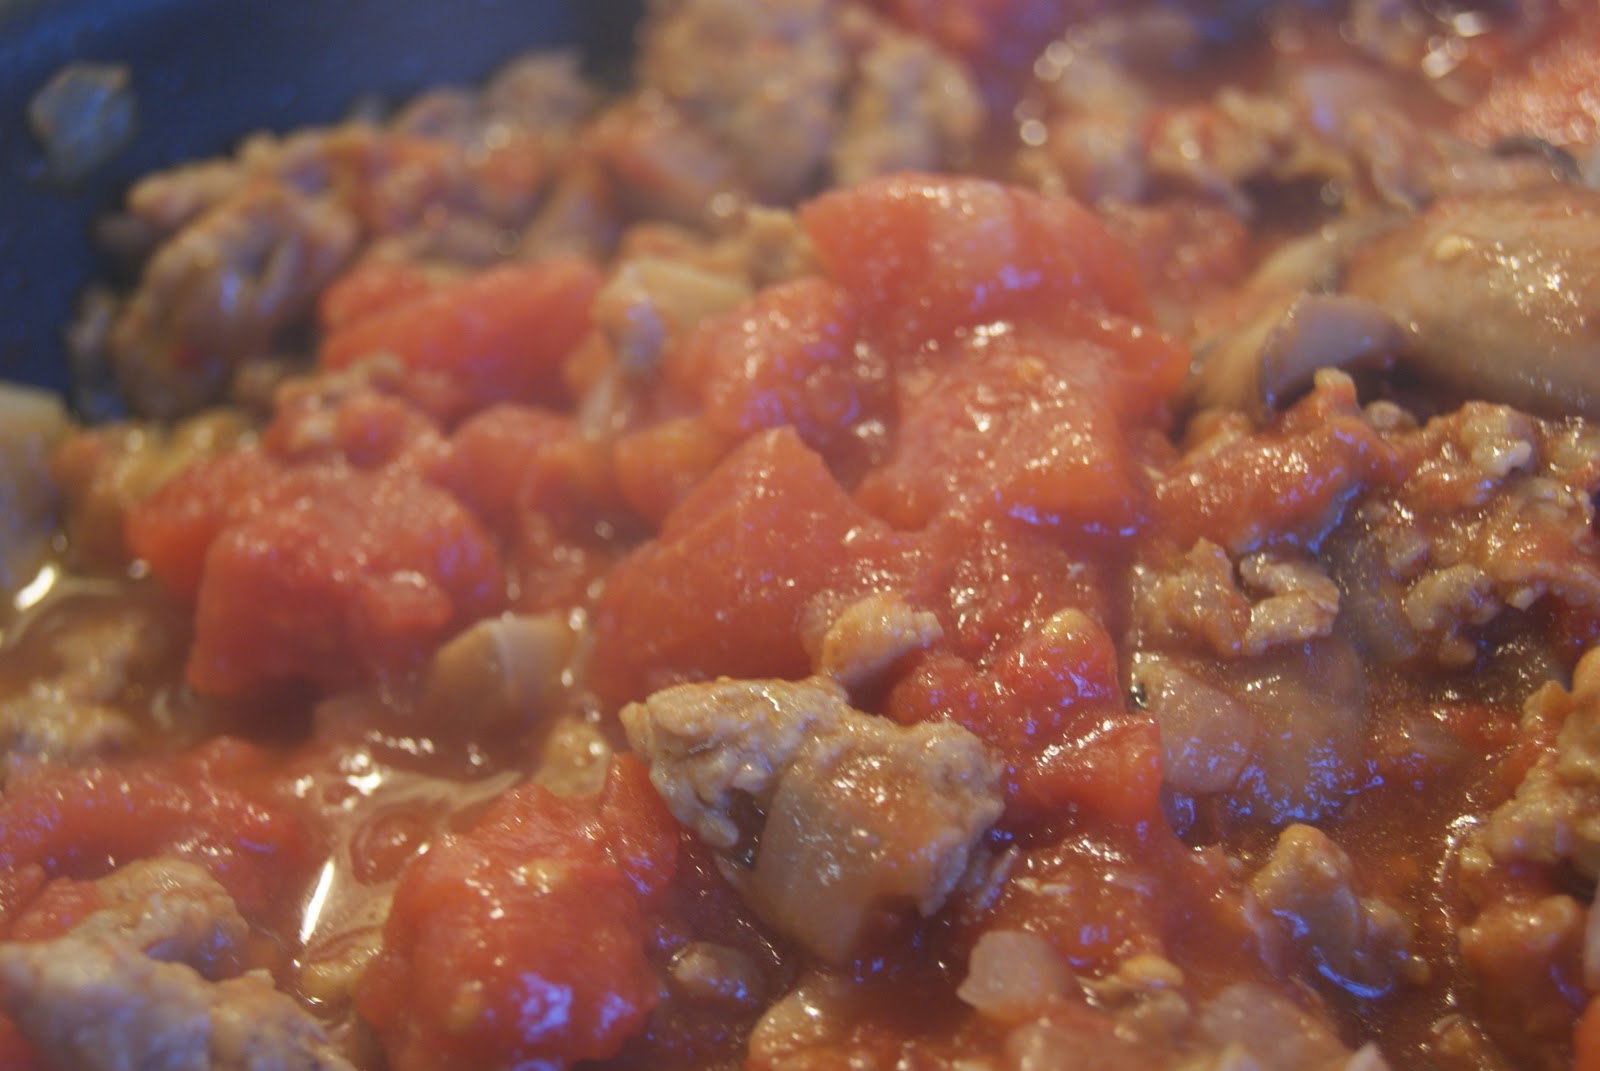
Heat a large skillet over medium heat and add some olive oil to coat the pan.  Toss in the onions, garlic, oregano, cumin, salt and pepper.  saute until fragrant, about 2 minutes.


Salt and pepper the chicken breasts and lay them on the top of the onions in the pan.  Clamp the lid on and cook for 18 - 20 minutes or until the chicken is fully cooked.  Remove from the heat and allow to cool until the chicken is cool enough to shred.


I just used my clean hands to pull the chicken apart.  Add the onion mixture and the juices and plunk it all in the fridge until you are ready to fill your enchiladas.

Yet another item difficult to find was corn tortillas...I did find some multi grain and some flaxseed tortillas that had a similar texture to corn tortillas and they worked wonderfully!

Mix the shredded chicken with some shredded monterey jack cheese, fresh chopped cilantro, and some chopped green chiles (optional).


Spray a 9 x 13 pan (or similar size) with cooking spray and pour a layer of your choice of either green tomatillo sauce or red poblano sauce over the bottom of the pan, just enough to cover.


Spoon about 1/3 to 1/2 cup of filling onto the centre of a tortilla, roll the tortilla up and place seam side down in the pan.

Lay each enchilada seam side down in the saucy pan.


Spoon some more sauce over the enchiladas and top with the rest of the cheese.


Bake at 350F for about 20 minutes or until hot, bubbly and the cheese is all melty/gooey.


Serve with re fried beans, rice, chips, guacamole, tortilla soup.....enjoy!!!

 Until next time, stay warm and eat well!

Saturday, April 23, 2011

One A Penny, Two A Penny....

Yesterday we finally took a day off from rehearsals (as it was Good Friday and the school was closed and all....).  I slept in a little, relaxed, and got some baking done.  A nice day if I do say so myself!  What did I bake you ask? Since it is Easter weekend and all, I decided to make some good old hot cross buns.  I remember my Mom making hot cross buns when I was little and I always loved the mildly spiced soft buns with the icing on top! This really is a nostalgic thing for me. I remember a distinct flavour and texture of these buns.  I have tried other recipes but they just didn't fit the bill. 


Years ago I scanned the recipe from my Mom's Purity cookbook.  It is a coil bound cook book with some real gems in it and still uses some very old fashioned language that I find so very neat. One of my sisters has it now and I couldn't find the scan.  Lucky for me, I actually found a newer re print version of the Purity Cook Book from 1967 last summer in the recycling  hut out at the cabin.  I opened the door to put my recyclables in the hut and found a stack of cookbooks just sitting there waiting for me.  It was just meant to be! 


When I make these, I just somehow feel  a bit closer to my Mom, as though she were back in the kitchen with me. I do miss her more during the holidays and I do find it interesting that something as simple as hot cross buns can help bring back so many memories.
Without further ado, I bring you hot cross buns:

Hot Cross Buns - Printable version

1 cup hot milk
1/3 cup sugar
2 tsp salt
1/3 cup butter
1 tsp sugar
1 pkg  active dry yeast
1/2 cup lukewarm water
1 egg, slightly beaten
1 egg yolk (save the white for the egg wash later)
1 tsp cinnamon
1/2 tsp allspice
1/4 tsp nutmeg
2 1/2 cups flour
2/3 cups raisins or currants
another 2 1/2 to 3 cups flour

In the bowl of your stand mixer using the paddle attachment (or a bowl and use a wooden spoon) place:
  • 2/3 cup of sugar
  • 2 tsp salt
  • 1/3 cup butter, cut into pieces
Heat the milk (original recipe says to scald the milk but I put it in the microwave for 2 minutes).  Pour the hot milk over the sugar, salt, and butter. Mix until the butter melts and the sugar gets mixed in.  Allow this mixture to cool while proofing the yeast.

Now get the yeast working. In a bowl mix together and let it stand for about 10 minutes until all foamy:
  • 1 tsp sugar
  • 1/2 cup lukewarm water
  • 1 pkg dry active yeast (or 2 1/4 tsp dry active yeast)

Add the yeast mixture to the hot milk mixture and stir.
Now add:
  • 1 slightly beaten egg
  • 1 egg yolk
  • 1 tsp cinnamon
  • 1/2 tsp allspice
  • 1/4 tsp nutmeg
  • 2 1/2 cups flour
  • 2/3 cup raisins or currants (I didn't have any so I didn't add any)
Beat until smooth, then switch to the dough hook (if using a stand mixer) and add another 2 1/2 cups to 3 cups flour.


Mix until a soft, smooth, and elastic dough forms this may take about 5 minutes.  If the dough is too sticky, add a bit more flour. 

Turn the dough out onto a lightly floured counter and continue to knead by hand (get that stress out!)

Form the dough into a ball and place it in a lightly greased bowl, turning the ball to coat the dough.  Cover the bowl with a clean tea towel and place in a warm spot to rise until double (about an hour)

Punch the dough down and divide into 2 equal portions, use a scale if you wish to make it really even!  Divide each half into 9 pieces and shape into a flattened bun.


Arrange on a lined baking sheet about 2" apart.  Cover with a clean tea towel and place back in that warm spot to double in size.(about 45 minutes).  This is a good time to pre heat the oven to 400.

Fetch that left over egg white mix in 1 tbsp water.  Brush the tops of the buns with the egg wash.


Using a sharp knife, cut an x (or a cross, a long the top of the bun.


Bake in a preheated 400F oven for 15 to 18 minutes.

Now it is time to make the icing!

Mix together:
  • 3/4 cup icing sugar
  • 1 tbsp hot milk (or water)
  • 1/4 tsp vanilla (or more if you like more vanilla)
Mix well and drizzle over the hot buns, following the cut marks in the buns.

Enjoy!

Until next time, stay warm and eat well!

Tuesday, February 8, 2011

You Do The Gnocchi Pokey and You Turn Yourself About.

Gnocchi are tasty little potato bundles of Italian dumpling goodness. I have had them in both in Italy and in local restaurants. In Italy I remember soft, pillowy dumplings that seem to go with any sauce that has been served with them. The gnocchi I ordered at a local establishment here were kind of tough and chewy so I didn't enjoy them as much as I thought I should have.

Therefore, I have been wanting to try making gnocchi for quite some time so I figured, why not today? I browsed through my cookbooks but everything with the word gnocchi in the tittle was basically a recipe for the sauce to go with already made gnocchi. Well, Food Network came through for me! More precisely, Mario Batali! The recipe itself is really so simple, the most trouble I had was forming them. I did end up with some pretty funny looking gnocchi but they were darn tasty!!

Ok, maybe I had one more bit of difficulty, I don't have a food mill or a potato ricer. I looked at the store for one but I really didn't feel like buying one just to try one recipe. I am sure I will eventually graduate to wanting one and using one, but right now, I am okay without it. I adapted and was able to push the boiled potatoes through a sieve with a wooden spoon and it worked!!

Gnocchi
By: Mario Batali on Food Network
  • 3 pounds russet potatoes
  • 2 cups flour
  • 1 egg
  • large pinch of salt
  • canola oil
Scrub and boil the potatoes with the skins on until tender.

Put a new pot of water on to boil so you can cook the gnocchi as you make them.

You will also want to put a large bowl of ice and water nearby to shock the gnocchi and stop the cooking process.

While the potatoes are still warm, pull the peels off and pass through a food mill, potato ricer or through a sieve. Make a pile of the potatoes on the counter.

Make a well in the centre of the potato mound.

Sprinkle with all of the flour.

Add the egg and the salt to the well.

Using a fork, beat the egg, slowly incorporating the flour and the potatoes.

Once you are able to, use your hands to finish mixing all of the potatoes and flour into the mound. Knead with your hands for about 4 minutes. The dough will be soft but should feel dry. I found I had to add another 1/3 cup flour to the dough as it was too sticky to work with.

Roll a fist sized ball of dough into a 3/4 inch diameter snake and cut into pieces.
Funny shaped gnocchi

Use a fork to roll the dough pieces to get some funky lines & grooves onto the gnocchi.

Carefully place the gnocchi into the boiling water and boil until they float to the surface.

Transfer the floaters to the ice bath.

Once cooled, transfer the gnocchi to a baking sheet with some canola oil on it to keep the little tasty bundles separate.

These little tasty bundles of gnocchi goodness are tasty straight from the baking sheet!! Of course a little sauce never hurt either!

The book I got my inspiration from for the sauce is "The Italian Way, Cooking with the Delucas" Deluca's is an the Italian place to buy all things Italy. They run a deli, a cooking school, a restaurant....all done with a love and enthusiasm for food! I really do need to make time to head over there soon! (Sounds like a blog field trip is in the works!!)
I didn't follow the recipe exactly as stated in the book (shocking, I know) but I still wanted to tell you where this idea came from.

Gnocchi with mushrooms and sausage
Adapted from The Italian Way, Cooking with the Delucas

1 pound hot Italian sausage, casings removed
1 small onion, diced
1 pound cremini mushrooms, sliced
1 28 oz can diced tomatoes
salt and pepper to taste
Parmesan cheese for garnish

If you are using a packaged gnocchi (with is perfectly alright) put a large pot of water on to boil so you can cook the gnocchi before you add it to the sauce.

Heat up your favourite skillet and add the sausage meat, breaking it up. Scramble fry the meat, crumbling as you go.

Add the diced onion and cook for a couple minutes longer.

Add the sliced mushrooms and cook another 5 minutes or so.

Add the diced tomatoes and cook for about 10 minutes. Let it get all bubbly and allow the flavours to get all happy, happy.

Add in your already cooked gnocchi and stir to cover everything in sauce.

Serve up heaping portions with some Parmesan cheese sprinkled on top.

I must say that these gnocchi were so soft and pillowy and tasty to boot!! Very reminiscent of the ones I had in Italy! Sooooo incredibly tasty!!!

Until next time, stay warm and eat well!

But wait!!!

Here is episode 3 of Little Kitchen on the Prairie.


Saturday, October 9, 2010

How to fill your house with the aroma of fresh baked bread

I doubt there is anyone around who doesn't LOVE the smell of fresh baked bread wafting through the air!  I absolutely LOVE the smell of baked bread so this morning I baked some fresh buns.  I have made this dough a few times over the past month.  Buns go into a zip top bag in the freezer and get used with supper or to make sandwiches for lunches.  If I decide to make loaves they get sliced (after they have cooled) and put into a freezer bag.  The slices are great for toast or sandwiches.  Homemade bread has no preservatives so it can go mouldy if you don't eat it or freeze it fairly soon after you make it.  This particular recipe I have adapted from Gordon Ramsay's 'Healthy Appetite' book.  !  People who know me know that I have trouble following instructions so many recipes I use are generally altered to suit my failure to follow along.  
As usual, I have doubled the original recipe.  If you are going to mess up the kitchen, you may as well make it worth your while!


Seeded Honey Loaf or Buns
In a bowl combine,
  • 4 1/2 tsps yeast
  • 2 1/2 cups warm water 
  • 1/4 cup honey
  • 6 tbsp olive oil
While this mixture is working to get a foamy, in the bowl of a stand mixer combine:
  • 2/3 cup whole wheat flour
  • 3 1/2 cups white flour                 
  • 2 tsps kosher salt

You can play around with the ratio of whole wheat flour to white flour.  You can replace up to 1/2 of the white flour with whole wheat without sacrificing the texture too much.

Add aproximately 4 tsps of each of the following:
  • poppy seeds
  • sesame seeds
  • pumpkin seeds
  • flaxseed
  • sunflower seeds
  • milled flaxseed
  • handful of wheat bran
This is the part where you can alter what you add.  If you don't like one of the items, swap it out for another item!

 
Mix the flours and seeds to combine.
Add the foamy yeast mixture and keep mixing with the dough hook.
As the dough comes together, you may need to add more flour. Depending on many different reasons, you may have to add up to 1 more cup of flour.  This is fine and will not alter the dough.  The dough will be soft but shouldn't be sticky.  Knead for about 5 to 10 minutes.
Knead the dough around with your hands for a couple of minutes and form it into a ball.  
Place the dough ball into an oiled bowl, cover with a tea towel and allow to rise to double. This will take about an hour.


Punch the dough down!  Get those frustrations out!

To form into 4 small loaves, divide the dough into 4 equal portions and shape into oval shaped loaves.  Place loaves on a parchment lined baking sheets.  Cover with a clean tea towel and allow to rise until double, about an hour.  Bake at 400 degrees F for about 20 minutes.  Fully baked loaves will be a dark golden brown and sound hollow on the bottom when tapped.

To form buns, measure out pieces of dough into approximately 100g portions.  I generally go for between 98 and 102g portions.


 Shape these portions of dough into balls and place on a parchment lined baking sheet.
Cover the buns with a clean tea towel and allow to rise until double, about another hour.

Preheat the oven to 400degrees F during the last 15 minutes of the second rise.

Bake for 17 to 18 minutes until a nice golden brown on top.