Saturday, October 30, 2010

Crantastically speaking it was an Experiment


Today I was rooting through the fridge looking for what I had (and tossing a couple of items that needed to go) and I found a couple of bags of fresh cranberries.  Thinking back to my plums and peaches recipes I wanted to try doing the same sort of thing with these cranberries.  It took some tweaking to get the sauce tasting right. The first time I asked Hubby to taste it, it was still quite tart.  The amounts I am giving in this recipe are approximate as I did have to constantly taste and add some sweetner and flavourings.  I was quite happy with the end product but then I found myself wondering 'what am I going to do with this cranberry sauce.  I wonder if I can make muffins?'

Before I knew it I was adapting my favourite banana bread substituting the cranberry sauce for the mashed bananas.  Although the muffins did not rise quite a well as I had wanted the results were quite tasty.  The boys both liked them.  I may have to play with the amount of baking soda and perhaps add some baking powder. I think next time I would definitely make the sauce sweeter and add some white chocolate chips and nuts to the muffins.
After the muffins had fully cooled and we tasted them again, they were even better than I had thought.  I also felt like they needed a little something else so I mixed up a glaze to top them with.


Cranberry sauce 
  •   2 pkgs fresh cranberries 
  • ½ cup brown sugar 
  • ¼ cup honey
  • 1/2 cup sugar
  • 1/4 cup maple syrup
  • Juice of one orange
  • Zest of one orange
  • 2 cinnamon sticks or 1 tsp ground cinnamon
Rinse and sort through the cranberries

Place cranberries in a pot on medium heat with the other ingredients

As the cranberries start to pop and the juices bubble, use a masher to crush the cranberries

Taste as you go so you can adjust the seasonings and the sweetness to suit your tastes.


Cranberry muffins

In a bowl, mix together: 
  • 2 cups flour
  •  1 tsp salt
  • 2 tsp baking soda
In the bowl of the stand mixer combine:
  
  • 1/3 cup canola oil
  •  1 ¼ cups sugar
Mix well with the paddle attachment and add:
  •  2 eggs
Continue mixing until well combined and add:
  • 1 ½ cups cranberry sauce
Keep mixing until the cranberry sauce is well incorporated.

Add the flour mixture and mix until just combined.

Stir in with a wooden spoon some nuts of your choice and some white chocolate chips.

Spoon into a lined muffin tin to 2/3 full and bake in a 350 degree F oven for 20 minutes or until fully baked.

To make the glaze mix together:
  • Fresh squeezed orange juice
  • icing sugar
Play with the amounts until you get the consitency you want to spoon on top of the muffins.

Wednesday, October 27, 2010

It's a small, small World Series Pretzel Rolls

Things are tense at my house!  With the Mets not even in any of the playoffs, Hubby is now rooting for the Rangers and my son is rooting for the Giants...the cheap shots, slight bickering, and show boating has begun.  I honestly wasn't too happy with the Buh bye Yankees pretzels I had made the other night.  They just didn't have the texture I wanted.  I think I had the water/baking soda bath too hot.  Oh well, live and learn.

The other night I joined foodbuzz and have been making new food blogging friends, pouring over countless recipes and ideas, and basically marvelling at the wonderous photos other foodies have posted.  I am in awe!!  I found a recipe that I just had to try for Pretzel Rolls.   They were a hit!  Easy to put together and baked up nice and pretzel brown!  I doubled the recipe and made them in 3 ounce portions instead of 2 ounce portions but they are amazing! 

Pretzel Rolls
For the rolls:
  •    3 cups warm water 
  •   4 ½ tsp dry active yeast
  • 4 tsp sugar 
  • 9 cups all purpose flour 
  • 4 tsp salt, kosher 
  • ½ cup melted coconut oil (or melted butter)
For the poaching:
  • 1 large pot boiling water
  • ¼ cup baking soda
For brushing the tops:
  • 1 egg, beaten 
  • 1 tsp water
For sprinkling:
  • Coarse salt
Directions:
In the bowl of your stand mixer, or in a large bowl, mix
  •  3 cups warm water 
  • 4 ½ tsp yeast 
  • 4 tsp sugar
 Let this get all foamy and fun loving.

 
Add:
  • ½ cup melted coconut oil (or melted butter) 
  • 4 tsp salt 
  • 9 cups flour
·  
Mix with the dough hook (or a wooden spoon) until a nice elastic dough forms.  This might take about 5 minutes.  The dough comes together so nicely to form a soft, slightly sticky dough.

Cover with a tea towel and set in a warm spot to rise for an hour.

Meanwhile back in the Little Kitchen:

Line 2 baking sheets with parchment or with silicone liners.

Put a large pot of water on the stove, but don’t turn it on yet...just getting ready.

When the timer beeps, or when the dough has doubled its size, punch it down and turn it out onto the counter, which you have sprinkled with flour.

Measure out even pieces of dough.  I like to measure out 3 oz portions with my scale and get 22 rolls from this recipe.

Form each piece into a ball and place on the baking sheet leaving some room between each roll.


Cover with a tea towel and let rise for 30 minutes.

Preheat the oven to 425 F and turn your pot of water on to boil.

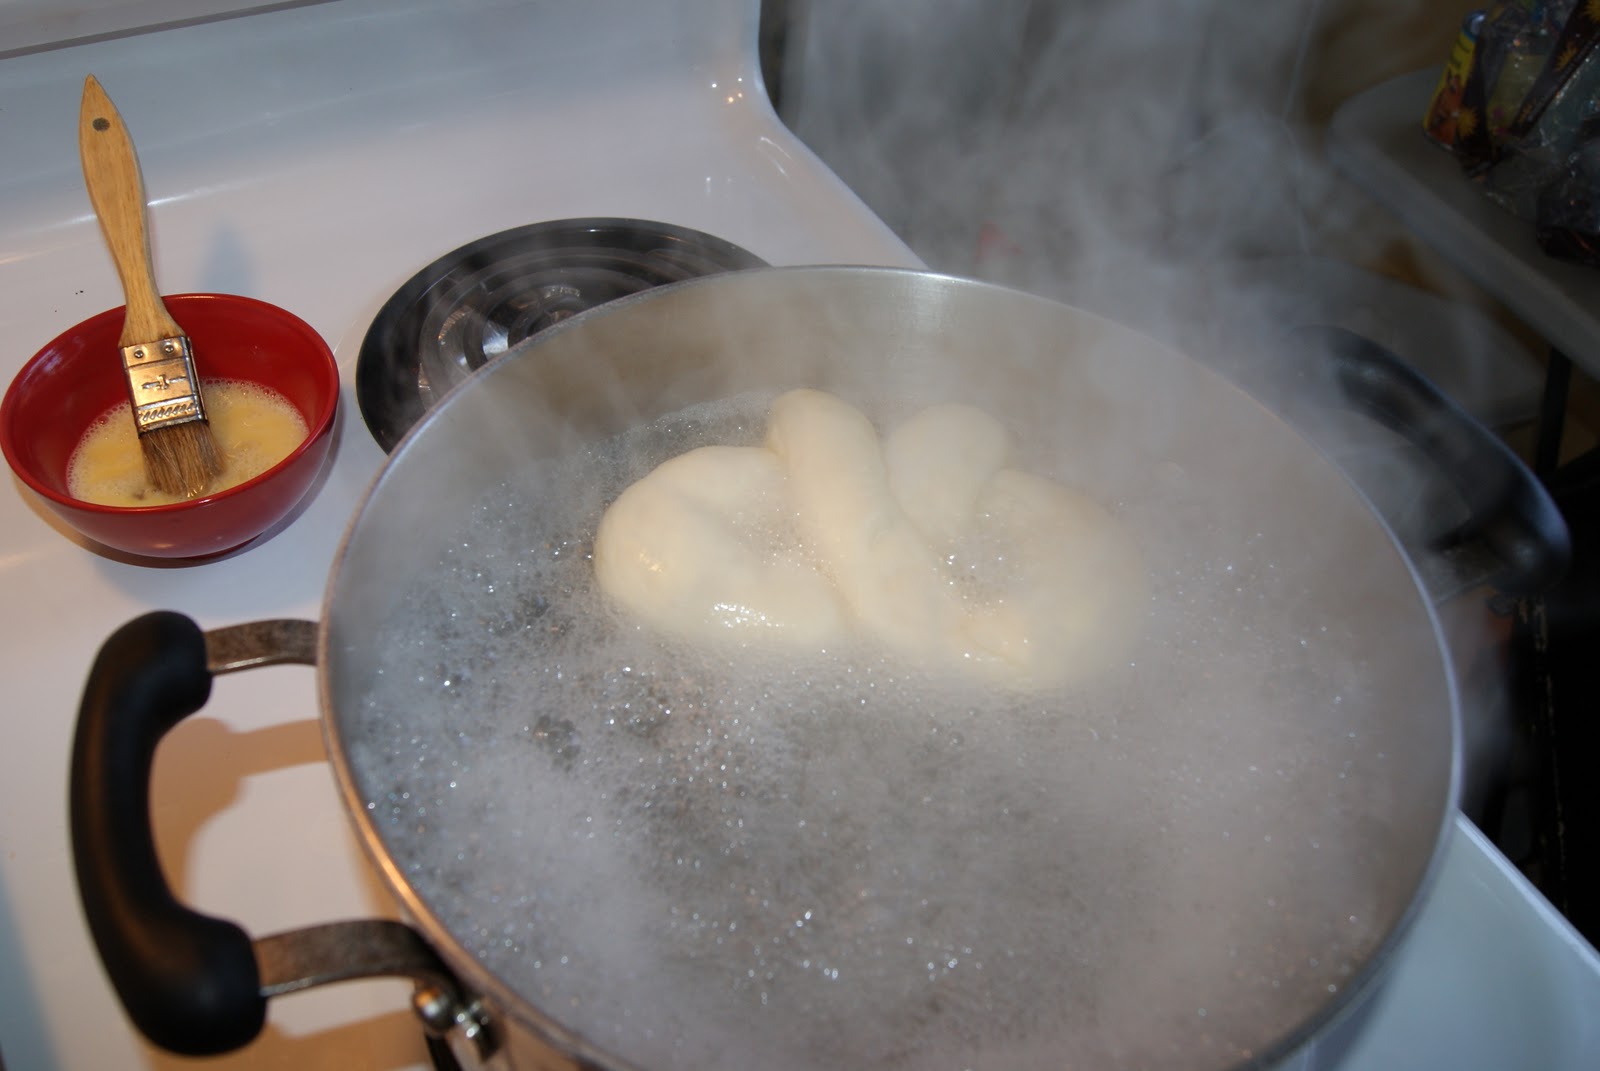
When the water is boiling, slowly add the ¼ cup baking soda to the pot....SLOWLY...it will bubble, foam, and spill over if you dump it all in at once.  Lower the heat to a simmer.

Poach the rolls a couple at a time for 30seconds, gently turn them over and continue poaching for another 30 seconds.


Remove from the pot, drain, and transfer back to the baking sheets.

Brush the tops with the egg wash and sprinkle with the coarse salt.


Using a sharp knife, cut an x (or a t) into the top of each roll.


Bake for 15 to 20 minutes until a nice dark golden brown.

As a side note, today was an accident free day!! Yesterday's wake up call has been answered.

·                


· 
·        
·       
·   

Tuesday, October 26, 2010

Friendly Neighbourhood Reminder: Be Careful Out There....More Confessions From a Little Kitchen

Those of us who spend a lot of time in the kitchen sometimes get a little careless.  It is so easy for us to think that just because we have done something a million times it will all work out.  We seem to test fate too often then get burned....literally!!  Tonight while making sweet potatoe fries, I burned three fingers on one hand in the oil in the pan then proceeded to burn the back of my other hand while attempting to turn the fries over!!!  The term dumbass comes to mind.  What was I thinking?  To be quite frank, I wasn't.  I became too careless and nonchalant and bad things happened.  To make things worse, Hubby was standing right there telling me to be careful and ask me what the hell I was thinking.....I was such a dumbass tonight!  Hubby sweetly pointed out that I do seem to hurt myself quite a bit in the kitchen....and he is only referring to the injuries he actually knows about!
One memory that pops into mind is when I purchased my first real professional knife!!  I cut myself just in front of the sales clerk right after she took it out of the display case!  If I recall I had three cuts by the time I made the purchase....I still use and love that knife.  We now know how to respect each other!
Tonight's post is dedicated to safety....just a friendly neighbourhood reminder to look after ourselves and our loved ones in the kitchen.
  • When adding items to a preheated, oil filled pan OR needing to flip the contents of a pan in the oven: Remove the pan from the oven and place on a safe place on the counter, then do your work.  Tonight I burned my hand on the top of a 400degree oven trying to flip the sweet potatoe fries over while the pan was still in the oven!!!!
  • Turn the handles of your pans towards the middle of the stove so they are not hanging over the edge.  This way no one will knock the handles and the hot pot off the stove or onto themselves.
  • Keep a box of baking soda on hand to douse flames.  (an extinguisher for the kitchen is also recomended)
  • Keep your counter clear of clutter and put things in their storage spots as soon as they are cleaned and you aren't using them.  In my little kitchen I have a bad habit of stacking things on the side to 'put away later'....the other day I killed my glass blender jar when my elbow knocked it off the counter.  It crashed to floor and exloded into a million pieces....of course I was in my bare feet.  My son kindly brought me a pair of shoes so I could get on with the clean up....no blood shed that day but now I need a new blender!
  • Blendy the blender is sadly missed...because I am a dumb ass

  • Tie long hair back....not only for the sake of cleanliness but when I was in middle school and in woodshop, they showed a safety video of a girl with long hair using a lathe.....enough said.
  • Always use the safety grip when using your mandoline....Yes I am guilty of using the mandoline 'just to get the vegetable to the a certain point, then I will use the safety'....Yes there was blood and yes, it was mine and yes, it was the tip of my finger....yes, I am a dumbass... 
So tonight I have established that I have dumbass tendencies in the kitchen...I have learned from my mistakes tonight but I am sure I will get careless again.  Thanks for reading and be careful out there!

As I go along, I will post more safety tips...Please feel free to add any confessions of you own or safety tips.

Saturday, October 23, 2010

Buh Bye Yankees Pretzels


In honour of the Yankees being knocked out of the World Series I decided to make ball park style pretzels!  They are fairly simply to make but there are a couple of steps that can get a bit tricky.  First with the rolling and shaping of the dough and then with the boiling of the pretzels.  Why is it necessary to boil the pretzels before you bake them?  It is all explained here by one of my favourite people, Alton Brown.  Of course this video clip also explains the birth of pretzels also gives a great recipe for them as well.  But you can still read the rest of this entry, watch the clip, then get baking!! The clip explaining the reasons behind the boiling is further down the page. It really is one of those things that gets easier after you do it once.

Soft pretzels

In a bowl mix together and allow to get it's foam on:
  • 2 cups warm water
  • 4 1/2 tsp yeast (or 2 packets)
  • 2 tbsps sugar 
  • 1/4 cup melted butter, cooled
Meanwhile, back at the ranch, uh....I mean in a large bowl or bowl of the stand mixer:
  • 5 1/2 cups flour
  • 1 tsp salt
Add the foamy yeast mixture to the flour/salt mixture and beat with the dough hook of your mixer or with a wooden spoon.  Add more flour if needed to make the dough less sticky. Continue kneading the dough until it is nice and elastic like (about 5 to 10 minutes).  It should be slightly tacky but not messy.
Place in a slightly oil bowl and cover with a tea towel to rise until double in size (about 45 minutes)

Once the dough is doubled, punch it down, just like the Rangers did to the Yankees.  Divide the dough into 12 equal pieces.  (Being the nerd that I am I measured out 100gram pieces, but that is just me).  You could make smaller pretzels if you like but just make sure you adjust the baking time!

Roll the dough pieces into a long 18 to 24 inch rope.

Make a U shape with the dough rope and curl the ends in to overlap making a loop.

Repeat on the other end.

Place the pretzels on a parchment or silicone baking sheet lined pan.  Cover with a tea towel and allow to rise for about 30 to 45 minutes.

During the last 15 minutes of rising, pre heat the oven to 500 degrees F and place a large pot on the stove and fill it with:
  • 10 cups of water
  • 1/3 cup baking soda
Bring this to a boil.  Carefully place 1 or 2 pretzels in the water and boil for about 30 seconds each.  Lift out with tongs or a slotted spoon, being careful to keep the pretzel in one piece.  Place the pretzel back on the sheet.

Brush each preztel with an egg wash made from:
  • 1 egg, beaten
  • 1 tbsp water
Sprinkle each egg washed pretzel with coarse salt and bake for 10 to 12 minutes.   Pretzels should be a deep brown.  Let them cool a bit before serving them with mustard!

***If you are planning on storing the pretzels do not put the salt on them.  Salt will just melt into the top of the preztels while in storage.***
Okay, let's face it, Alton Brown does a way better job than me explaining how to make pretzels and he does it with tons of geeky science and video.  His budget is also way larger than mine!  Please watch the Alton Brown episode.  It is just so darn good and is one of  my favourite shows.

Slowin' it down with the slow cooker

Slow cooker pulled pork
Click here for a printable version


 First we need to make the dry rub.  This dry rub is very versatile as you can change up the mixture of seasonings to suit your taste.  This rub is adapted slightly from Alton Brown's version which can be found in his book "Good Eats the early Years".  He changed it somewhat from the show he originally aired.  As a ratio, the rub is basically 6:1:1:1. (All in tbsp)
  • 6 tbsp light brown sugar, firmly packed
  • 1 tbsp kosher salt
  • 1 tbsp chilli powder (sometimes I use paprika instead)
  • 1 tbsp of any mixture of spices (this is where you can really alter the mixture to suit your taste):
    • for example: 
    • ½ tsp cayenne
    • ½ tsp old bay
    • ½ tsp garlic powder
    • ½ tsp onion powder
    • ½ tsp ground black pepper
    • ½ tsp dried thyme      
    • (as long as you combine 3 tsp of spices, you will get the last 1 in your ratio)
Mix until everything is well blended and rub all over:
  • 1 pork shoulder roast.  (I will buy whichever pork shoulder or blade roast is on sale, sometimes the one with the bone in and the nice layer of fat still wrapped around and sometimes the boneless one.)
Place in the slow cooker

Turn cooker on to low for 6-8 hours or on high for 4 -6 hours.  Times vary greatly and depend on the size of the roast and the size of the slow cooker. (Make sure slow cooker is also plugged in!!!)
 
  • Shred the pork.  You will know the pork is ready because it will fall apart completely when you try to take it out of the slow cooker. 
  • Sort through the pork with some tongs or forks, shred it and take out any fat or gristle, or bone left behind.   
  • There will be some yummy juices in the slow cooker. Strain out any sediments a nd return the juice to the slow cooker.  (I like to use a large pot as the handles on the side make it easy to pour the liquid back into the slow cooker.)
  • Add the pork back to the slow cooker so it can bath in the yummy, liquidy goodness. 
 
  • I like to shred the pork in the pot I just had the juices in because then I am re using a pot.  Remember to add the pulled pork back to the pot to soak up those juices! 
  • Mix pork with a bar b q sauce of your choice.
  • Serve on a bun.  (tonight I used the honey seed buns from an earlier post)
Pulled pork goes well with coleslaw.  In fact the boys like to put coleslaw on the sandwiches with the pulled pork!

As a bonus, here is the coleslaw recipe:

In a large bowl put:
  • 2/3 cup mayo (use your favourite)
  • 1 tbsp sugar (or honey)
  • 2 tbsp vinegar (I used white rice vinegar as it was the first bottle I found in the cupboard)
  • salt and pepper to taste
Mix the dressing and taste.  Adjust seasonings as needed then add to the bowl:
  • a 1 pound bag of  your favourite ready to use coleslaw mix
Mix well and put in the fridge until ready to use.