Showing posts with label icing. Show all posts

Thursday, June 28, 2012

Canada Day Eats Part 5 - Happy Canada Day, Cupcake!

While I was baking away mass quantities of cupcakes for another occasion this week, I was able to save some batter from the vanilla cupcakes, colour some of it red, and scoop alternating white and red batter into cupcake liners....voila! Canada Day cupcakes!


Use your favourite vanilla cake recipe (or boxed if that's how you roll), divide your batter in half (I always suck at the half thing so if you end up with a couple of cupcakes all one colour, just roll with it).

To half of the batter, add red food colouring gel (gel won't water down the batter). I used the Wilton brand that I buy at Bulk Barn. You will have to use an alarming amount to keep from getting pink batter but adding a tablespoon or two of cocoa powder will help take the pink edge off.


I use a scoop that fills half of the cupcake liner so I used 1 scoop of white and 1 scoop of red then use a toothpick to swirl the colours together.


Bake according to your recipe's directions.

Here's the recipe  I used:

Vanilla Cake Printable recipe
Preheat oven to 350
Butter and flour the pan(s) of your choice.
Ingredients
In a bowl, combine:
  • 6 cups all-purpose flour
  • 6 tsp baking powder
  • 1 tsp baking soda
  • 2 tsp salt
Measure out and set aside:

·         3 cups buttermilk

In the bowl of your stand mixer (or a bowl with a hand mixer) cream together:
  • 2 cups unsalted butter, at room temperature
  • 3 cups granulated sugar
Add and continue to beat:
  • 8 eggs at room temperature (one at a time)
  • 8 tsp vanilla
Alternate additions of ½ of the flour with ½ of the buttermilk; this way you start and end with adding the flour mixture.  Mixt well so there are no lumps but not too long, keep a close eye.
When filling your pans, make sure to stop at no more than ¾ full.
Bake in the centre of the oven for 20 to 30 minutes.  This time varies greatly because it does depend on the size(s) of pans you have used.
Remove pans to a rack, cool for 15 minutes, then remove cake from pans to cool completely before icing.
(15 minutes for cupcakes)

Use your favourite icing recipe (or a container of white store bought icing) to ice the cupcakes. If you'd like to swirl the red in, you will need a piping bag, a large star tip, and a some more of the red food colouring gel.

Paint the inside seams of the bag with the colour of gel you want to show on the icing.
Once you have painted the inside seams of the bag, fill the bag with icing and start piping swirls of icing using  a steady, even pressure.


Until next time, stay warm and eat well!

Saturday, June 11, 2011

Drink Your Cocktails, Cupcake

Did you know it is very easy to add booze to your cupcakes?  It is as simple as brushing on some rum or tequila, or whatever on to cupcakes when they come out of the oven, again before icing, and heck, put some in the frosting as well!
Strawberry rhubarb daiquiri
Remember those amazing strawberry rhubarb cupcakes?? Well, I brushed a batch of these little beauties with rum, twice...then I added rum to the the strawberry meringue butter cream....Yum!! You heard me correctly....just add some liquor to a Swiss meringue butter cream after it is finished and you are set!!

Mango lime margarita
Then there was the wonderful mango lime cupcakes?  Those were brushed with tequila, twice then were topped with a tequila lime icing!!  Tequila lime icing is as easy as switching out the water or other liquid for lime juice and tequila.  A little lime zest never hurts either!!

I took these little gems over to a friend's house to help celebrate her birthday.  I must admit I enjoyed hearing the rave reviews!!

Until next time, stay warm and eat well!!

Tuesday, May 10, 2011

Chasing Away the Rain with Mango Lime Cupcakes

The Boy had his first baseball game of the season scheduled for last night. Unfortunately it rained and the game was cancelled. This calls for cupcakes.  I know, I know, I just made cupcakes the other day...I was just so excited at how well the pretty pink strawberry rhubarb cupcakes turned out that I wanted to try another flavour combination....hmmm....what to do, what to do.

Last week while shopping for Cinco de Mayo, I grabbed a mango thinking I'd probably use it....I also grabbed a bunch of extra limes....hmmmm....what to do, what to do...


Mango Lime Cupcakes!!!! Oh yes I did! I used my basic vanilla cupcake recipe, you know the same one I used to make the strawberry rhubarb cupcakes and just switched out the fruit!


Mango Lime Cupcakes

3 cups flour
3 tsp baking powder
1 tsp baking soda
1/2 tsp salt
1 cup butter
1 1/2 cups sugar
4 eggs
4 tsp vanilla
1 1/2 cups buttermilk
2 cups mango (chopped fine)
zest of 1 lime (I think I will use more next time)
squeeze of lime juice
1 tbsp sugar

Pre-heat oven to 350F

Peel and finely chop the mango.  Zest the lime, making sure to get only the green.  Mix the mango, lime and lime zest with a squeeze of lime juice and 1 tbsp sugar and set aside.


In a bowl mix together 3 cups flour, 3 tsp baking powder, 1 tsp baking soda, 1/2 tsp salt and set aside.

In the bowl of a stand mixer (hand mixer or by hand will work too) cream the 1 cup butter with the 1 1/2 cups sugar until light and thoroughly mixed.

Add the eggs, 1 at a time allowing each one to mix in completely before adding the next one. Mix in the vanilla. (I suppose tequila would also go well here....)

Add the flour mix and the buttermilk, alternating additions starting and ending with the flour.

Mix in the mango/lime zest/lime juice mixture.

Scoop into lined cupcake pans to 2/3 full and bake for 15 to 20 minutes or until a toothpick inserted in the centre comes out clean.  Cool in pans for 5 minutes then remove to cooling racks to complete cooling.

I looked around (again by look I mean Internet search) for a coconut icing recipe.  I found and interesting one that was similar to a meringue butter cream but used the egg yolks instead of the egg whites...I just happened to have some egg yolks leftover from the the strawberry meringue butter cream I made the other day...perfect!

To make a long story short, I was 100% skeptical of this recipe but I gave it a go.  You know what, it is silky, rich and sooooo tasty.  I just wished I had the coconut extract it calls for but it still has a nice coco nutty flavour with a hint of lime...I did make the addition of lime zest to the recipe and sprinkled the final cupcakes with toasted coconut...yum!!
 
Find the icing recipe here


To toast coconut:

Pour the coconut in a dry pan and heat over low to medium, watching closely.  Give the pan a stir or a shimmy shake every now and then.  When the coconut starts to brown, it will finish toasting quickly.

You can also toast coconut in the oven on a baking sheet.  Just make sure to not have the oven too hot and to keep a close eye on things.

Until next time, stay dry and eat well!

Saturday, May 7, 2011

Strawberry Rhubarb Cupcakes

I am the only girl in my house (unless you count the cats but....).  Sometimes being surrounded by the boys, I feel the need to have nice, pretty, girlie things around.  You know, just because it is nice sometimes to have pretty things.  One really girlie thing I have is my lunch bag.  It is a Disney princess lunch bag and it is pink.  Co workers giggle at it, I know they do because the giggles are often followed by "Nice lunch kit, did you steal it from your kids?"  No, it is mine.  The boys both have New York Mets lunch bags but if they leave that one in a locker or at work, they will not take the pink princess lunch kit! Having pretty things really is just a way of establishing ground rules for what belongs to me.  (Although I am sure that when it really comes down to it, they really don't care either way.  I do however appreciate them letting me think that way.)

My friend Trina made some oh so pretty looking strawberry cupcakes the other day, they really had me drooling.  I started looking (by looking I mean Internet search) for strawberry cupcake recipes.  I found so many that it was overwhelming.  What I decided to do was adapt my vanilla cupcake recipe into a strawberry cupcake recipe.  The strawberry meringue butter cream recipe I saw on Annie's Eats. These girl knows her butter creams! She and Trina both used the one from Martha Stewart.  I changed things up a bit. What I did was this, I used my regular Swiss meringue butter cream and added pureed strawberries at the end.....GLORIOUS (insert angels singing here).


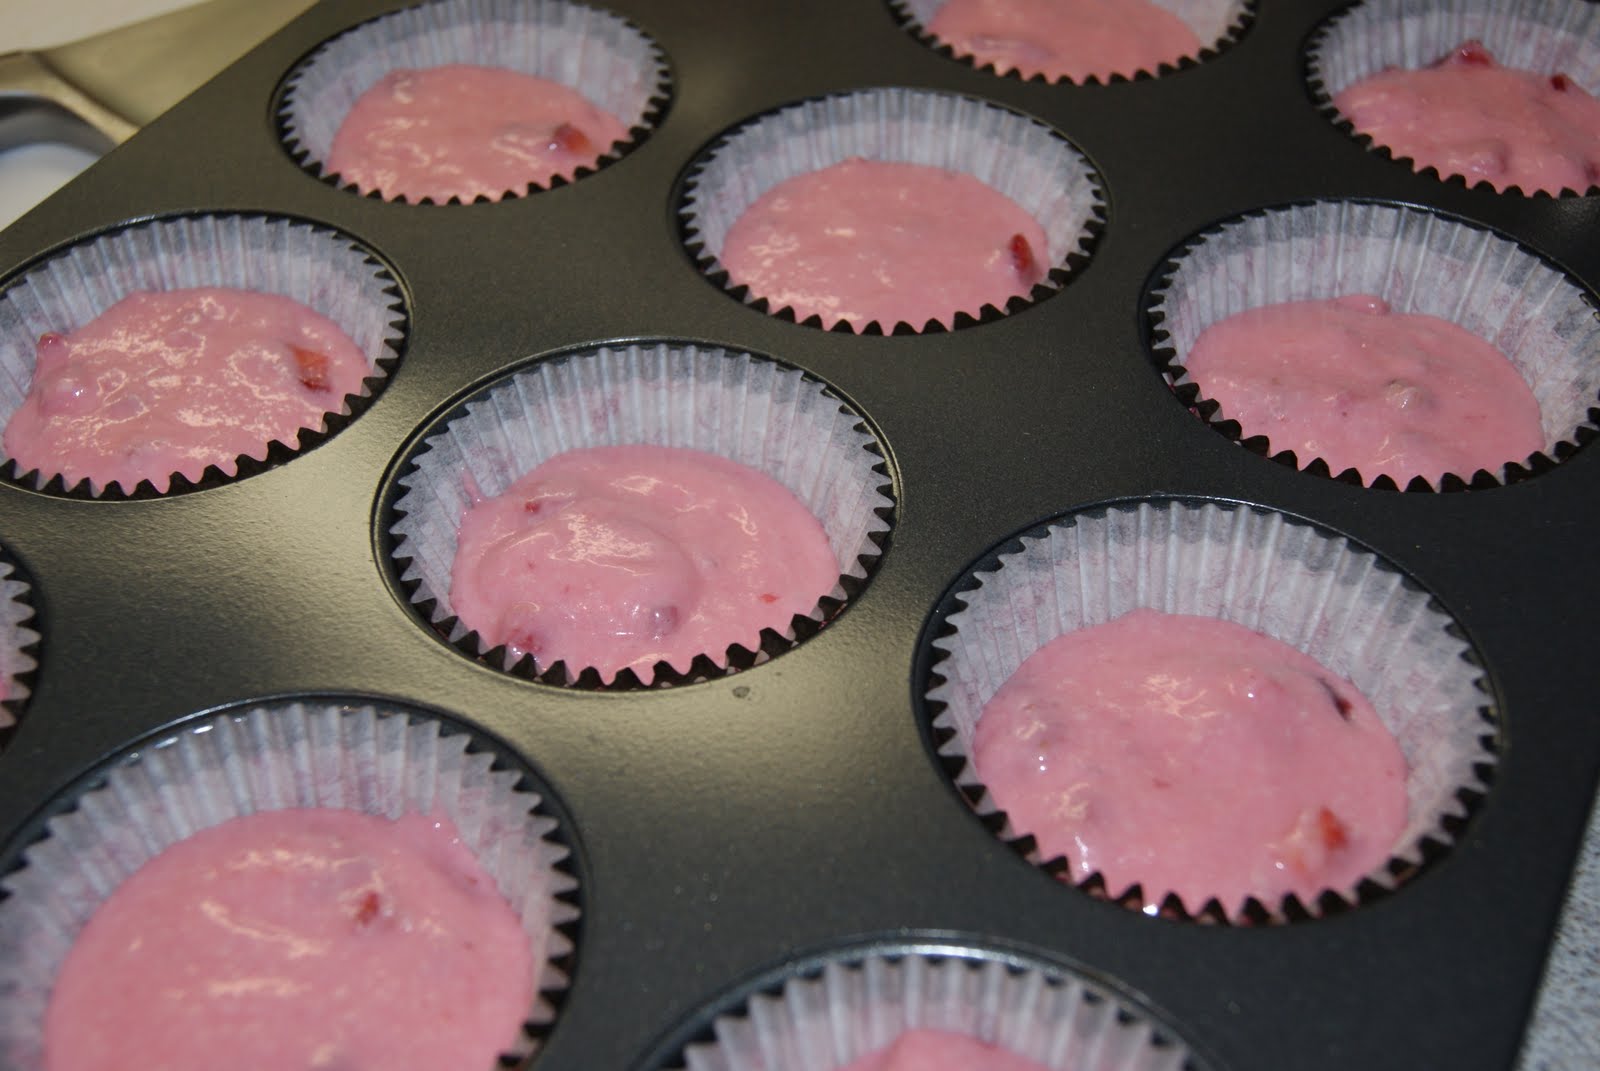
I did make another addition to the cupcake recipe.....Rhubarb!! We were wandering around the produce section and low and behold they had beautiful looking stalks of rhubarb so I made strawberry rhubarb cupcakes with strawberry meringue butter cream.....summer in a cupcake!!


Strawberry Rhubarb Cupcakes
Printable recipe

R2 D2 is always close by...
3 cups flour
3 tsp baking powder
1 tsp baking soda
1/2 tsp salt
1 cup butter
1 1/2 cups sugar
4 eggs
4 tsp vanilla
1 1/2 cups buttermilk
2 cups strawberries and rhubarb (chopped fine)
splash lemon juice
1 tbsp sugar
Small dash of pink food colouring (optional)

Pre-heat oven to 350F

Finely chop the rhubarb and the strawberries.  Mix with the splash of lemon juice and 1 tbsp sugar and set aside.

In a bowl mix together 3 cups flour, 3 tsp baking powder, 1 tsp baking soda, 1/2 tsp salt and set aside.

In the bowl of a stand mixer (hand mixer or by hand will work too) cream the 1 cup butter with the 1 1/2 cups sugar until light and thoroughly mixed.


Add the eggs, 1 at a time allowing each one to mix in completely before adding the next one. Mix in the vanilla and the food colouring, if using.


Add the flour mix and the buttermilk, alternating additions starting and ending with the flour.

Mix in the strawberry/rhubarb mixture.


OK, I am going to level with you here.  I added some pink food colouring to the batter with the eggs to make sure I got a pretty pink batter!!

Scoop into lined cupcake pans to 2/3 full and bake for 15 to 20 minutes or until a toothpick inserted in the centre comes out clean.  Cool in pans for 5 minutes then remove to cooling racks to complete cooling.


Strawberry Meringue Butter Cream

5 egg whites
1 cup plus 1 tbsp granulated sugar
1 1/2 to 2 cups butter, room temperature
1 cup strawberry puree (strawberries, splash of lemon juice in a blender until smooth)

In a bowl set over (not in) simmering water whisk together sugar and egg whites until the sugar is dissolved and the temperature reaches 160F.   Remove from heat and start the next step. (I pulled mine off the heat before 160 as my 'finger test' was not gritty indicating the sugar had dissolved.)

Finger test- dip in a finger and rub with thumb...if it feels gritty, keep whisking and heating.

With the whisk attachment, beat the egg whites until thick and glossy and form stiff peaks. This will take about 5 to 8 minutes.

Add in the room temperature butter 1 tbsp at a time until mixed in.  You may find that you want to stop adding butter when you reach the desired consistency.  I noticed right away when the consistency changed and decided to stop adding butter. I used only 1 1/2 cups of butter today.


Mix in the vanilla and the pureed strawberries until well combined.


Swirl onto pretty cupcakes!!

R2 D2 approves of these pretty cupcakes!
I love these liners!! I found them at Williams Sonoma when we were in St. Louis and have been saving them for a pretty cupcake occasion!

Until next time, stay warm and eat well!

Thursday, March 10, 2011

What Ever Shall I Do??

I had quite the dilemma in the Little Kitchen tonight.  You really wouldn't believe it, it was just that shocking!!! While icing some lovely cupcakes and baking cookies for Friday, I found myself with extra cookies AND extra icing!!! After about 2 seconds of hard thinking (I didn't want to hurt myself you know) I decided to put the two together.....Ricotta cookies and Swiss meringue butter cream, together at last!  I won't need to eat for the rest of the week....

Ricotta cookie recipe here

Swiss Meringue Butter cream recipe here

Delectable things I tell you!  Here's to a terrific weekend to everyone.....despite the whole 'spring ahead' thing.  I think I really do need that hour....

You know, the Boy has a 6am practice Sunday morning....up at 5 am.....with the whole 'spring ahead' thing happening....that is just mean, even if it is all for the love of baseball!

Until next time, stay warm and eat well!

Saturday, November 27, 2010

Birthdays mean Birthday Cake!!!

Birthday season is officially upon us in our house.  This season really starts back in September and continues on until the end of January...one birthday after another.  Birthdays mean birthday cake.  Birthday cake means I like to bake and pretend I am an employee at one of those bakeries you see on TV who put out those fabulous cakes in wonderful designs and shapes....I do try hard but more importantly, I have fun!  I do have some cake recipes that I will share, but if I put them all in one post....I just may run out of ideas!!  I am also excited about sharing some of my other cakes with you...I just have to find them on the hard drive.  It appears that Cake Week has started in the Little Kitchen!

Today I made a vanilla cherry cake.  I baked it in a Wilton ball pan so I could make my first try at making a baseball cake for my boys.  I am fairly happy with the outcome.  It is afterall, my first cake of this shape.


 Original recipe

Cherry Vanilla Cake

Preheat oven to 350

Butter and flour the pan(s) of your choice.

In a bowl, combine:
  • 3 cups all-purpose flour
  • 3 tsp baking powder
  • 1/2 tsp baking soda
  • 1 tsp salt
Measure out and set aside:
  •  1 ½ cups buttermilk
Drain, chop finely, and set aside:
  •   1 375 ml jar maraschino cherries
In the bowl of your stand mixer cream together:
  • 1 cup unsalted butter, at room temperature
  • 1 1/2 cups granulated sugar
Add and continue to beat:
  • 4 eggs at room temperature (one at a time)
  • 4 tsp vanilla 
  • 1 vanilla bean, scraped (I wanted to add as much vanilla flavour as I could so I decided to give it a try!)
Alternate additions of ½ of the flour with ½ of the buttermilk This way you start and end with adding the flour mixture.  Mix until just combined to avoid a tough cake.

Stir in the chopped and drained maraschino cherries.

When filling your pans, make sure to stop at no more than ¾ full.

Bake in the centre of the oven for 20 to 30 minutes.  This time varies greatly because it does depend on the size(s) of pans you have used.

Remove pans to a rack, cool for 15 minutes, then remove cake from pans to cool completely before icing.

Allow the cakes to cool completely before icing them.

Decorator's icing - original recipe here
  • 1 cup vegetable shortening
  • 8 cups icing sugar
  • 1 tsp clear vanilla extract (the only time to use the fake stuff)
  • 1 tsp clear butter flavouring
  • approximately 1/2 cup water (depends on desired consistency)
Start by mixing the icing sugar and the shortening with an electric mixer or stand mixer.

Add the flavourings and the water.  Mix until smooth, adjusting amount of water or icing sugar until the icing reaches a spreadable consistency.

Before you attach the 2 cakes, you will need to trim the tops to make 2 flat surfaces that will face each other evenly.  (I failed to take picturs of this process....my apologies)


Get your base ready (if you are just making the ball, trim one end so it is flat and the ball will sit without rolling away).

Apply a crumb coat to the entire cake.  (A crumb coat is a thin layer of icing that will help keep crumbs on the cake and not on the surface of your finished cake)

For this cake I cut a hole in the top layer so the ball would have a place to nest in.  I still used a wooden dowel through the centre of the ball to help keep it on the cake and to help keep the ball together...consider it my insurance)


Let the crumb coat settle and get crusty.  You don't want your top layer of icing or fondant (if using) to mix in.  The crumb coat is meant to be a separate layer.

Colour some of the icing your desired colour.  Prepare and fill your icing bags. (We can cover this process in another post)