Showing posts with label Maple syrup. Show all posts

Monday, June 11, 2012

Mason Jar Salad: Day 1 (And Banana Muffins)

Today's jar salad was fantastic! (It was also the talk of the staff room for both Hubby and I.)  I managed to leave enough room for a good shake an successfully mixed it all up! The lemon vinaigrette was perfect.  The beets managed to colour everything a nice shade of purple too! Of course today was day one. Hubby has a couple more salads in the fridge for his week but I am leaving for 2 days of camp with the grade 8s tomorrow so I didn't make more. I am however tempted to make a couple to take and store in the camp fridge. (I'm not sure if I can handle mass produced camp Cesar salad...)


In keeping with my experimenting theme, I decided to make some banana muffins to take with me to camp. That wasn't the experiment. The experiment was switching out the white sugar for maple syrup! I researched a bit online and decided to use 1 cup of maple syrup in exchange for 1 1/4 cups white sugar. I also added an extra 1/4 tsp baking soda and another 1/3 cup flour. Oh, I also only used 2 tbsp of canola oil instead of 1/3 of a cup and I have a sneaky suspicion that I may be able to omit the oil altogether!

Here's the recipe....and FYI, I'm not sure these guys will actually make it out of the house and to camp...they are just that tasty!


Maple Syrup Banana Muffins - printable recipe here

2 Tbsp canola oil
1 cup maple syrup
2 eggs
5 over ripe bananas
2 1/3 cups flour
2 1/4 tsp baking soda
1 tsp salt (or less if you prefer)
1 cup chocolate chips

Pre heat oven to 325

Whisk together the oil, maple syrup, and the eggs until the eggs are thoroughly mixed in.
Mash the bananas, add them to the liquids and mix it all up.
Add on top, but don't mix yet the flour, baking soda, and salt. Use a fork to quickly stir the dry ingredients before mixing them into the wet....this just saves dirtying another bowl!
Mix the dry and wet ingredients together until almost combined, add the chocolate chips and finish stirring until just combined.

Scoop into lined muffin tins (This made 24 muffins) and bake for 20 to 25 minutes...these ones took 25 minutes but always check at the earliest time.

Try to allow these little gems to cool first but try one if you must. (Remember, they are tasty warm but the flavours will have time to meld and these will taste even better the next day!)

Not too shabby!

Wish me luck at camp!

Until next time, stay warm and eat well!

Tuesday, April 24, 2012

Sin is In Part II: Bacon Maple Cheese Cakes


Sometimes I see a recipe in a magazine and think 'What a fabulous idea! I should make that!'.  Other times I see a recipe in a magazine and think 'That's okay, I bet I can make it better!'

That's exactly what I did with a recipe from this month's edition of Food Network Magazine. They had these great looking mini bacon cheesecakes on page 124 of the May edition.  Now don't get me wrong, they look fabulous with their little pieces of bacon on top but I started thinking...

'A chocolate cookie based crust would just take over the bacon flavour'....then it was..
'Why use vanilla when you can use maple? Everyone knows maple and bacon were just meant to be together!'
'How can I get more bacon into the the crust?'
'Can it really be called a bacon cheese cake if the only bacon is actually just the garnish?'

Seriously folks, I almost hurt myself on this one!  After making some adjustments to the original recipe, I came up with a fantastic little treat with a great bacony bite and a maple taste.  This may seem like a lot of work for 24 mini cheese cakes, but come on now, it's bacon!

Maple Bacon Mini Cheese cakes
Yield: 24 minis

Bacon

Place 10 strips of your best bacon onto a baking sheet and slip it into the oven. Turn the oven on to 350F and bake for 20 to 25 minutes. You want the bacon to be crisp, but not too dark as some will cook more in the crust and some will cook more with the maple glaze....mmmmm
Drain the bacon on some paper towel. Save 4 for the crust and 6 for the maple application.

Maple glazed bacon

6 strips cooked bacon
¼ cup maple syrup (NOT fake pancake syrup...the real deal people!!)

Cut each strip of bacon into 4 or more pieces. As long as you have at least 24 you will be good.

Heat the maple syrup in a pan and add the bacon strips.  Let the syrup get all bubbly and thick (boil it down, reduce....whatever word you want to use).

Once the syrup is all thick and the bacon pieces are each well coated in a nice coat, remove the pieces to a sheet of parchment paper to cool. Save 24 pieces so you will have one piece per mini cheese cake.

You will know you've boiled it enough because you will get sugary/maple strings like this:

sweet, stringy, maple goodness!


Line a mini muffin pan with liners

The crust

½ cup panko
4 strips bacon, baked until crisp
2 tbsp sugar
2 tbsp melted bacon fat (or butter)

Whir everything in the food processor or blender until mixed and the bacon is broken down into small pieces.

Scoop 1 tsp of the crust mixture into each liner and pack it down tightly with your finger tips.


Cheesecake

1 8oz pkg cream cheese (at room temperature)
1/3 cup sugar
2 tsp maple extract
2 tsp maple syrup (optional)
1 egg

Heat the oven to 325F

Make sure your cream cheese is at room temperature before starting. It will be easier to blend and make a smoother cheese cake.

Cream together the cream cheese and sugar until smooth. (I like to use the mixer for this but a wooden spoon works the arm muscles).  Scrape down the sides of the bowl as needed.

Add the maple extract and syrup.  Keep mixing until smooth and blended.


Add the egg and blend just until fully incorporated.

Scoop 2 tsp of filling onto the crusts.


Bake for 15 minutes (at 325F), until the cheese cakes are set in the middle.

Cool in the pan, then transfer to an airtight container, top with a piece of maple glazed bacon and store in the fridge!

Chill for at least 4 hours....or as long as you can wait....

Until next time, stay warm and eat well!

Sunday, September 4, 2011

If Sin Was a Pie, Then this Pie is The Biggest Sin EVER

Happy Bacon Day!!
Yup! That's right...this pie has bacon on the top of it....yes, it is an apple pie.  Yes, it tasted so good, it was sinful!!  I needed something a little sinful so close to the end of summer...

Tuesday will be my first day back at work...my summer is over and a new school year begins.  No more sleeping in, no more staying up late, no more fun...no wait, that's not right.  Fun is always to be had, sleeping in and staying up late will happen on the weekends! All is good.  This week was much better than the week before.

It was a busy week!!
  • The show "Wicked" was in town, and it was just that, Wicked!! Amazing!!!
  • Trips to the gym, Cost co, and just plain getting ready for the back to school season....felt busy, but good.
  • The Boy and I made perogies (with a cheddar bacon potato filling). He did a fabulous job pinching perogies.  Although I don't think we got as many in the freezer for fall as I wanted.  Many perogies fell into his mouth as soon as they were boiled! I am surprised he didn't burn his mouth! We had fun and they tasted great.


  • BBQs went on sale at Home Depot so we upgraded.  You know, from no BBQ to one so big it is like challenge to see just how much food I can fit on the grill.  We are working on some ribs for the inaugural BBQing.  The Boy helped with the ribs as well.  I think my kitchen job is in danger!


Now on with the sin....It felt so sinful just thinking of making this pie, never mind actually baking it.  I originally got this idea from Karen at Tasty Trials.  I had bookmarked this recipe when she first posted it and National Bacon Day seemed like the perfect time to try it out.  Now I didn't follow her recipe exactly, I mean how many of us actually do follow the recipe?  Karen is much like me and usually forgoes recipes.  Recipes are really just guidelines.  Once you know the methods, you can change it up.

Sin is In Apple Bacon Maple Pie

Printable recipe here

Pie crust of your choice (homemade or store bought)
14 slices Bacon (10 slices for the top weave and 4 to cook and crumble)
reserved bacon grease
8 granny smith apples
Squeeze lemon juice
1 tsp cinnamon
½ cup maple syrup (give or take)
¾ cup brown sugar
½ cup flour
¼ cup white sugar

springform pan (or a deep dish pie plate)

Roll out a thicker bottom pie crust than you normally would. (you want a substantial base for all the apples and bacon.)  Chill the pie crust until ready to use.

On a piece of parchment, construct a weave of bacon.  Place in a cold oven and turn oven on to 300F. Let the bacon weave bake away until slightly crisp but not overly crispy as it will continue to cook on the top of the pie.
In a large fry pan, fry the last 4 slices of bacon until crisp. Be careful not to burn the bacon or the pan. Drain the bacon on paper towels and cool.  Save the bacon fat in a bowl for later.


Peel, core and slice your apples.  Toss with some lemon juice.  Mix with the brown sugar, cinnamon and flour.

Add the white sugar to the hot pan with the bacon grease and tasty bits to start the caramelizing process.  Add in about ¼ cup of maple syrup.

Tip the apples into the pan and cook until caramelly and thickened but you don’t want the apples cooked through.  Let the mixture cool.

Crumble the four slices of bacon and mix in with the apples.

When the bacon weave is cooked, but not crisp, remove it from the oven and place it on paper towels to drain.

Remove the pie crust from the fridge and brush the entire surface with bacon fat.

Pour the apples and syrup mixture into the crust and bake at 400F for 20minutes.  Check the pie, if the edges are over browning, cover with foil and bake another 10 minutes.

Top the pie with the bacon weave.  Brush the bacon with 2 tbsp maple syrup.  Bake for 10 minutes.
Remove pie, brush bacon with more maple syrup, reduce oven temp to 300.  Bake for another 10 to 12 minutes.  Remove the pie, brush again with maple syrup and bake for another 12 minutes.


Resist eating the pie until it has cooled somewhat... you don't want to burn your mouth!!


Serve while in the company of good friends!
I am not going to lie to you....this was absolutely divine!!! Discussion actually touched on the topic of 'too much bacon' (if you can believe it).  Suggestions were made of perhaps a litte extra bacon in the pie and no weave on the top....as nice as the weave of bacon looked, it was a LOT of bacon!  The caramelly/maple goodness went sooooo well with the bacon. This pie is a must to try at least once!

Until next time, stay warm and eat well!!

Monday, March 7, 2011

Ricotta Vanilla Pancakes

Let me just start off by telling you how difficult it is to concentrate when there are Nerf guns shoot darts all over the living room....it is even more difficult to stay out of it when you have your own Nerf gun!! 


OK, with that out of the way, I can now talk about food. Pancakes.  Ricotta pancakes to be precise. I found a lovely looking ricotta pancake recipe here at Liv Life for blueberry ricotta pancakes...they really look fabulous, as does her other blog entries.  I didn't have any lemons or blueberries on hand, or the spelt flour so I needed to adapt and experiment a little.  When making pancakes of any sort in this house, I also must double the recipe....hungry  teen....

Since I did not have any blueberries on hand to make the scrumptious sauce, I served the pancakes with some fresh fruit, bacon and maple syrup!!


Ricotta Pancakes


1 cup flour
½ cup whole wheat flour
2 tbsp ground flax seed
2 tsp baking powder
½ tsp baking soda
Healthy grating of nutmeg
1 vanilla bean, split and scraped
1 tbsp vanilla extract
1 ½ cups low fat ricotta
4 eggs
1 cup buttermilk (or 1 tbsp lemon juice with enough milk to make 1 cup)

In a large bowl, mix together the dry ingredients, set aside.

This photo is missing the flax, it was a last minute addition that worked beautifully!

 In another bowl, thoroughly mix together the wet ingredients.  This is your chance to mix the wet ingredients all together and make sure the vanilla bean seeds are well mixed in.


Split and scrape the vanilla bean, make sure all of those little beadlettes of vanilla goodness go into the we mixture.


Combine the wet and dry ingredients and mix until just combined...the fewer turns of the spoon, the better.


 Heat a skillet or non stick pan, grease lightly with a brush of oil or melted butter.


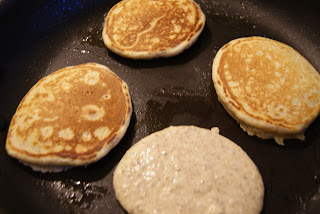
Scoop ¼ cup of batter onto the skillet.  Let the pancakes cook until bubbles form on the tops and they appear dry on the edges.


Flip the pancakes and cook a few minutes more until browned.

Move cooked pancakes to a foil lined dish to keep warm until you have finished cooking all the pancakes.


Serve with fresh fruit and maple syrup.

 Until next time, stay warm and eat well!

Monday, January 31, 2011

A Week's Worth of Brekkies

A great way to get going on these cold winter mornings in is a hot bowl of oatmeal! I don't have time every morning to make a pot of good old fashioned oatmeal but I am not a fan of the prepackaged instant oatmeals, they just aren't the same. The oats have been so over rolled there isn't nearly as much fibre left in them as there should be and I can make my own flavours with natural ingredients.  If I want maple flavoured oatmeal, I will just add maple syrup!

My breakfast is happy to see me!
 I generally buy the generic brand of steel cut oats or multigrain oats and cook up a week's worth of oatmeal on Sunday afternoon or evening.  Follow the instructions on the box to cook up the oatmeal and divy the oatmeal out into single serve portions into bowls (with plastic wrap) or containers with lids if you have.  All you have to do in the morning is pop it into the microwave for a minute or two and you are ready for the day! (Or grab it to take to work, use the  microwave in the classroom/staffroom and let the kids watch you enjoy your oatmeal!)

Cook the oatmeal according to package instructions.


Here's where you can adjust the flavours to suit your mood:
  • Switch out the water for another liquid such as juice, coconut milk, soy milk, milk....even tea
 
While cooking add to the pot the flavours of your choice:
  • 1 chopped apple (keep the peel), handful of raisins, 1/2 tsp cinnamon
  • handful of chopped dates (sweetness), shredded coconut,
  • pumkin pie spices and smow pureed pumpkin
  • chopped pineapple, coconut, and some rum extract (Do you like pina colodas?)
  • a handful of chopped dried apricots, some chopped walnuts...
  • dried blueberries
The possiblities really are endless, just use your imagination.
Today I felt like apples, dates, and cinnamon!

Lately I have been adding some frozen strawberries and a gulp of maple syrup before popping it into the microwave for 2 minutes.

Being prepared for the week ahead helps keep morning mayhem to a minimum.  Get up, get ready, have breakfast, and go.
One for each day of the week!! This batch has apples, dates, and cinnamon in it but I will most likely add some maple syrup and strawberries in the morning!  This really does save so much time in the mornings.

Saturday, January 22, 2011

"What do I Aways Say is the Most Important Thing?"

Bonus points to anyone who knows where the quote in the title comes from and knows the answer to the question!

It is another cold morning on the prairies, yes I know I have been complaining about the freezing temps and many of you are most likely thinking "Suck it up buttercup, you live there, get used to it.....blah, blah, blah....)" I will say this about this morning's weather:  At least there is no windchill.  After a certain point I wonder if it really matters what the temperature is, cold is cold.  The sun is shining, which is nice as that means no more snowfall for the time being. And since it is cold, it is the perfect time bake something so I can turn the oven on!!

I have been wanting to make these tasty little morsels of breakfast goodness for quite some time....I would hazard to say since Mandy from Whipped posted the recipe I have had these in the the back of my mind. So here I am almost an entire year later finally making them!!  I did make a few adaptations to Mandy's original recipe. Partly because I only had buttermilk in fridge and partly because I have been trying to incorporate more while wheat flour into my recipes.
Mmmm....bacon....

Bacon Cheddar Breakfast Muffins

In a small bowl, mix together 1 strip of crisp cooked crumbled bacon and 1/4 cup grated cheese and set aside.  This will be used as a topping for the muffins.

Spray muffin tins with non stick spray, or brush with oil, melted butter.....something to keep the muffins from sticking.

Preheat the oven to 375 F.

In a large bowl, mix together:
  • 2 cups all purpose flour
  • 1 cup whole wheat flour
  • 1 tsp kosher salt
  • 1 tsp fresh ground black pepper
  • 4 1/2 tsp baking powder
Mix together with a whisk and add to the dry ingredients:
  • 1 cup grated old cheddar cheese (or which ever cheese you have on hand)
  • 7 strips of crisp cooked bacon, crumbled
  • 1/4 cup chopped green onions, or chives
Mix until the cheese, bacon, and green onions are coated in the flour mixture.

In another bowl mix (beat) together:
  • 1/2 cup canola (or veggie) oil
  • 1 cup buttermilk
  • 1/2 cup sour cream (I want to try these with ricotta)
  • 2 eggs
  • 2 tbsp maple syrup
Add the wet ingredients to the dry and mix until well combined.  The batter will be thick.  Scoop into the muffin tins.


Bake for 20 to 25 minutes until the tops are golden and a toothpick inserted comes out clean.

Allow to cool for 5 to 10 minutes then remove from pans.  I loved the crispiness these muffins have from the cheese melting and crisping up on the edges of the pan.  Cheddar bacon breakfast muffins are indeed tasty and everyone enjoyed them on this cold winter Saturday morning. Highly recommended!

Stay warm and eat well!


Complete ingredient list:
  • 2 cups all purpose flour
  • 1 cup whole wheat flour
  • 1 tsp kosher salt
  • 1 tsp fresh ground black pepper
  • 4 1/2 tsp baking powder
  • 1 cup grated old cheddar cheese (or which ever cheese you have on hand)
  • 7 strips of crisp cooked bacon, crumbled
  • 1/4 cup chopped green onions, or chives
  • 1/2 cup canola (or veggie) oil
  • 1 cup buttermilk
  • 1/2 cup sour cream (I want to try these with ricotta)
  • 2 eggs
  • 2 tbsp maple syrup