Tuesday, November 23, 2010

Tomato Soupy Goodness with Bacon Swiss Biscuits: A Great Way to Chase Away a Cold!


Last night I could feel a sore throat developing, felt a headache coming on, and was just plain tired out.  I decided to play it safe and call in sick.  This way I was assured not only a day to rest and kick this thing in the teeth but I was assured the substitute of my coice, which I got!  Feeling blah like this sucks!  I did get to sleep in, which was nice, but I am still not feeling completely up to par. 

I was craving some feel good, cold weather, coming down with my first cold of the season food.  To be exact, I wanted tomato soup with grilled cheese.  As I was having a shake this cold day and being in the kitchen is relaxing, I decided to make some tomato soup and up the grilled cheese a notch and make bacon-cheese biscuits instead of the grilled cheese.
Regular readers may now note that for some reason I am on a bacon kick.  Why bacon?  Why not bacon!! Bacon is just so darn tasty.  Today's bacon was an applewood smoked bacon that cooked up nice and crisp in the oven.  Baking bacon in the oven in my favourite way to cook it.  It always comes out crisp, flavourful, and evenly cooked.  This is especially useful for crumbling into recipes, salads, soups, or just for eating!

This tomato soup recipe is so easy: there is no fussing, no mussing, just tomatoy goodness in soup form.  I do use canned tomatoes but this is so fresh tasting you will never go back to canned soup again!
For the tomato soup you will need:
  • 1 28 oz can whole tomatoes
  • 1 26 can diced tomatoes(you can use 2 of the same kind, we are just going to blend the soup anyways)
  • 1/2 large sweet onion
  • 1 tbsp honey (or sugar)
  • 1 - 2 cloves garlic, smashed, grated, or passed through a press
  • salt
  • pepper
  • basil
  • 1 tbsp olive oil
To make Tomato Soup:

In a pot,  heat the oil over medium heat.  Once hot, add:
  • the diced onion
  • pinch of salt
  • couple grinds of pepper
Saute until translucent and add to the pot:
  • 2 cans of tomatoes
  • a spinkle of salt
  • another grind of pepper
  • 1 tbsp honey (or sugar)
Let the soup cook at medium until bubbly and hot.  Reduce the heat and blend with a stick blender or in small batches in the blender.  You can choose to to puree the soup smooth or leave it slightly chunky.
Let the purred soup simmer on low until ready to eat. 
 
If you are looking for a creamy tomato soup, add 1 cup of cream to the simmering soup.

Stir in fresh basil just before eating. 

Other great tomato soup garmishes include:
  • shredded cheese
  • bacon
  • your favourite fresh herbs
  • croutons
  • crackers
  • dallop of sour cream
A great soup needs a great sandwich or biscuit to go with it!  Today I started out wanting a grilled cheese with bacon sandwich and wound up making bacon cheese biscuits.

Bacon Cheddar Biscuits

You will need:
  • 4 cups flour
  • 2 tbsp baking powder
  • 1 tsp salt
  • 1/2 tsp cayenne pepper
  • 1 cup cold butter (cut the butter into cubes and refrigerate until needed)
  • 1/2 cups shredded swiss cheese (or chedder, or which ever you have on hand)
  • 8 strips bacon, cooked and crumbled
  • 1 cup 1/2 and 1/2
  • 4 eggs
  • 1/4 cup shredded cheese (to top the biscuits)
Now lets start making bisuits!!

In a large bowl stir together:
  • 4 cups flour
  • 2 tbsp baking powder
  • 1 tsp salt
  • 1/2 tsp cayenne pepper
Using a pastry cutter, cut in:
  • 1 cup cold butter (cutting the butter into cubes and chilling it before cutting it into the flour makes it easier)
Continue cutting untilthe butter is pea sized and well coated in the flour mixture.

Stir in:
  • 1 1/2 cups shredded swiss cheese
In a separate bowl, mix together:
  • 1 cup 1/2 and 1/2
  • 4 eggs
Mix the milk/egg mixture into the flour mixture until it barely comes together.  Turn the mixture out onto the floured counter and knead, folding it over onto itself a few times, until it comes together.  (be careful to not over mix).


Pat the dough out until about 1 inch thick and cut out using a biscuit cutter.  I usually get 24 biscuits out of this recipe.  Refold the scraps and pat out again.  Continue cutting and refolding the scraps until there is no more.

Top the biscuits with a few strands of shredded cheese (I found some already shredded cheddar in the fridge so I used that with some of the swiss).

Bake in a preheated 400 degree oven for apporximately 20 minutes.
Try to let then cool a little before devouring!


Sunday, November 21, 2010

Snowy Sunday Morning Brekkie


Well the snow is definitely here to stay.  It is a winter wonderland outside.  Sometimes I think all we do here is complain about the weather.  In the summer it is too hot, or too rainy, or not hot enough.  In the winter it is too cold, there is too much snow....the list goes on.  It is actually quite pretty outside right now and not too cold at all.  (Cold being a relative term here.  Some of us are just more used to the cold than others.)  In all honesty I do enjoy the changing seasons.  I don't however enjoy the longer hours of dark that goes along with our fall into the winter months. Thank goodness we now have some snow to help light things up bit.
The sad looking garden donkey covered in snow.  The snow is still falling.
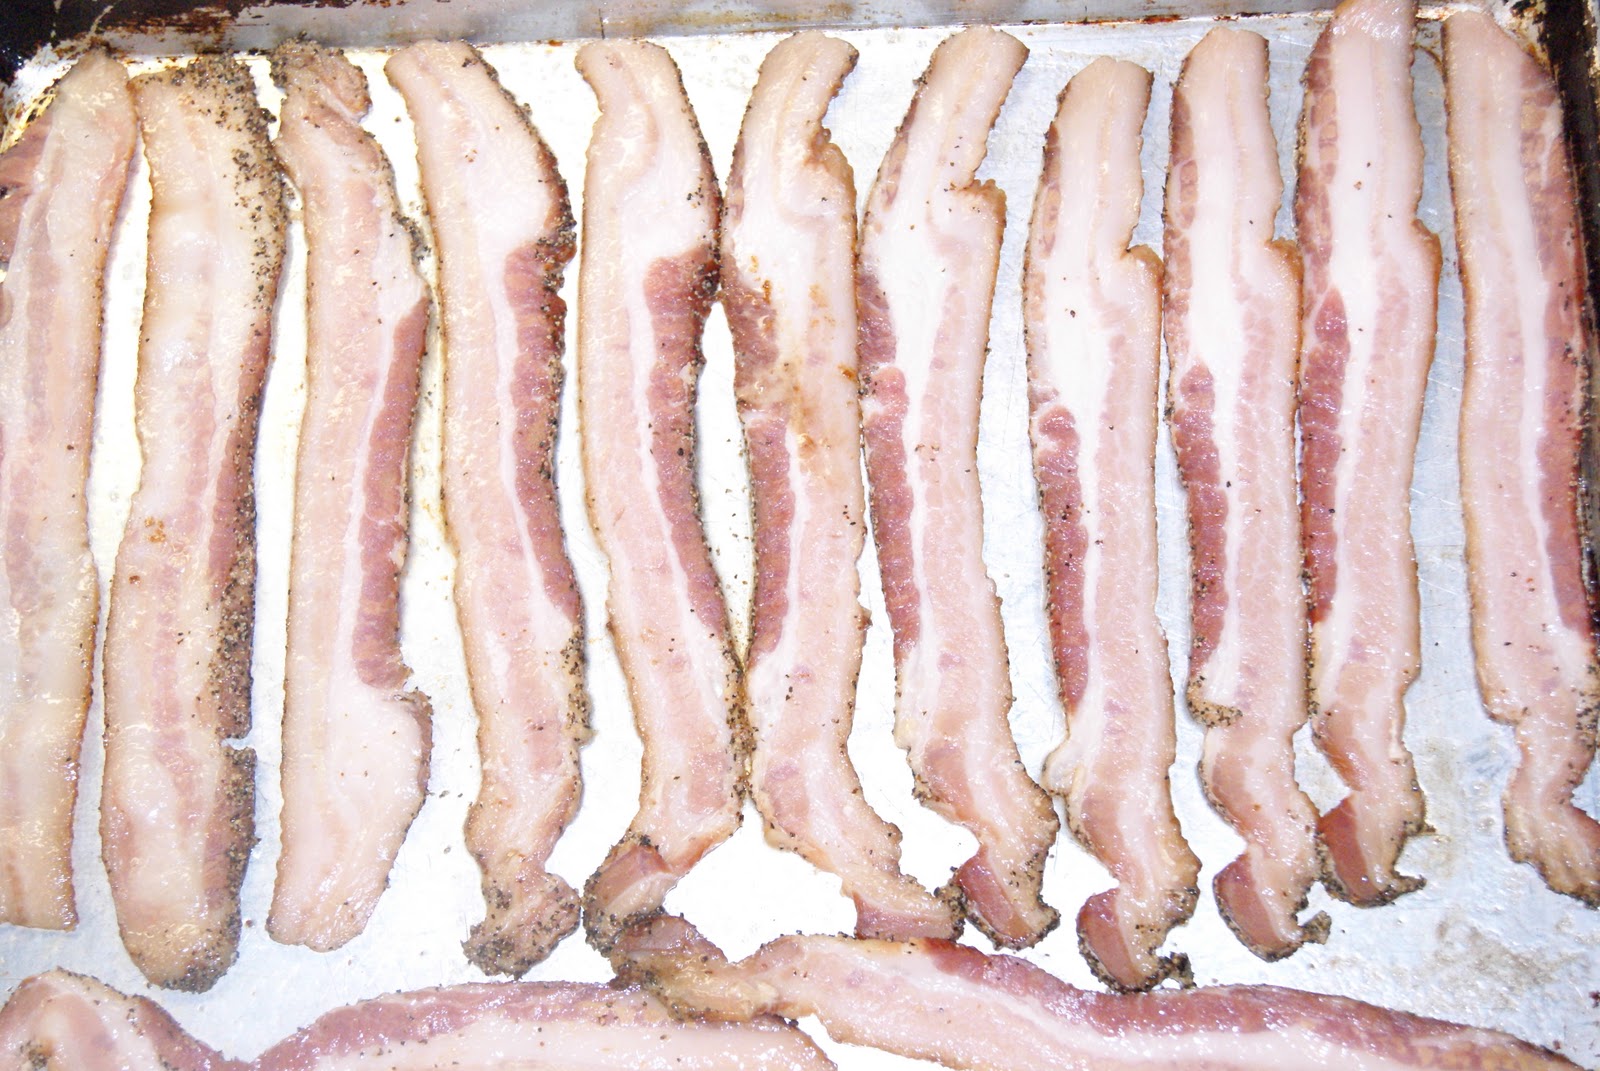
All of this fresh snow on a Sunday morning means a hearty breakfast is needed.  After all, I must make sure the teen has the energy needed to shovel all of that freshly fallen snow!  I have been dying to try out the bacon we found at the grocery store.  It is a hickory smoked, peppered thick cut bacon.  Looks so good before I even cooked it!

Snowy Sunday Morning Brekkie
  • 1 lb bacon of your choice (today we used a thick cut peppered and hickory smoked bacon
  • 6 - 8 red potatoes (or whichever you prefer or have on hand), cubed
  • 1/2 large sweet onion, diced
  • 1/2 red pepper, diced
  • green onions, chopped
  • 1 chili pepper
  • 8 eggs
  • some 1/2 and 1/2 or milk
  • salt and pepper
 Preheat the oven to 300 degrees F and spray a baking sheet with non stick spray.  Lay the slices of bacon out in a single layer on the sheet.  Bake for 20 to 30 minutes, or until cooked to your liking.  I give a large gap in time because some people prefer their bacon more crisp than others.

While the baon is in the oven, preheat a non stick frying pan to medium. Once the pan is hot add:
  • 2 tbsp butter
Let the butter melt and add:
  • the cubed potatoes
Give the pan a shake to coat the potatoes in melted buttery goodness, sprinkle on some salt and pepper.  Slap the lid on the pan and let it work its magic for about 10 minutes.  Remove the lid and add to the pan:
  • the diced onions
Give the pan another shake, slap that lid back on and cook for about 5 minutes.  Remove the lid again and add:
  • the diced red peppers
Shake the pan, slap the lid back on and cook for another 5 minutes.  After this last 5 minutes is up, remove the lid for good and shake up the pan.  (you can also use a utensil to stir things up, just be careful not to break or mash up the potatoes.)  Let the taters cook and brown some more until ready to serve.  Add salt and pepper to taste before serving.


**This recipe works well in the oven as well but you need to be careful and add the onions and peppers later so they don't burn.  The oven will need to be at a hot 400 degrees so if you are cooking something like the bacon low and slow, then the fry pan method is best. **

Once the bacon is done, feel free to trasfer the potates to a 400 to 450 degree oven to finish, especially if you need the stove space to make the eggs. 


Since eggs cook fairly quickly, I cook them last.  Preheat the fry pan to medium-low. 

In a bowl, crack open the 8 eggs and add about 1 tbps of 1/2 and 1/2 per egg to the bowl.  (here it was about 1/2 cup, but honestly, I didn't measure today, I just eyeballed it) 

Add some salt and pepper to taste.  Scramble the eggs with a fork, making sure to break up all of the yolks and mix in the milk. 

Add a pat of butter to the pan and let it melt.  Pour the eggs into the preheated pan and let them sit for a moment.  Stir the eggs with a spatula every so often to scrape up the gently cooked curds and let the liquid hit the bottom of the pan.  If you prefer smaller curds of egg, stir more often.  Continue cooking until eggs are cooked the way you like.  Top with diced green onions and sliced chilis.  Some grated cheddar is also nice here. 
Remember to start toasting at some point while the eggs are cooking... place a couple of pieces of your favourite bread in the toaster and toast away!!


The view from the front door this morning.

Wednesday, November 17, 2010

Breakfast for Dinner?

Well the weather has turned cool...cooler than it was yesterday anyways and cool enough to snow!  It is also getting dark so darned early that everyone is sleepy and feeling like comfort foods.  By 5:00pm tonight (official sunset was at4:42pm with a sunrise of 7:44am), it was pitch dark outside.  Making the transitions to such short days can be tough but we put on an extra layer of clothes, turn the lights on earlier and tough it out until spring.

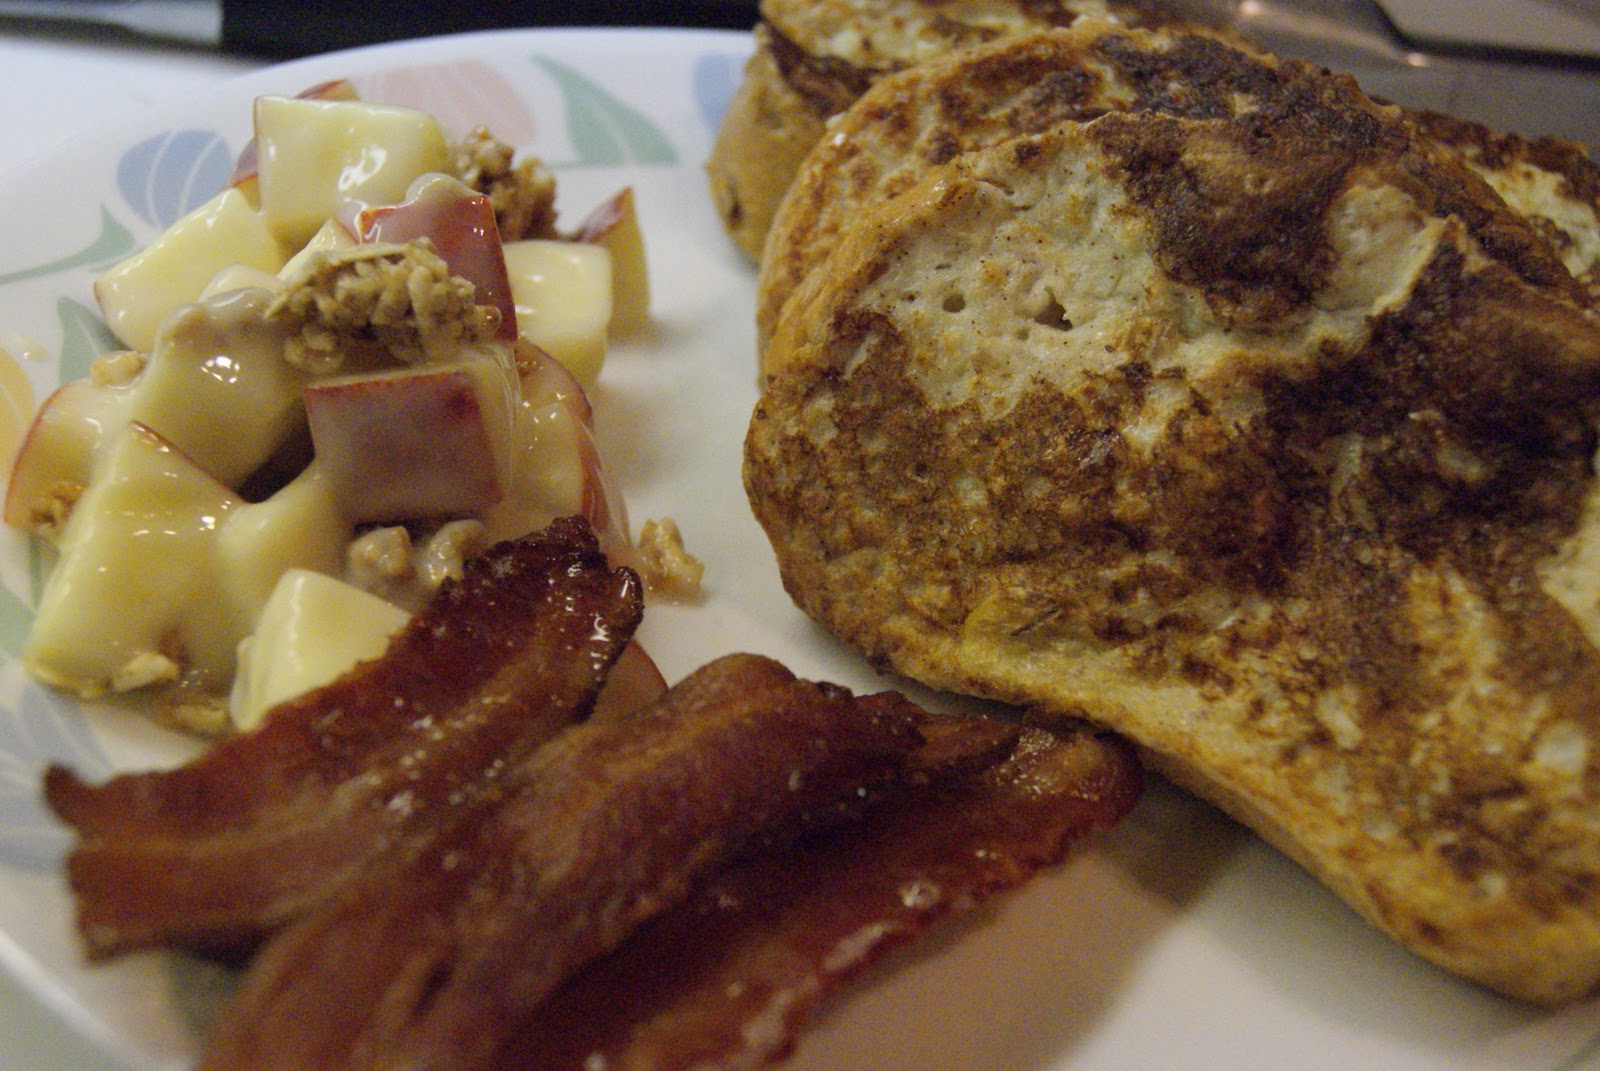
Tonight is a great night for breakfast for dinner!  French toast to be exact!  I have been thinking about making french toast for a few days so when I came home to a slow cooker meal that just didn't go as planned, I delighted in making French toast!  Warm, soothing, with a touch of cinnamon...just the thing to warm me up!  Served up with crisp bacon and a maple apple salad, tonight's dinner was not only soul soothing, it warmed the heart as well!


French toast 

Thickly slice 2 loaves of day old bread of your choosing.  Tonight I used a loaf of rye and a loaf of multigrain bread.  Any rustic, unsliced loaf will work well.

Heat a fry pan or griddle to medium heat.


In a casserole dish or other vessel with a flat bottom and high sides mix together:
  • 6 eggs, beaten well
  • 2 cups 1/2 and 1/2 (or cream or milk. I have also used evaporated milk)
  • 1 tsp cinnamon
  • 1/4 tsp nutmeg
  • 1 tsp vanilla
Beat these ingredients together really well.

Melt a pat of butter in the hot fry pan

Dip a piece of bread into the custard (egg) mixture and turn it over so that both sides are will coated.  Allow excess to drip off and place in the hot pan.
 
Fry until golden, flip and fry side number 2 until golden.  Place finished pieces in a pan in a warm oven to keep until serving.

Serve topped with maple syrup, or powdered sugar, or fruit, or whipped cream, or what ever floats your boat!


For the bacony side kick:
Preheat oven to 300 degrees F.
Spread bacon out in a single layer on a greased (or sprayed with cooking spray) baking sheet.
Bake until golden delicious.  (about 20 minutes)
Once cooked to your desired doneness, layer between some paper toweling to drain the fat.

Maple apple salad


In a bowl, mix together:
  • 1/2 cup plain yogurt 
  • 2 tbsp real maple syrup
  • 2 apples, cored and chopped (I like to leave the skins on)

Top with granola (I didn't have any granola on hand tonight but I did use some Kashi cereal and it tasted great!


This salad also tastes great topped with some crumbled bacon.

Sunday, November 14, 2010

I'm Going Bananas & Blueberry Muffins


It has been a busy week!  Between baseball practices, work gatherings, family dinners, and head colds this week has flown by and I realized I hadn't posted anything new.  When we got back from our family dinner tonight I felt the need to bake up some banana muffins.  It really had more to do with the extremely over ripe bannas that were sitting on the counter, beckoning me to mash 'em up into an oh so yummy batch of muffins than the need to have something for the teen age bottemless pit to snack on.  This recipe I have had hand written in my recipe binder for longer than I can remember.  I have made so many changes and notations in the book that it has become my own famliy recipe.  I usually turn loaf recipes into muffins to help with portion control...although the bottomless pit sometimes makes that attempt futile!

Banana Bread/Muffins
Printable recipe
Over ripe bananas are sweeter
  • 1/3 cup canola oil
  • 1 ¼ cups sugar
  • 2 eggs
  • 5 bananas over ripe...the more over ripe the better
  • 1 cup all purpose flour
  • 1 cup whole wheat flour
  • 1/4 cup wheat bran
  • 1 tsp salt
  • 2 tsp baking soda
Possible add ins:
  • Chocolate chips, blueberries, nuts, 
Preheat oven to 350 degrees F

In a bowl mix together:
  • 1 cup ap flour
  • 1 cup wh wh flour
  • 1/4 cup wheat bran
  • 1 tsp salt
  • 2 tsp baking soda
Set this flour mixture aside.

In the bowl of a stand mixer (or a bowl with a wooden spoon..whatever you have) mix together until well combined:
  • 1/3 cup canola oil
  • 1 ¼ cups sugar
Add and mix well:
  • 2 eggs
Now add and mix well;
  • 5 over ripe bananas
Mix well, mashing the bananas up as you go.

Add the flour and mix until just combined.  Remember that with muffins you do not want to over mix the batter or the muffins will be tough.

This will make 2 loaves or about 24 muffins (depending on size of muffins)

Muffins bake for 20 to 25 minutes.

Loaves bake for 40 – 45 minutes or until golden brown and the top springs back when pressed with your finger.

Sunday, November 7, 2010

What do You Mean You are STILL Hungry???? Some friendly neighbourhood tips on feeding a hungry teen.

Keeping enough food in the house to feed a rapidly growing almost 15 year old boy is tough.  Not only can it be expensive but it is a never ending job.  After school snacks are more like a first dinner.  Snacks after baseball practice have turned into just another meal.  I swear he would eat in his sleep if he could. When I tell you that my boy is a big guy, what I mean is that he is tall.  He towers over me.  If I need something from the top shelf, which is waaay out of my reach, I just call my son.   At the tender young age of 14, he is already over 6 feet tall....he doesn't get that from me.


Between baseball workouts, growth spurts, and his seemingly bottomless stomach, we have been looking for ways to keep him full.  Lucky for us, our son will give anything a try and is not a picky eater.  He loves sandwiches.  Actually, I think that is an understatement....he LOVES sandwiches.  The only problem with sandwiches is that deli meat is not only expensive but it is loaded with nitrates, sodium, and any number of other additives.  Lucky for us, today was grocery shopping day!


Today while shopping, outside round roasts were on sale.  We snagged a nice size roast for little money, rubbed it up with flavour and slow roasted it in the oven.  We will slice it up with the deli slicer and voila: sandwiches for lunches and snacks.  Of course it does take a little more than a great deal on a roast to feed a ravenous teen ager for a week.

Since I do enjoy baking and my son enjoys eating the results of my baking, yesterday I had a bakery day in my kitchen.  It really is a perfect match. I made a double batch of honey seeded buns and a double batch of pretzel rolls.  Both of these will help keep the food costs down for the week.  He can make a quick bunwich (or 3), have a piece of fruit and get on with his day.

 Tips for feeding hungry teens:
  • Shop the sales!  Buy a roast or chicken or which ever is on sale and plan the weeks lunches and snacks around that.
  • Cook your sale meat items to your liking and slice.  The kids will be more likely to use it up if it is already sliced and easy to access.  
  • Freeze excessive amounts in 1 or 2 sandwich portions for easy thawing and sandwich making.
  • bake your bread or buns at home, if possible.  If not, keep the freezer stocked with:
    • buns
    • tortillas
    • pitas
    • flatbreads
    • anything to make a sandwich or a wrap
  • keep a basket in the fridge with approved sandwich fixings (helps keep kids away from things you are wanting to use for other meals):
    • mayo
    • mustard
    • cheeses
    • dressings or spreads of choice
    • washed lettuce (also great for salads on the go) I like to buy the giant bag of prewashed lettuce to keep on hand so my son can make a quick cesar salad.
  • keep another basket with pieces of fruit or other pre portioned snack items that are solely for the purpose of snacking and lunches.  Ours tends to include:
    • apples
    • oranges
    • baggies of carrot sticks
    • yogurt cups
    • baggies of other cut fruit (melon, pineapple)
    • baggies of grapes, cherries
(These baskets are also a great way to get teens to make their own lunches for school.  Just keep them stocked and get input from the kids so you know what to buy)

 
Peppered Roast Beef

Pre heat the oven to 250 degrees F. (This temperature can change depending on what type of roast you have purchased.  Some roasts cook up better in a low temperature oven.)

Today I used an outside round roast.  Take it out of the fridge to come to room temperature while you assemble the rub.

Make a rub to season the roast.  Today I used:
  • 2 tbsp black pepper (fresh ground)
  • 1 tsp kosher salt
  • 1 tsp garlic powder
  • 1 tsp onion powder
  • 1/4 tsp cayenne pepper (or to taste)
Rub the pepper mixture all over the roast, don't miss any part of the roast.  This rub will make a nice peppery crust on the outside of the roast.

Place the roast in a roasting pan, stick in a thermometer, and cover with foil.

Roast in the oven until medium on your thermometer (or medium rare, if that is how you like it).

Allow the roast to cool before you slice it.  This not only allows the juices to redistribute but allows the crust to settle on the roast.


Slice to desired thickness and start making sandwiches!!