Sunday, February 12, 2012

Just Stuff It!! Pretzel Sammies

It is Saturday Sunday today! Hooray! I was supposed to vacuum but I haven't done that yet.  What I did do was make some pretzel bites and pretzel sammies.  Spring training is upon us and that has me thinking of pretzels!! I used a good old stand by recipe that I have posted before because it was tasty and lets face it, sometimes it is just relaxing working with a recipe you  know works and works well.  I made the pretzel bite using this recipe here.  It can also be found at this link. For the sammies, I did switch out 2 cups of all purpose flour for whole wheat this time without affecting the texture or the taste.  These sammies were an absolute hit!!
Ham and Havarti pretzel sammies

Pretzel Sammies
For the pretzel dough:
·         2 cups warm water
·         2 tbsp light brown sugar
·         1 pkg active dry yeast (2 ¼ tsp)
·         ½ cup butter, melted
·         3 cups all purpose flour
·         2 cups whole wheat flour
·         3 tsp salt

Hot water bath
·         6 cups water
·         ¼ cup baking soda
Egg wash
·         1 egg
·         1 tsp water

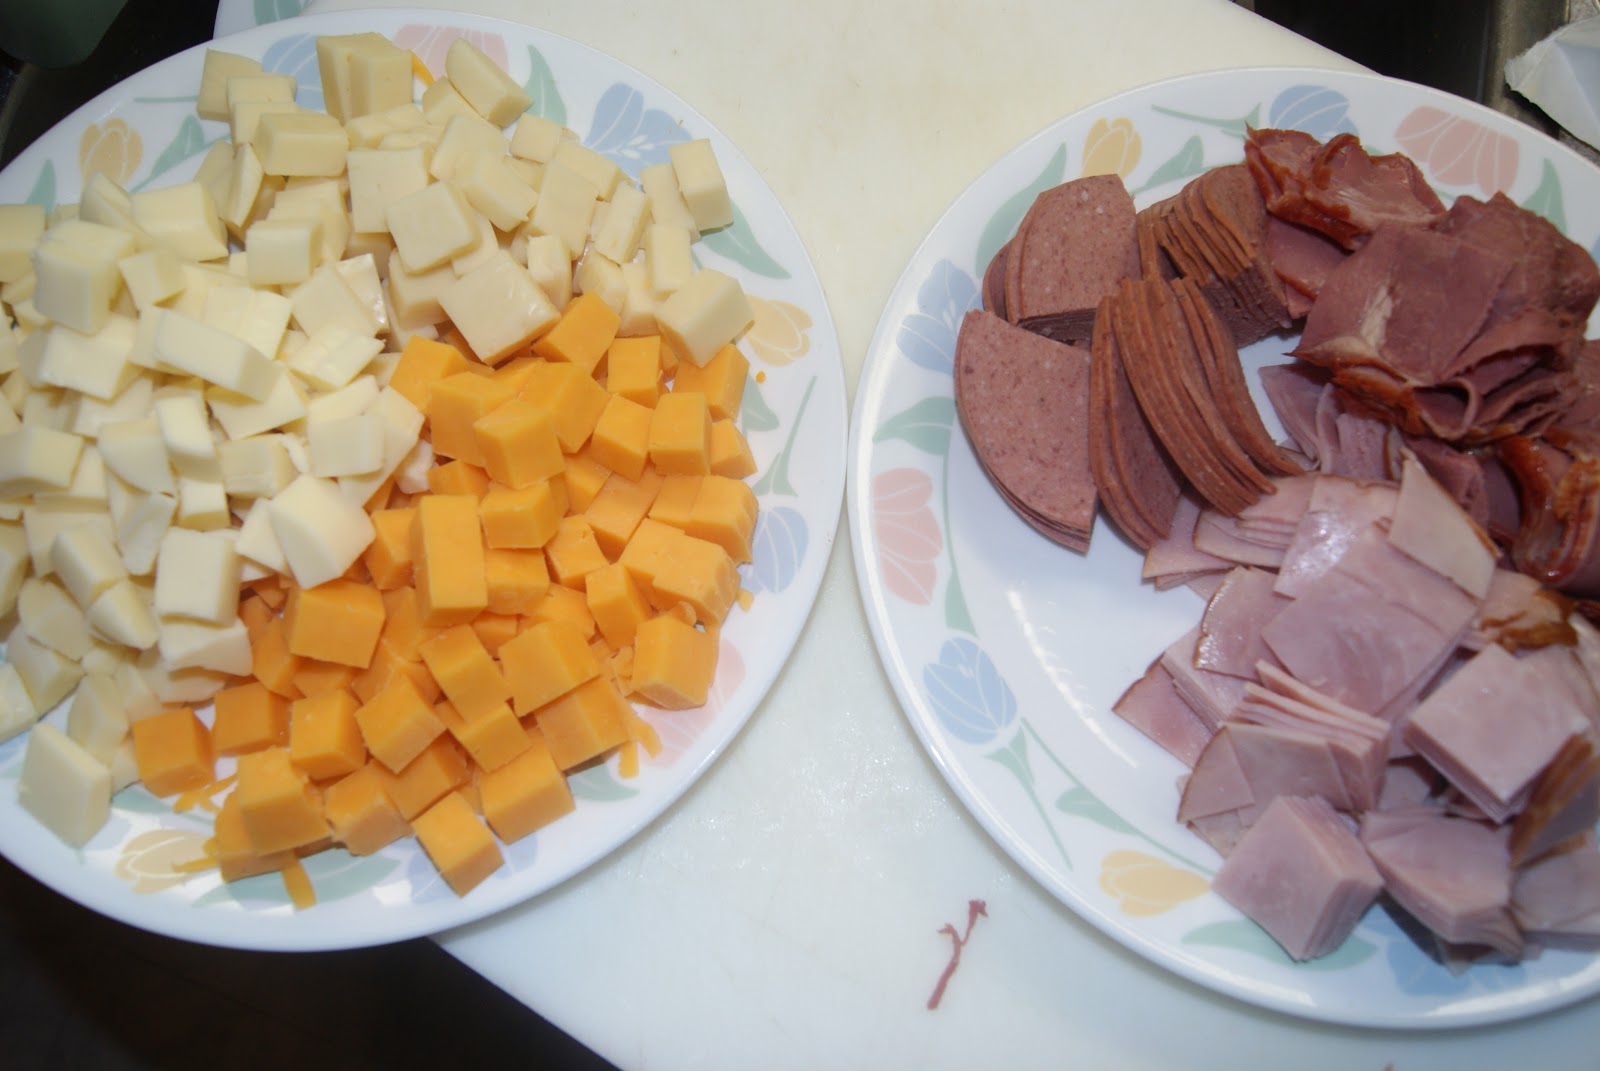
For the fillings, go with your favourite combinations of meats and cheeses.  Today I went with ham and Havarti, salami and provolone, as well as pastrami and cheddar.
Combine the warm water, yeast, and brown sugar.  Set aside for about 5 minutes and let it get all foamy.

Add the melted butter, the flour, and the salt.

With the dough hook, mix everything.  The dough will come together.  If the dough is sticky, add a bit more flour.

Knead the dough for about 5 minutes.

Place the dough in a lightly oiled bowl, cover with a tea towel and set it in a warm spot to rise until double in size, about an hour.

While the dough is rising, cut the cheese into cubes and the meat into more usable portions.

Divide the dough into equal 15 portions. I used a scale and was able to get 15 portions of dough that were roughly 3 oz each.

Form each piece of dough into a ball and cover them with a clean tea towel while you work with a few pieces at a time.

Flatten each dough piece into a flat circle and start piling on the toppings alternating cubes of cheese and pieces of meat.  Pile the fillings on until you think it won’t close.

Pull the dough up around the filling and start pinching to seal all the sandwichy goodness up inside.

Put a large pot of water on the stove to boil.  Once it is boiling, reduce the heat slightly to a high simmer and slowly add ¼ cup of baking soda...it will bubble up so add it slowly!

Simmer the sammies in the hot baking soda water bath for about 1 minute flipping over after 30seconds.  Transfer to a baking sheet, brush with an egg wash.

If you like, sprinkle with coarse salt after the egg wash.  Although if you aren’t eating these right away, then skip the salt as it will just melt away in storage.  If you are making more than 1 kind, use a piece of the meat to lay on top of the sammies to help identify them.

Bake at 425F for about 15 minutes until golden brown.
Until next time, stay warm and eat well!

Tuesday, February 7, 2012

Bacon, Pasta, and Power


Tonight was one of those nights I actually got some time to myself after work. I must admit it is a bit of a strange feeling.  The Boy is at school until 6:30 for driver's ed, Hubby has a class, and there was no rehearsal for the school production due to a meeting (that I didn't have to attend)!! What to do with that time??? I thought about having a nap but didn't think I would wake up until tomorrow morning. Instead I wandered over the the IGA by my house to browse the shelves and get some ingredients for dinner.  I had a recipe in the back of my head and had a quasi-mental list...okay, I confess, I checked a recipe in my new Jamie Oliver cook book and knew what I wanted to make.

The original inspiration for tonight's dinner was "mini shell pasta with a creamy smoked bacon and pea sauce". Such a long title but it was an easy peasy recipe and has bacon in it! Once I got to the store, I discovered that IGA didn't have fresh mint and things just got worse from there.  As I was at the dairy case, the power went out.  It did kind of throw me for a loop. It wasn't dark as it was actually still light out and there are windows but it still caused me to forget to grab some frozen peas and double check what I was getting as all the interact machines were down!

So I walked home from the powerless store to my powerless house and put my groceries away in my powerless fridge. With no power to cook supper, run the Internet, or heat the house I bundled up and walked over to my friend Marie's house.  We drank some beer so it wouldn't go bad....and she has three fabulous dogs that took turns sitting with me to keep me warm!!

The original recipe can be found on page 52 of Jamie Oliver's book Jamie's Food Revolution and calls for:
  • 10 slices smoked bacon
  • a small bunch of mint
  • salt and pepper
  • 1 lb mini shell pasta
  • olive oil
  • a pat of butter
  • 2 cups frozen peas
  • 2 tbsp creme fraiche or heavy cream
  • 1 lemon
  • 6 ounces Parmesan cheese
As some of you may know, I have issues following rules recipes so many times the recipe I start with is very different from what I actually cook.  I do like to use the recipes as a base idea and then add my own flair. The pasta dish I served up tonight included:
Printable recipe
  • 1/2 lb bacon, cut into small pieces
  • basil
  • salt and pepper
  • rotini pasta
  • 1 cup frozen peas (dug in the freezer and found some)
  • 2 tbsp half and half
  • 1/2 lemon
  • 2 cloves garlic (because hey, it's garlic)
  • 1 cup chopped tomatoes in juice (I had some left over from the other day. I blitzed them with a hand blender first)
  • sauteed mushrooms and asparagus (these were left over from last night's dinner. They had been sauteed in garlic and were fan-freaking-tastic)
  • Parmesan cheese (I actually had some leftover from making the chicken fingers last week! It was about 1/2 a cup)
Put a pot of water on to boil, heat a skillet, and chop the bacon.

Saute the bacon until it is crisp. Drain the fat (or at least some of it).  Add the peas, mushrooms, and asparagus.  Also grate on a micro plane or use a press to add in the 2 cloves of garlic.  This is also a great place to add in a couple grinds of pepper.

To the pot of boiling water, add a hefty pinch of salt and plunk in the pasta.  Cook according to package directions.
Pour the tomatoes into the skillet along with some pinches of basil.  Let this boil down until the pasta is half cooked.

Add 2 tbsp of half and half to the skillet and stir.

Remove the pasta from the water and add it to the skillet.  Mix it all together and add the squeezings of half a lemon and the Parmesan cheese.

Serve with salad or veggies.

This dish received fabulous reviews from the boys and heated up nicely for Hubby when he got back from his class tonight.


Devour!

FYI, the power did go back on just before 6pm, after 2 hours.  Apparently the hydro company had to shut off the power so they could fix a hydro pole fire issue. 

Until next time, stay warm and eat well.


Dreaming of sunny weather and blue waters...

Sunday, February 5, 2012

Comfort Food for Finals

Oh my!! Where has the time gone! I cannot keep making excuses for abandoning my blog and my precious readers.  We have been doing our darnedest to get back into the swing of things after the holidays. January has been cold and busy here on the prairies. I have kept up going to the gym 3 to 4 times a week and feel great!!
I miss Hawaii sooooooo much!
Unfortunately my sun kissed glow from my holiday trip to Hawaii has faded. The new freckles stayed though!  We have sort of settled in to a sort of winter routine here. The Boy is busy with all things studying, baseball, and now, drivers' education.  That's right. You heard me. The Boy is learning how to drive....ACK! I can't be old enough for this! He can't be old enough for this! Am I ready for this? I am going to have to be.
This past week was exam week at the high school and while he won't admit it, nerves played a role.  To help get him through,  I made a couple of the Boy's favourites for dinner.  Nothing like a little comfort food to get  you through!  Chicken Fingers and fries.  He asks for homemade chicken fingers every time I buy boneless chicken breasts!  Of course, this can be a messy undertaking because you need to dredge the chicken strips in flour, dip them in egg yolk, and then in the bread crumb mixture but it is so worth the effort!

First start your french fries!! Heat the oven to 400F and scrub 3 large russet potatoes. Line a baking sheet with a layer of tin foil or parchment paper. Cut the potatoes into fry size sticks.  Toss the fries with 2 tbsps oil and sprinkle with seasoning salt. Place the fries in the oven.


Chicken Fingers
  • 3 or 4 boneless, skinless chicken breasts, cut into 4 strips each
  • 3 eggs
  • 1 cup flour, seasoned with salt and pepper
  • 1 cup panko 
  • 1/2 cup grated Parmesan cheese
  • 1 tsp garlic powder
  • 1 tsp onion powder
  • salt and pepper
Take out 3 dishes or pie plates.
In the first dish, toss in the seasoned flour.

In the second dish, beat the eggs.

In the third dish, mix together the panko, Parmesan, garlic powder, onion powder, a big pinch of salt and a healthy grinding of pepper.

Get a baking sheet ready with either parchment paper or a silicone baking sheet.

Now, first all of those strips of chicken need to be dredged in the flour and shaken off.

Next, plunge the flour coated chicken into the beaten eggs and let the excess drip off.

Plunk the drippy chicken into the panko mixture making sure to coat the entire piece of chicken in crumbly goodness.

Place the strips onto the prepared baking sheet and slide it all into the oven with the fries. You can flip the fries over if you want, I never do and things always seem to turn out just fine.

Once the chicken strips are in the oven, everything should be cooked in 25 to 30 minutes.

The fries and strips should both be golden brown when done.

Homemade honey mustard.
  • 1/2 cup mayo
  • 2 tsp mustard
  • 2 tbsp honey
Mix all three ingredients together until thoroughly mixed.

Serve with chicken fingers.

Until next time, stay warm and eat well.


Monday, December 26, 2011

Christmas Dinner

My apologies for the lateness of this post. I had such a crappy connection at the hotel it just wasn't a feasible thing to post. Now that I am back, I hope to get back into the swing of things...I know, I've been saying that for a while now...sorry. If it helps, I am having trouble adjusting to slushy snow instead of sand....
I must say, I loved my view of Diamond Head during dinner!

I hope everyone celebrating Christmas had a fabulous time and your dinners were everything you expected and more.  We attempted another BBQ but unlike last year's disastrous Christmas day BBQ we are in a warm and sunny spot in Waikiki.  We found a place called the Shorebird in one of the hotels close by (The Outrigger Reef hotel).  They have a sunset special where you get an 8 oz steak and an all you care to eat salad bar for 16.95! We decided to go there for our Christmas dinner.  The neat thing about this place is they bring out your steak (or whatever meat you ordered) and you grill it yourself at the massive grill.

Our steaks and a packet of mushrooms for the grill
 Of course we put the Boy in charge of grilling since he does such a fabulous job.

Hubby giving the Boy a hand putting the steaks on
I started my meal out right....


The Shorebird has a fabulous salad bar that even has some hot items on it such as pastas.


The grill had plenty of room for everyone to get their grill on!


We even snagged some bread from the salad bar, extra butter and garlic to make some garlic toast!!

The Boy likes to put butter on the steaks...
Gratuitous steak shot
As always, the Boy grills my steak to perfection!!


I really need to figure out how I can get to do this every year...this Christmas day sunset was a fantastic Christmas present!

Well, that's it for today's post. I hope everyone had a fabulous holiday season and wish everyone all the best in the new year!

Until next time, stay warm and eat well!!

Sunday, December 25, 2011

Melike Liki Maka

Melike liki maka everyone! The folks of the Little Kitchen have embarked on a fabulous adventure this holiday season. If you haven't already guessed it, we are in Hawaii!  We left in the wee hours the other day, getting up at 3am and staying on the go for approximately 24 hours straight! It was quite the day with a stop in Calgary, Alberta, and another stop in Vancouver, British Columbia before boarding the third plane of the day to take us to Honolulu!

 After a very long but exciting day, we had a laid back Saturday. A stop at the Honolulu Farmers' Market was the only must do thing on my list today. I must say, I will be back there. Some amazing sights, sounds, smells, and tastes going on there! I've got a few pictures to share but that is about it. The internet connection is very slow at the hotel but I hope to post some pics for you guys over the next few days.

We finally saw the sun while leaving Calgary!

Getting ready to go into the market
Opening the coconut
Enjoying some fresh coconut water
Big wave tomato grilled pizza
A very Merry Christmas to everyone!  Until next time, stay warm and eat well!