Showing posts with label salad. Show all posts

Thursday, July 25, 2013

Quinoa Salad is Berry-licious!


I really have no excuse for not posting too regularly except for the fact that I have been enjoying some much needed alone time.  How is this you ask? For one, I am on holidays from work until September.  Two, Hubby has been working during the day, as per usual. Three, the Boy is on a fantastic Me to We adventure in Ecuador building a school, playing games with kids, and having a blast. (He's a keeper!)

Not to brag too much, but I have been sleeping in, watching Netflix, and hanging out in the garden.  Nothing too exciting but seems to be just what I needed.  That being said, many apologies if I haven't kept in touch. I must also admit to spending a good amount of time browsing Pinterest.  I love seeing the ideas and thing people come up with and sometimes it inspires my own thought processes.

I found some salads featuring quinoa and berries.  The dressings didn't seem to appeal to me so I figured honey and lime always go well with berries and boom....there you have it. 


Berry Quinoa Salad with Honey Lime Dressing

4 cups mixed berries 
    - I used a mixture of blueberries, cherries, raspberries, and strawberries
1/2 cup un cooked quinoa
1 cup water
Slivered almonds, toast almonds in a dry pan until slightly golden and allow to cool.

Honey lime dressing

1/4 cup lime juice
2 tbsp honey
3 tbsp oil (use a neutral tasting oil such as canola)
Pinch of salt

Combine the quinoa and water in a pot.  Bring to a boil, slap a lid on it, reduce the temperature to low and set the timer for 15 minutes.  When the timer dings, take it off the heat, fluff it with a fork and set it aside to cool.

Wash and dry the berries, cut up the strawberries, pit and halve the cherries, and put it all to the side.

Combine the dressing ingredients in a jar and shake it until everything is combined. Give the dressing a taste to see if it needs more honey, or lime, or salt.

Once the quinoa is cooled, combine it with the berries, almonds, and the dressing. Chill until serving time.

This salad was divine....Hubby gave it rave reviews!


Until next time, stay warm and eat well.

Wednesday, July 4, 2012

CSA Update: Our Farm Share

How's the heat treating you? I'm never going to complain about the heat because we get sooo much cold, this is glorious!! We've been busy here in the Little Kitchen.  The Boy had 4 wisdom teeth removed and is on the mend. A few giant pots of home made mac 'n cheese helped, so did the T3s....

Yesterday We got our 3rd week of goodies from the CSA program and we are knee deep in leafy greens! One of the things people said to us we we started talking about joining a CSA was "I hope you like kale".  We actually got a little bit of kale for the first time in this box but have been enjoying the gorgeous salads we've been able to make with the greens we've been getting.

This time we got some pea shoots!


Beets and salad turnips.


Lots of greens!

A couple of cucumbers, a few baby squash, garlic scapes, and peas.


The first peas of the season!!
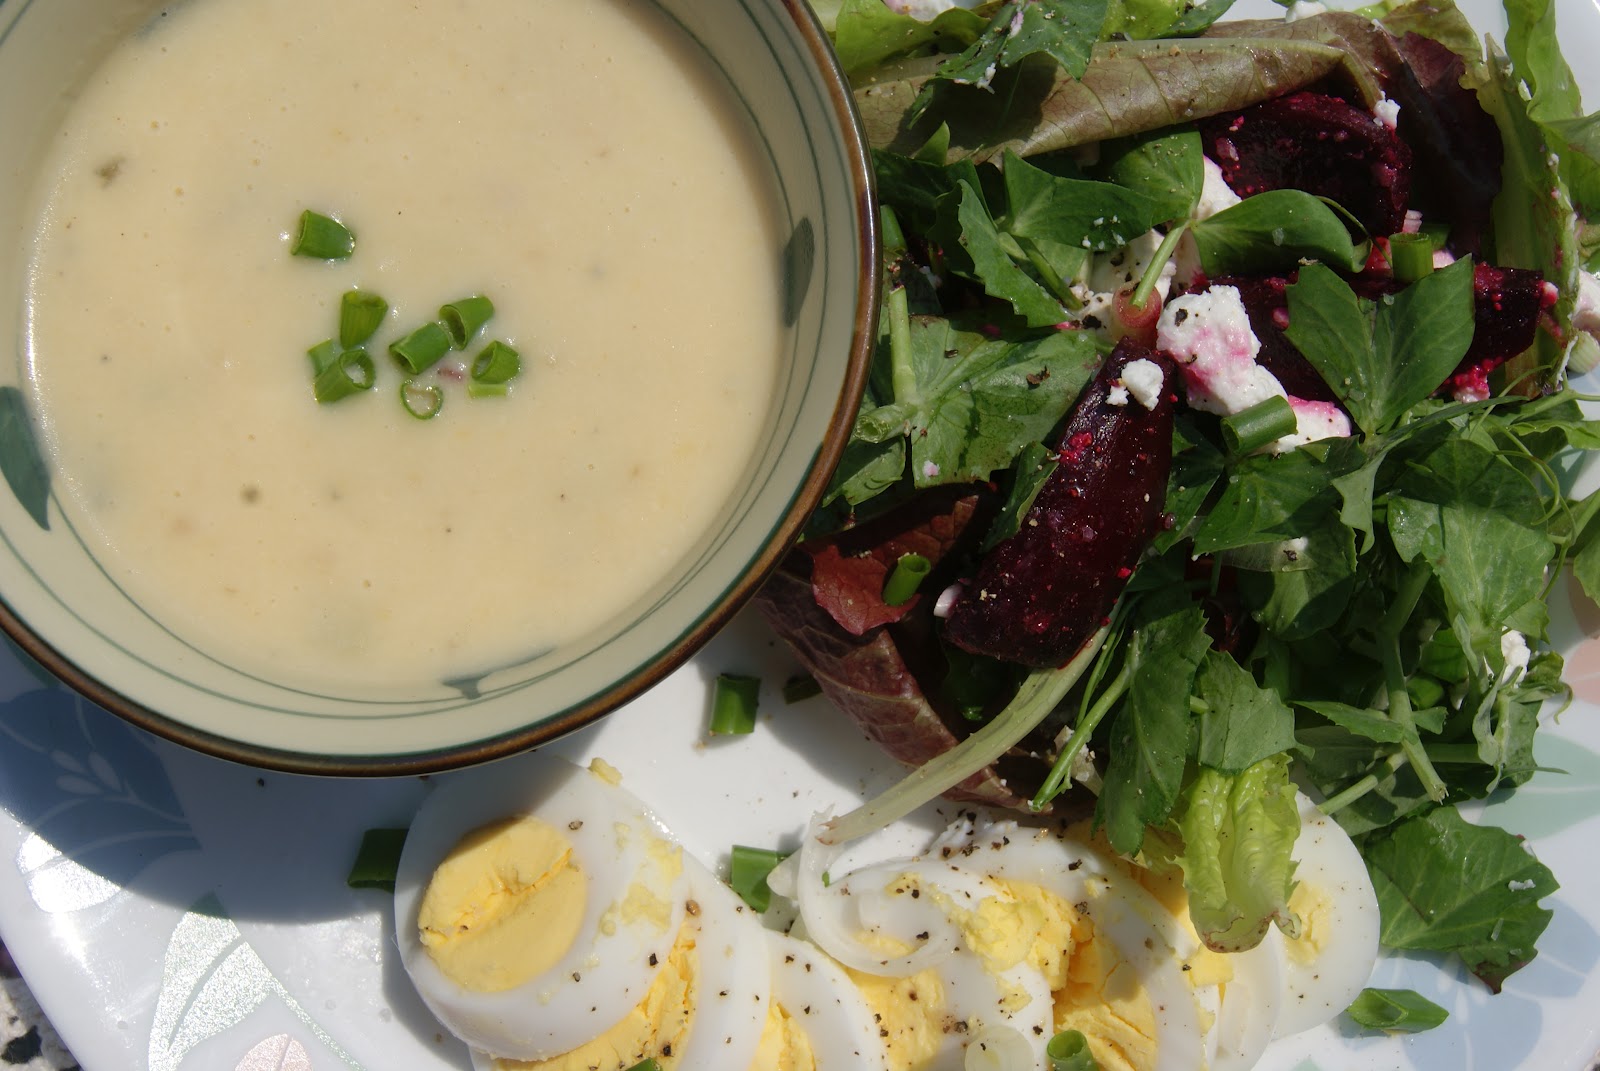
 Today for lunch, I had a tasty salad with roasted beets, goat cheese, and hard boiled egg along with a bowl of Perogy soup from Frozen Comfort.

 Again, I used no dressing. The goat cheese and some salt and pepper was all that it needed! (Oh, I think some walnuts would go perfectly here too....I will add walnuts to the list!)

It was a perfect lunch, especially since I am planning on going to the ball park later to annoy the Boy at work!!! (Mmmmmm, ballpark goodies!!!)


Until next time, stay warm and eat well.

Saturday, June 30, 2012

A Simply Pretty Salad

This week in our CSA pick up we got some more lovely greens 'n things so tonight we made one of the prettiest salads ever with some of the contents.

Roasted beets, goat cheese, greens, flowers, tomatoes, and a few bean sprouts....


It didn't need any dressing.


It was just that tasty and lovely.


It was the perfect meal before family movie night!


Until next time, stay warm and eat well.

Wednesday, June 20, 2012

CSA Week 1

Yesterday Hubby picked up our first basket of goodies from our wonderful community supported agriculture program with Almost Urban.  We were so excited when we got the email telling us of our first pick up. As it is early in the growing season, and we have had large amounts of rain, our first basket is mainly leafy greens that will pump up our mason jar salads.

Some radishes and salad turnips were in there as were mixed greens with edible flowers,

lovage, chard, spring onions, garlic scapes, a bouquet of flowers, dill,


A bag of micro greens (Sunflowers)


and a bar of soap!

We know as the growing progresses we will get more and more wonderful goodies in our basket.  For now our salads have some extra fresh & local flavour and we get to try some things we haven't had before (such as edible flowers and lovage....)

We are so looking forward to getting new things each week this summer!

In other news: CTV Morning Live has invited me back to their show! Next week (July 29) I will be discussing Canada Day inspired edibles for your celebrations!! I am so excited!!

Until next time, stay warm and eat well!

Monday, June 11, 2012

Mason Jar Salad: Day 1 (And Banana Muffins)

Today's jar salad was fantastic! (It was also the talk of the staff room for both Hubby and I.)  I managed to leave enough room for a good shake an successfully mixed it all up! The lemon vinaigrette was perfect.  The beets managed to colour everything a nice shade of purple too! Of course today was day one. Hubby has a couple more salads in the fridge for his week but I am leaving for 2 days of camp with the grade 8s tomorrow so I didn't make more. I am however tempted to make a couple to take and store in the camp fridge. (I'm not sure if I can handle mass produced camp Cesar salad...)


In keeping with my experimenting theme, I decided to make some banana muffins to take with me to camp. That wasn't the experiment. The experiment was switching out the white sugar for maple syrup! I researched a bit online and decided to use 1 cup of maple syrup in exchange for 1 1/4 cups white sugar. I also added an extra 1/4 tsp baking soda and another 1/3 cup flour. Oh, I also only used 2 tbsp of canola oil instead of 1/3 of a cup and I have a sneaky suspicion that I may be able to omit the oil altogether!

Here's the recipe....and FYI, I'm not sure these guys will actually make it out of the house and to camp...they are just that tasty!


Maple Syrup Banana Muffins - printable recipe here

2 Tbsp canola oil
1 cup maple syrup
2 eggs
5 over ripe bananas
2 1/3 cups flour
2 1/4 tsp baking soda
1 tsp salt (or less if you prefer)
1 cup chocolate chips

Pre heat oven to 325

Whisk together the oil, maple syrup, and the eggs until the eggs are thoroughly mixed in.
Mash the bananas, add them to the liquids and mix it all up.
Add on top, but don't mix yet the flour, baking soda, and salt. Use a fork to quickly stir the dry ingredients before mixing them into the wet....this just saves dirtying another bowl!
Mix the dry and wet ingredients together until almost combined, add the chocolate chips and finish stirring until just combined.

Scoop into lined muffin tins (This made 24 muffins) and bake for 20 to 25 minutes...these ones took 25 minutes but always check at the earliest time.

Try to allow these little gems to cool first but try one if you must. (Remember, they are tasty warm but the flavours will have time to meld and these will taste even better the next day!)

Not too shabby!

Wish me luck at camp!

Until next time, stay warm and eat well!

Sunday, June 10, 2012

Your Salad is a Jar

What is with all these jars??
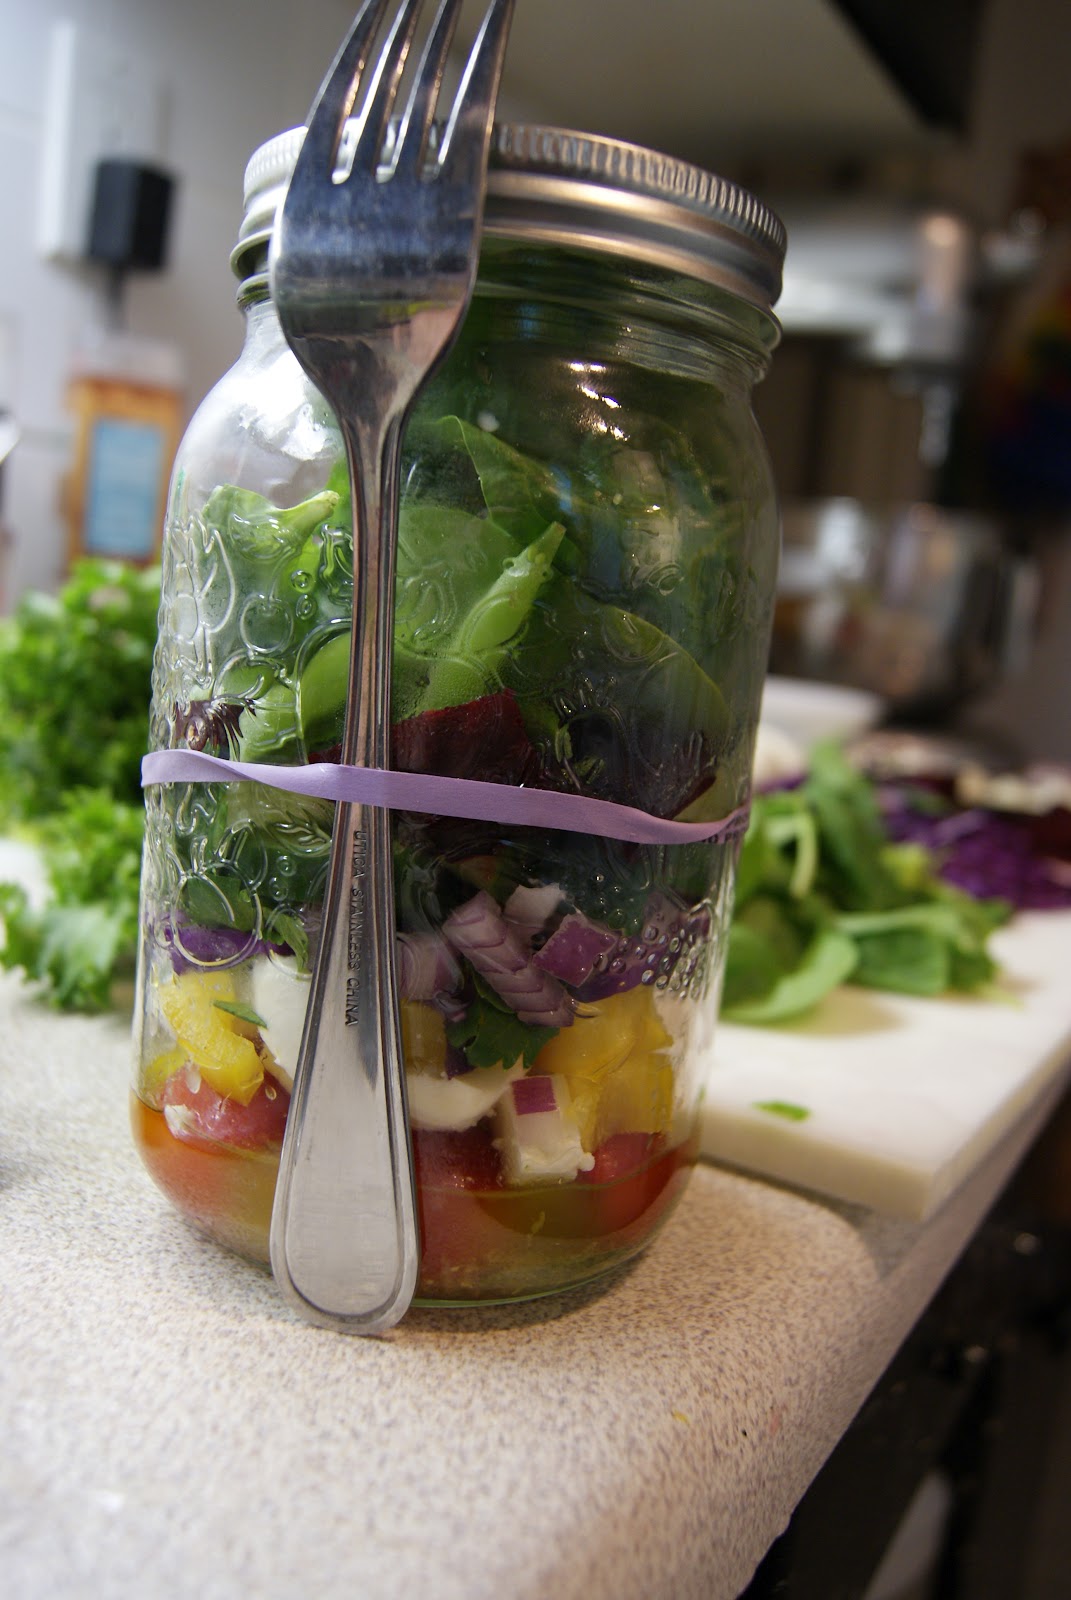
 I have another confession. I have become addicted to Pinterest. It is such a quick way to share and browse ideas and let me tell you, I have found some very neat things on Pinterest and these include ideas for the garden, the kitchen, and even ideas for work. One of these neat ideas, Hubby and I put together tonight for lunches this week! There have been some pins about using mason jars to layers salad ingredients for a quick and tasty lunch. Once assembled, the jars of salads are supposed to keep all week so you can make one for each day on Sunday, then all you have to do is grab a jar, some fruit and yogurt to go with it and you are set! We are trying this out for the week, even though I am going to camp with the grade 8s, Hubby will test the jar theory out for the week.

Wash out your jars so they are ready to go!

We splurged and bought new jars for this one!
 Once you get everything organized, washed, and chopped assembly goes fairly quickly.


We made both a lemon vinaigrette and a balsamic vinaigrette so we didn't have the same dressing the entire week.
Hubby seems to be having fun making his salads!
 After putting a couple tablespoons of vinaigrette in the bottom of the jar it is time to let the layering begin!!

 It is important to put the heavier/more sturdy items in the bottom of the jar so the dressing won't wilt the more fragile items.
 Keep the layers coming!

  Wrap an elastic band around the jar and tuck a fork underneath it (even a napkin!).


Store in the fridge for your grab 'n go lunches!! Remember to leave room so you can shake your salad up at lunch time.


Other things I've been up to (and may or may not have been found on Pinterest):

Growing celery from the end of the stalks.

Once the leaves are up, plant the entire bottom into the soil!
Freezing chicken with marinade in the sealer bag so it can flavour up while it thaws! (I also did this with a large pork loin which I was able to cut into 12 generous chops and 2 fair sizes loin roasts!) We are getting the freezer filled!
This is a ginger honey lime mixture....kind of looking forward to it!
I will get back to you and let you know how the mason jar salad experiment turned out.

Until next time, stay warm and eat well!

Thursday, March 24, 2011

On The Road - Day 1

After a long day of driving, we made it to Omaha, Nebraska! We spent pretty much the entire day in the car....really, we did.  Approximately 960km or almost 600 miles. The I 29 just seems to keep going South! Our first stop was in Grand Forks at the Jimmy John's for sandwiches.  We don't have a Jimmy John's back home and when we are on the road we like to stop at the places we don't have at home.


Therefore, our first road meal of the day was sandwiches!  BLTs to be exact!!


We lucked out when we got to the hotel in Omaha tonight there was a Culver's practically in the parking lot! Another restaurant we do not have back home.  I completely forgot the camera in the car but by the time we got to eat, we were pretty darn hungry!  I went with a salad tonight so I could splurge a little and try their deep fried cheese curds....wow! The cheese was tasty, so was the chicken cashew salad.
Back on the road again tomorrow!
 
Until next time, stay warm and eat well!

Monday, March 7, 2011

Summer Dreaming of Quinoa Salad

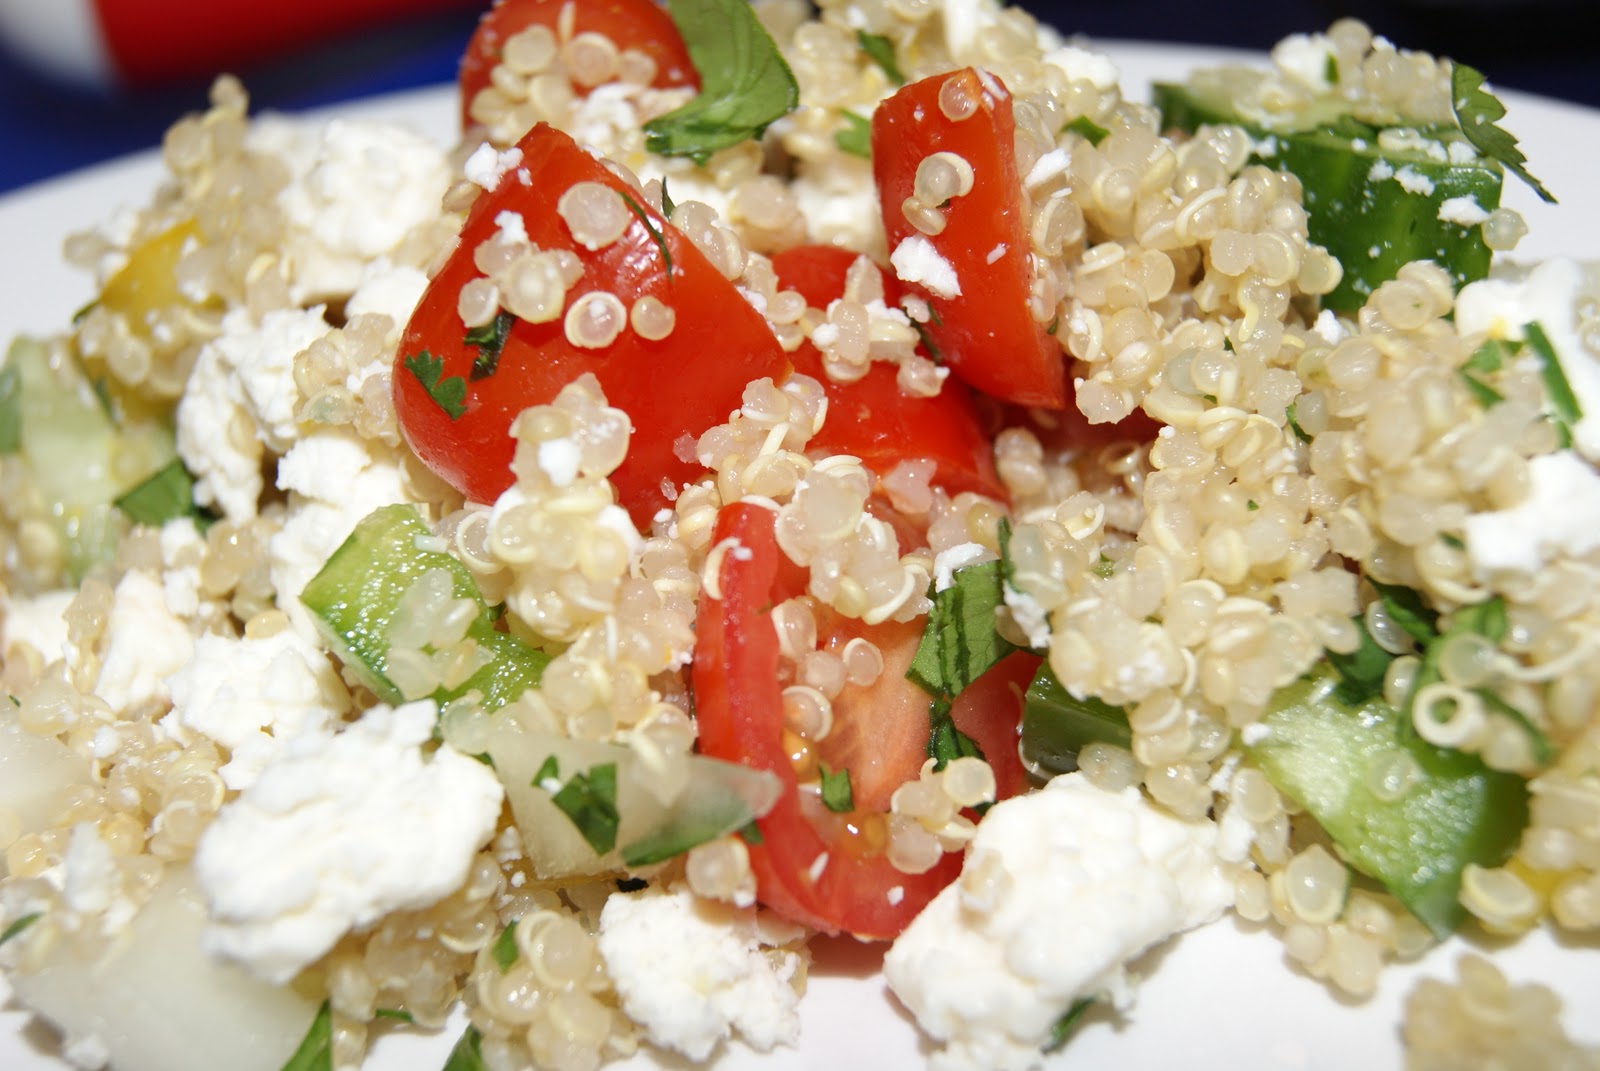
Well, my posting has slowed down a little lately. Life just gets busy sometimes!  I have had some photos tucked away on the hard drive for a while, but just haven't had a chance to write or post anything.  Lately I have been day dreaming of summer...warmer weather, sandals, sunshine, BBQs, fresh summer fruit & veggies...the list goes on.  This has been quite a cold winter, even in prairie terms. The other evening I found some Quinoa in the cupboard and I just knew it was time to make a quinoa salad, the perfect summer salad!!


Quinoa Salad
Print recipe

1 cup quinoa
1 1/2 cups water
1/2 green pepper
1/2 yellow pepper
1/3 to 1/2 long English cucumber
1/2 medium white onion (or whichever colour you have on hand)
handful grape or cherry tomatoes, halved or quartered depending on size
big handful cilantro
1/2 cup feta cheese
1 lemon
salt and pepper to taste

Rinse and drain the quinoa.  Place the quinoa in a a pot with 1 1/2 cups cold water.  Bring to a boil, put a lid on the pot, reduce heat and simmer for 15 to 20  minutes, until water is absorbed (just like cooking rice).


Once the quinoa is done cooking, fluff it with a fork and let it cool.


While the quinoa is cooking, cut up the veggies into smallish bite size pieces, place in a bowl and set aside.


Rinse, dry and chop the cilantro.


Mix together the veggies, the cooled quinoa, the feta, and the cilantro.


Squeeze on the lemon juice, salt, and pepper....mix it again!


Enjoy!!


The real beauty of this salad is that you can used what ever veggies you have on hand...My favourite version of this salad includes the above veggies, but fresh from the garden or farmers' market!

Until next time, stay warm and eat well!!

Saturday, October 23, 2010

Slowin' it down with the slow cooker

Slow cooker pulled pork
Click here for a printable version


 First we need to make the dry rub.  This dry rub is very versatile as you can change up the mixture of seasonings to suit your taste.  This rub is adapted slightly from Alton Brown's version which can be found in his book "Good Eats the early Years".  He changed it somewhat from the show he originally aired.  As a ratio, the rub is basically 6:1:1:1. (All in tbsp)
  • 6 tbsp light brown sugar, firmly packed
  • 1 tbsp kosher salt
  • 1 tbsp chilli powder (sometimes I use paprika instead)
  • 1 tbsp of any mixture of spices (this is where you can really alter the mixture to suit your taste):
    • for example: 
    • ½ tsp cayenne
    • ½ tsp old bay
    • ½ tsp garlic powder
    • ½ tsp onion powder
    • ½ tsp ground black pepper
    • ½ tsp dried thyme      
    • (as long as you combine 3 tsp of spices, you will get the last 1 in your ratio)
Mix until everything is well blended and rub all over:
  • 1 pork shoulder roast.  (I will buy whichever pork shoulder or blade roast is on sale, sometimes the one with the bone in and the nice layer of fat still wrapped around and sometimes the boneless one.)
Place in the slow cooker

Turn cooker on to low for 6-8 hours or on high for 4 -6 hours.  Times vary greatly and depend on the size of the roast and the size of the slow cooker. (Make sure slow cooker is also plugged in!!!)
 
  • Shred the pork.  You will know the pork is ready because it will fall apart completely when you try to take it out of the slow cooker. 
  • Sort through the pork with some tongs or forks, shred it and take out any fat or gristle, or bone left behind.   
  • There will be some yummy juices in the slow cooker. Strain out any sediments a nd return the juice to the slow cooker.  (I like to use a large pot as the handles on the side make it easy to pour the liquid back into the slow cooker.)
  • Add the pork back to the slow cooker so it can bath in the yummy, liquidy goodness. 
 
  • I like to shred the pork in the pot I just had the juices in because then I am re using a pot.  Remember to add the pulled pork back to the pot to soak up those juices! 
  • Mix pork with a bar b q sauce of your choice.
  • Serve on a bun.  (tonight I used the honey seed buns from an earlier post)
Pulled pork goes well with coleslaw.  In fact the boys like to put coleslaw on the sandwiches with the pulled pork!

As a bonus, here is the coleslaw recipe:

In a large bowl put:
  • 2/3 cup mayo (use your favourite)
  • 1 tbsp sugar (or honey)
  • 2 tbsp vinegar (I used white rice vinegar as it was the first bottle I found in the cupboard)
  • salt and pepper to taste
Mix the dressing and taste.  Adjust seasonings as needed then add to the bowl:
  • a 1 pound bag of  your favourite ready to use coleslaw mix
Mix well and put in the fridge until ready to use.