Showing posts with label winter. Show all posts

Tuesday, August 28, 2012

Preparing For The Zombie Apocalypse (I Mean Winter) Part II

Lovely tomato jam....soooo tasty

Once upon a time people canned and jarred their garden bounty because it was needed to get them through the winter. It was a necessity of life before markets and grocery stores were able to provide year round produce. Now a days canning seems to be a novelty or a hobby people try out to test their abilities. I do know some people who can so they remain as close to their locavore ways as possible. The truth is canning takes some planning but doesn't have to take all day- unless you are actually going to process mass quantities that is. Many of the recipes I've tried out only made 2 or 3 jars of garden goodness at a time so it didn't take that long at all.

I used to think tasks such as pickling were too much work to bother with but now I think the real issue was I just didn't know how to do it, or have the right equipment. Sure you need jars with the right size sealer lids. Some tongs or even a handy dandy jar lifter helps. Many people use the sanitize setting on their dishwashers to sterilize the jars but I don't have that machine in the Little Kitchen so I bought this ginormous canning pot from Canadian Tire many  moons ago to boil the jars in. It even had a lifter jar lifter inside but I'm not too sure where that went. I have lined the bottom of the pot with a towel to keep things from jumping around too much.
This tomato will make delectable tomato jam
 There's a few basic rules (for safety) to follow when canning and pickling:
(If you are ever unsure, please make sure to do some research and find information and directions you are comfortable following. This is not a definitive list but just the steps I follow. Always follow the recipe's instructions.)

1) A clean, uncluttered kitchen:  Depending on how much you plan on canning, you will need space for the jars to rest until  you move them to storage.  Workspace for prep food and a spot to keep things while you work is always handy.

2a) Inspect your jars. There should be no nicks or cracks in them, especially around the lip where the sealer lid needs to seal.

2b) Wash & sterilize:  Your jars and lids must be washed in hot soapy water, rinsed, and sterilized to keep food borne illness at bay. I usually wash my jars before I do anything else and then pop them in the giant canning pot full of water and turn the heat on. (It will take a while for such a large pot to boil so this helps organize my tiny workspace.) Jars boiled for 10 minutes are sterilized.  It is important to sterilize your funnels, tongs, and jar lifter as well so toss those in too.  Some people also put jars in the oven at 225F for 10 minutes. Most recipes will tell you to keep the jars warm until ready to use (read the instructions). The oven is good for keeping jars warm without the water but keep in mind, some recipes do call for a water processing step after you put the lids on your jars.


2c) Sealer lids can be boiled separately just before using so you don't risk boiling away the sealing compound from the lids.

3) Read the instructions on your recipe a bunch of times to make sure you know what to do. I also keep the recipe at the ready to double and triple check that I am doing things right.

4) Prep your food as per instructions and proceed from there as per your recipe instructions.


5) Enjoy the popping sound of sealer lids being sealed! When it comes to the sealer lids and rings, many recipes tell you to just finger tighten until the sealer lid gets sucked in and seals out all the air, then tighten. Follow the recipe's instructions on this one. I like to store the jars with the screw rings loose so that if food spoilage happens, the sealer lid will literally pop its lid.

So far this summer I have tinkered with pickled beets, pickled zucchini, spicy pickled green beans, and tomato jam! I have failed to take photos of all these as this was my first time for all of these things and wanted to enjoy the process. I must confess that I loved the tomato sauce so much I went out to buy more local tomatoes because I didn't have enough in the garden....

Until next time, stay warm and eat well.

Thursday, February 24, 2011

Maple Syrup Taffy and Other Yumminess

Tonight the temperature dropped to -35C (with the windchill) so we decided to go back to the Festival du Voyageur....what were we thinking???  To be quite honest, we were thinking about food.  The line to the food tents were so darn long on Monday, we decided to give it a try tonight.  Luck was on our side.  We go to Voyageur park about 10 minutes before they opened, got a nice close parking spot, in the actual parking lot, and were some of the first people in the park!! 

Hubby and I opted for some Tourtiere, which came with beans and a bun.  We decided on no gravy on the tourtiere but in the end we probably should had gravy.  The tourtiere was a bit dry, but still tasty.  The beans were nice and hot with a bit of a sweet maple note to them.


The Boy had the Voyageur breakfast.  This was a big piece of ham with fried egg on a bun, served with maple syrup and some crepes.  He made his sandwich with the egg and the ham and proceeded to dip it in the maple syrup...he adored the sandwich and proclaimed the crepes to be some of the best he has ever eaten.


After dinner, we HAD to have some maple syrup taffy!!  This is one of my favourites!  Boil up some of the tastiest tree sap on Earth, pour it onto some clean snow, put a stick on one end and press it in.  Wait a few seconds and start rolling up your taffy....soooooooo goooood....this is why the line ups are so long!

 Hot maple syrup!!
The waiting is the hardest part!!
Roll it up!
Ready to eat!!

Maple syrup taffy is a sticky sweet and a little bit chewy.  So incredibly good!!

Dinner was in a tent so it was warmer than the outdoors and there was a live band on the stage to keep us entertained.  Honestly, the band wasn't all that good....the boys enjoyed when they switched to the speed metal type of music....French speed metal...it was interesting to say the least.

We also had a chance to visit some of the other things we missed on Monday due to long lines. 


Such as the black smith's cabin


And the tee pee to learn some things about the aboriginal ways of life!

We did have fun tonight, despite the cold....I still haven't had any poutine yet during the Festival but I will be back on Sunday.....Yes....Sunday, the poutine will be mine!

Until next time, stay warm and eat well!!

Wednesday, February 23, 2011

Festival Du Voyageur - Winter Festival Fun

What do the fine people of the prairies do when winter seems to last forever?  We have a festival of course! Festival du Voyageur is is full swing!!  This 10 day long festival happens every February and highlights the Metis and French way of life during the days of fur trapping, the Northwest Company.  The French quarter, St. Boniface lights up with life during Festival.  You know Festival is gearing up when you see the giant blocks of snow being prepared for the snow sculptures.  Snow sculptures go up in key areas around the city to remind us Festival is close.  It is always interesting to see what the sculptors will come up with.


The nerd in me completely loves going on a tour of Fort Gibraltar.  The Fort is a replica of a fur trading post circa 1810 with all of the buildings inside manned by people in period costumes and working.  The black smith is plying his trade, the store has products on display, there are people 'relaxing' in the workers quarters.  All you have to do is ask questions and the 'players' are more that eager to explain things to you.


The man on the right is 'in charge' of the Fort and the man on his right is his body guard.


I know what you are thinking, an outdoor festival in winter?  Crazy!  You really do have to dress for the weather.  Long undies are essential, as is proper layering of clothes.  There are plenty of opportunities to warm up along the way.  There are fire pits set up all over the place to stop, listen to some tales and warm your tootsies.  Tents are also warm places stop and warm up.
The snow bar is always popular....no need to chill your beer!


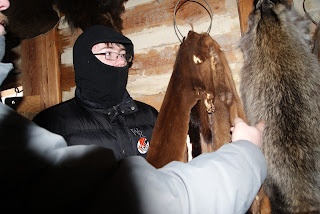
The Boy and Hubby check out some furs inside the general store


A mill stone to make flour


This is a brick of tea!!  They would grate it on the metal micro plane type of thing and then steep their tea!

The tents house entertainment such as live bands, the souvenir tent, the food tent (woo hoo), and of course the beer tent.  Along with all the fun at Voyageur park, there are several venues around town  that house live bands and other fun events such as fiddling contests and the voyageur games.  These venues are called trading posts and do add to the fun.
The port-a-pottie for the very brave!

It has been a few years since we braved the Festival.  It is so difficult to get everything in that you really do have to plan ahead and pick and choose what you would like to do.  We went on Monday, which happened to be Louis Riel day, which is a long weekend Monday so it was ridiculously busy and we didn't even get near a couple of things we wanted, such as the 'Sugar Shack', which is the food tent....Luckily, we bought the Festival pass so we can go back anytime and check things out.  It really is best to go a couple of times during the week.

Our local paper has some survival guide tips here.

You can check out the official Festival du Voyageur website here.

I am almost too busy to cook during Festival!  I will try to keep up though!  We are going back to see some of the things we missed on Monday.

Until next time, stay warm and eat well!!

 I couldn't resist adding some more photos....

Here I am waving to the boys who are walking on the Fort wall. I end up wandering to the fire pit to warm up a bit!


The walk back to the car seemed so long!!

Monday, January 31, 2011

Buns, Borscht, Beer, and Friendly Neighbourhood Snow Clearing

Everyone deserves friends and neighbours like ours!! Our friends look out for us (and vice versa).  These particular friends have all the tools you could ever need to borrow (and they know how to use them).  They also fix the lawn mower when it is broken, look after the house and the cats when we are out of town, and help us out with their snow blower after a big snowfall!  Wow!  I just made it sound like they do everything for us.  We do our best to return the favours and look after their house and their adorable dogs.  We also buy the occasional case of beer for them, but I also like to bake for them every now and then...I do like to bake occasionally you know.  I know at least one of them likes the honey seeded buns I make so I can make those, but these lovely Oatmeal Ale Roles I found over on the Flour Dusted site just might do the trick!  They do have beer in them after all! (If you haven't been over to the Flour Dusted site, you really are missing out!

I decided to also make some borscht today, since it was so cold and soup always helps to warm people up.  I like to use the recipe from Gordon Ramsay's Healthy Appetite book.
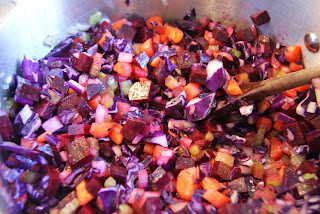
Love the colour of those beets!

Borscht
From Gordon Ramsay's Healthy Appetite
Printable recipe
  • 2 Tbsp Olive oil
  • 1 onion, peeled and minced
  • 2 celery stalks, trimmed and minced
  • 1 large carrot, diced
  • 1 thyme sprig, leaves stripped
  • Salt and pepper
  • 1 lb raw beet, peeled and chopped
  • ½ red cabbage, about 8 oz minced
  • 3 ½ cups vegetable stock or water
  • 1 tbsp red wine vinegar
  • 1 tsp sugar
  • Handful of dill, chopped
  • 4 tbsp sour cream or plain yogurt, for serving
Heat a large pot and add the 2 tbsp olive oil.

Saute the onion, carrot, and celery, thyme, and some salt and pepper for 8 to 10 minutes, stirring occasionally

Add the beets and the cabbage along with about 1 cup water.  Let the veggies cook, stirring occasionally for about 10 minutes.


Add the veggie stock (or water) to the pot.  Cover the pot with a lid and let it cook for 15 to 20 minutes until the veggies are tender.
When the veggies are tender, transfer the soup in batches to the blender and blend.  I like to leave my borscht a little chunky so I don't blend it too much.  You can also use a stick/immersion blender as well.
If the soup is too thick, add some water of stock to thin it out.  Server warm with a dollop of yogurt or sour cream and some chopped dill on top.
So sad, I didn't have any dill....but it still tasted wonderful!

Remember to send some soup and buns over to the nice neighbours who used their snow blower to clear the snow from you walk and drive way!!

The adorable dogs, from left: Kobe, Bella, and Cinqo...they are so cute!

So the plows finally came and did a thorough job and scrapped the built up snow off the roads.  Then it got piled up on the sides of the roads...fun...this means we have to shovel a path through these piles to make the side walks accessible!  Just to show how much snow is piled up, I took a few pictures.  Currently we are over the average amount of snowfall for the year and the winter isn't over yet..Oh well.  We will just have to wait and see how much more we will get.

This one on the corner is about 5 feet high!
This one is as tall as that SUV parked there!!!
The one is almost as high as the garage!
 Stay warm and eat well!


Borscht on FoodistaBorscht

A Week's Worth of Brekkies

A great way to get going on these cold winter mornings in is a hot bowl of oatmeal! I don't have time every morning to make a pot of good old fashioned oatmeal but I am not a fan of the prepackaged instant oatmeals, they just aren't the same. The oats have been so over rolled there isn't nearly as much fibre left in them as there should be and I can make my own flavours with natural ingredients.  If I want maple flavoured oatmeal, I will just add maple syrup!

My breakfast is happy to see me!
 I generally buy the generic brand of steel cut oats or multigrain oats and cook up a week's worth of oatmeal on Sunday afternoon or evening.  Follow the instructions on the box to cook up the oatmeal and divy the oatmeal out into single serve portions into bowls (with plastic wrap) or containers with lids if you have.  All you have to do in the morning is pop it into the microwave for a minute or two and you are ready for the day! (Or grab it to take to work, use the  microwave in the classroom/staffroom and let the kids watch you enjoy your oatmeal!)

Cook the oatmeal according to package instructions.


Here's where you can adjust the flavours to suit your mood:
  • Switch out the water for another liquid such as juice, coconut milk, soy milk, milk....even tea
 
While cooking add to the pot the flavours of your choice:
  • 1 chopped apple (keep the peel), handful of raisins, 1/2 tsp cinnamon
  • handful of chopped dates (sweetness), shredded coconut,
  • pumkin pie spices and smow pureed pumpkin
  • chopped pineapple, coconut, and some rum extract (Do you like pina colodas?)
  • a handful of chopped dried apricots, some chopped walnuts...
  • dried blueberries
The possiblities really are endless, just use your imagination.
Today I felt like apples, dates, and cinnamon!

Lately I have been adding some frozen strawberries and a gulp of maple syrup before popping it into the microwave for 2 minutes.

Being prepared for the week ahead helps keep morning mayhem to a minimum.  Get up, get ready, have breakfast, and go.
One for each day of the week!! This batch has apples, dates, and cinnamon in it but I will most likely add some maple syrup and strawberries in the morning!  This really does save so much time in the mornings.