Showing posts with label slow cooker. Show all posts

Friday, March 23, 2012

Da bomb of Irish Car Bomb Cupcakes

Okay, let's face it. I suck at getting posts out before an event or  'holiday' or even quickly after for that matter. Timing has never really been my thing...baking and cooking however is my thing.

St. Paddy's day was last Saturday and boy did I kept myself busy! I found a slow cooker recipe for corned beef and cabbage that I'd been waiting to try and I wanted to make a batch of cupcakes.  All this while trying to get everything ready for the Boy's trip to Kenya! Lucky for me the corned beef required the slow cooker so once that was underway I had plenty of time to make cupcakes.


Not just any cupcakes of course....Irish Car Bombs to be exact!  I used this recipe from Brown Eyed Baker which is a fabulous recipe, and not just because it uses 3 different types of alcohol: these things are darn tasty.  We have Guiness in the chocolate cupcake, whiskey in the chocolate ganache filling, and Bailey's in the icing....Irish car bomb.

For the corned beef and cabbage, I went with a recipe from Everyday Food that I had originally found in the March edition of the magazine. Of course you can find this recipe online here.  I am starting to wonder why I even bother with paying for a subscription anymore. (Don't tell Hubby that, I just like getting mail that isn't a bill!)
Baby potatoes, carrots, celery, onion
Beef brisket, fat side up, sprinkled with pickling spice
cabbage wedges for the last 45minutes

enjoy!

I used the slicer to slice up the rest for sandwiches for the week....and for the freezer!

 I even had to 'force' myself to drink the rest of the Guiness I had after baking cupcakes! (also test the whiskey and the Bailey's to make sure is was suitable for the cupcakes..."no dear, I can't drive. I've been baking....") 

Until next time, stay warm and eat well!

Tuesday, February 21, 2012

Growing Up Too Fast

Warning....this post is a little sappy because my baby is growing up quicker than I'd like....

Consider yourself warned!

Strange Exciting things are happening in the Little Kitchen!! The Boy has earned his learner's permit....he has even been behind the wheel of the car!! A few of his friends have their licenses already and let me tell you, I have a mini panic attack every damn time I hear "so and so said he'll pick me up" or "so and so drove us to the mall for lunch today" (I didn't even know he had money!).  As a mom, it does rattle the nerves. You worry about their safety, their where abouts, the choices they make with their new found independence, have I done my job properly......(see, just thinking about it put me on the verge of a nervous breakdown).

My own mom never let me drive when I was learning so I already knew that I didn't want to be like that.  I took him to get his permit and then took him to an empty parking lot to practice driving around....then I let him venture out on the street and drive us to the mall for dinner. He did such a fabulous job, you know, for his first time behind the wheel and all.

This all really makes me think back to all the little steps of 'letting go' as a parent.  Things like letting him walk to school on his own for the first time, riding his bike around the neighbourhood with his buddies (without me following them around), and sending him to the IGA to pick up a couple of ingredients for dinner on his own are all in the back of my mind these days.  Until he gets his actual license, he needs to have a trusted adult in the passenger seat but I will hold on tightly and do my best to let go when the time comes....if I have to....

Let's get to the food now, shall we?

Since we've been busy, I have been trying to cook up a a big batch of something tasty on the weekend and using it during the week.  This week I got an email from the Canadian Parent website with a slow cooker recipe for Beef Stroganoff that looked so simple and straight forward, I gave it a shot.  Here's the link to the site.  I won't post the recipe here but please go to the website and check it out. There are some pretty neat slow cooker ideas there.
Pile stewing beef, onions, mushrooms, and beef broth into the slow cooker
Reheat in a large skillet on the stove
Boil your pasta
Roast asparagus at 400 for 10 to 15 minutes (brush with olive oil and sprinkle with salt and pepper.

Guess what, everyone loved it. It smelled soooooo go while cooking but we actually didn't eat it until the next day but it heated up so nicely.  I heated the beef on the stove while boiling the pasta and roasting some asparagus! It really was a tasty meal!

Until next time, stay warm and eat well.  (also, drive safe!)

Monday, January 24, 2011

Roasted Garlic Beef Stew

The wind is blowing, the snow is falling blowing coming at me from every which way.  This is the perfect time for another crock pot creation!!  Generally I don't use a recipe when it comes to stews.  You know, toss a bunch of stuff in the crock pot and dinner cooks on its own!  But a friend sent me a recipe they had tried at their house and it looked good so I figured hey why not give it a go?  When I got home from work, dinner was cooked and ready to serve, save a small salad and some bread.  This recipe for Roasted Garlic Beef Stew is from Canadian Living Magazine.  Canadian Living magazine is a tried and true type of magazine when it comes to recipes.  I have a couple of their books on my book shelf. I don't subscribe to this one but I do pick it up every now and then in the store. (They just recently changed their format and I am not a huge fan of it, but their recipes still come out great!)


Roasted Garlic Beef Stew, adapted for the slow cooker
adapted from Canadian Living Magazine

That's right, 12 cloves!
First the ingredient list:
  • 12 cloves garlic
  • veggie or canola oil
  • 2 carrots, peeled and cut into 1" chunks (I used baby carrots)
  • 2 parsnips, peeled and cut into 1 " chunks
  • 2 Yukon gold potatoes, scrubbed and diced into 1" cubes
  • 1 onion, diced
  • 1 1/2 lbs stewing beef
  • 1 tsp kosher salt
  • 1 tsp fresh ground pepper
  • 1 tsp dried thyme
  • 1 tsp dried sage (all I could find was ground so I used less)
  • 1 1/2 cup beef stock
  • 1 cup red wine (or more beef stock)
  • 1/4 cup tomato paste
  • 1 cup frozen peas
  • 1/4 cup fresh chopped parsley
  • 1/2 cup (or so) chopped celery tops (I had some in the fridge so I added them)
    You can add almost anything to a stew so if you have something in the cupboard or fridge hanging around that you want to use, toss it in)

    Ok, that is quite the list, but once you break it down, it is a cinch to put together in the evening to slow cook all day while you work.

    First lets deal with all of that garlic! Put a pan on to heat up to medium while you start working with the garlic.  Add some canola oil to the pan so there is enough oil to cover the cloves of garlic. Let the oil heat up though before you add the garlic.

    Peel the garlic cloves (a slight smash with the side of the knife helps release the skins!) Add the garlic to the oil and let the cloves fry.  You want the garlic to not only infuse the oil but to get all nice and golden brown! YUMMY!  Give the pan a gentle shimmy shake every now and then to ensure the cloves get even golden coverage.


    Remove the golden yummy garlic from the pan and drain.  Also drain all but 1 or 2 tbsp of the oil from the pan.


    Season the meat with salt and pepper.  In small batches, brown the meat in the oil.  Do not crowd the pan on this one!  You want the meat to brown, not to steam.  Brown = yummy, yummy goodness in the crock pot!

    Don't crowd the pan!!
    As the meat browns, transfer them to the crock.  Once all of the meat is done, add the chopped onions to the pan.  Saute the onions until translucent and they have picked up the brown flavour filled goodness from the bottom of the pan.  Add the onions to the pan.


    Add the beef stock, tomato paste, (and wine if using) to the pan and further deglaze all of the yummy goodness from the bottom. Pour into the crock.


    Add the carrots, parsnips, potatoes, and celery to the crock.  Give everything a stir, slap on the lid and store the crock in the fridge until morning!

    Toss it all in the crock pot!
    In the wee hours of the morning, just when you are awake enough to venture into the kitchen to conjure up something for breakfast, take the crock out of the fridge, place it into the cooking apparatus and turn it on to low....and for heaven's sake, make sure it is plugged in as well!! (Don't laugh, I have come home to a cold, uncooked pork shoulder sitting in the crock....so sad.....)

    Remember to add the frozen peas when you get home, these won't take long at all.  Also toss in the chopped parsley!

    All in all this was a tasty stew.  Although I couldn't really taste the garlic as it had mellowed so much in the crock pot I found I was really missing not having a bay leaf or two in the stew for flavour.  Perhaps next time I will add the bay leaf and up the garlic content if I am going to use the crock pot.  

    Stay warm and eat well!

    Tuesday, January 18, 2011

    Cold Snap Slow Cooker Shredded Buffalo Chicken Sammies

    I pulled out the crock pot again!  This time it was the smaller one.  Yes, you read correctly, I have 2 crock pots, or slow cookers if you will. Why? Why not?  One is a ginormous 8 quart size, perfect for large batches of chili, stews, and for pot lucks or any situation where you are making a large amount of food.  The other is a slightly smaller 5 quart (I think) which is good for (obviously) smaller amounts of food and testing new recipes before I double them to keep the Boy fed!


    One of the ways I while away the long cold winters, besides cooking, baking and blogging of course involves my two magazine subscriptions or guilty pleasures if you will.  Food Network Magazine, and Everyday Food.  I get so darn excited when these come in the mail.  I get new ideas from them and it helps refresh old recipes with new twists.  I also just like reading them! My chicken wings from the other night were from this same edition of Everyday food as this recipe comes from.


    The first thing I did before assembling everything in the crock was to make some homemade vegetarian worcestershire sauce.  I don't use the real stuff as we have a fish allergy in the Little Kitchen.  I must send props out to Liz from Blog is the new black for clueing me into the fact that I could make my own vegetarian worcestershire sauce!  Thank you!  She has a recipe for this on her site to make a small amount but I found almost the same recipe, but larger amounts from Martha Stewart.  This will keep in the fridge for 3 months and since I am excited about giving this a try, I made a bigger batch.

    Home made Worcestershire Sauce!
    From Martha Stewart
    In a pot over medium heat combine all of the ingredients listed:
    • 2 cups apple-cider vinegar
    • 1/2 cup soy sauce
    • 1/4 cup light-brown sugar
    • 1 teaspoon ground ginger
    • 1 teaspoon ground yellow mustard seed or dry mustard
    • 1 teaspoon onion powder
    • 1 clove garlic, crushed
    • 1/2 teaspoon ground cinnamon
    • 1/2 teaspoon freshly ground black pepper
    Bring to a boil, then reduce the heat to a simmer.  Simmer stirring occasionally for about 20 minutes or until reduced to about 1 cup of liquid.  
    Let cool and store in the fridge for up to 3 months.

    Now on to the Sammies!!
    Shredded Buffalo Chicken Sammies
    Adapted from Martha Stewart
    Everyday Food, Jan/Feb 2011

    In the crock of your slowcooker combine:
    • 1 14oz can crushed tomatoes (all I had was a 28 oz can but I used the rest of it for pizza sauce!)
    • 1/3 cup hot sauce (Used Frank's Red Hot.  The recipe calls for 1/4 cup bet we like it spicy)
    • 3 tbsp worcestershire sauce (the homemade vegetarian stuff)
    • 2 tbsp yellow mustard
    • 1 tbsp molasses
    • 3 garlic cloves, minced (I grate mine on the microplane)
    • 1 medium onion, diced small
    • 1 medium red bell pepper, diced small

      Mix all of this together and toss in:
      • 2 lbs boneless, skinless chicken thighs. (original calls for half of this to be chicken breasts to 'lighten' it  up but we found a 1 kg package of the chicken thighs and decided to use that...it was cheaper that way

        If you are preparing this the night before, slap the lid on it and place it in the fridge until morning.

        In the morning, put the crock into the cooking part and turn to low for 6 - 8 hours.

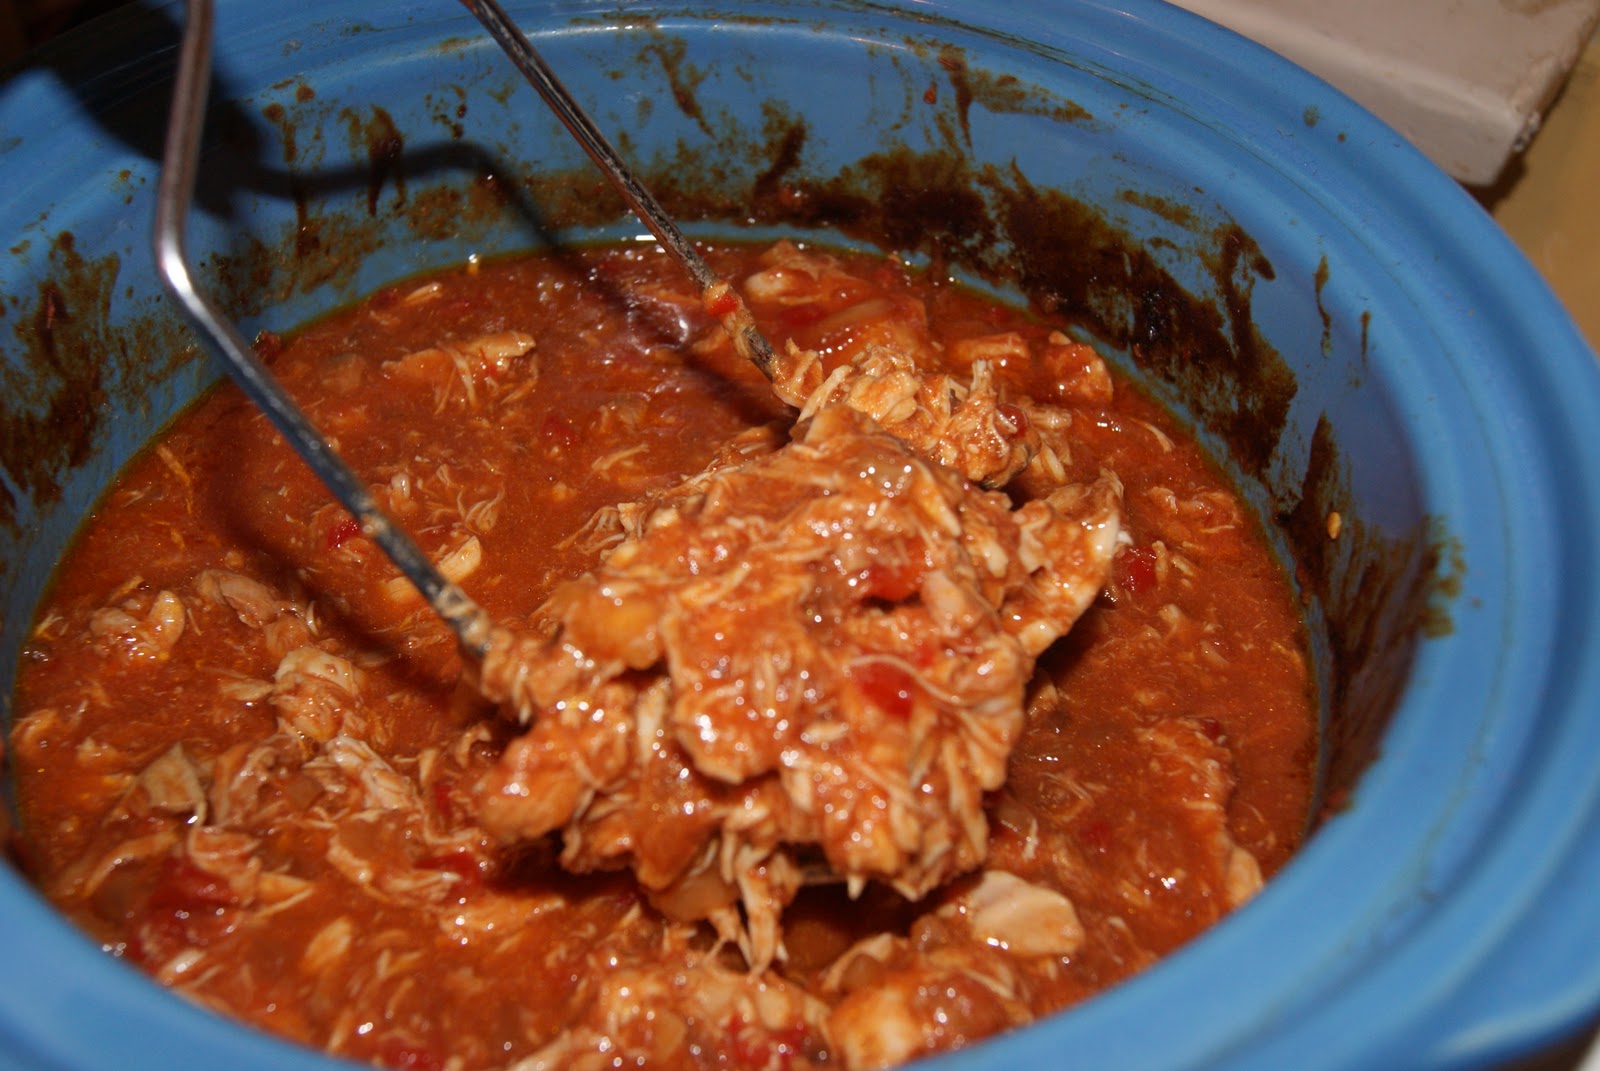
        When cooked, the chicken will fall apart and shred easily with 2 forks or try a potato masher to break it up!


        Serve on rolls (I used Pretzel rolls) and serve with a salad (coleslaw works) but so does any type of veggie!

        This was quite tasty and the boys both enjoyed it.  We only had 2  issues with the chicken.  The first was that there was a LOT of liquid in the pot and I had to strain it so it wasn't too sloppy.  The 2nd was that it really wasn't spicy.  Not a true buffalo chicken.  We do like things on the spicy side in the Little Kitchen and this just didn't cut it.  Perhaps jalapenos, cayenne, hot pepper flakes (I even have some dried habaneros).....hmmm....I am already thinking about next time. I will make this again but with less crushed tomatoes and more hot sauce.  I know the veggies added more liquid as well so I could cut the onion and red pepper in half....ideas....this one has me thinking!!

        Keep warm and eat well!

        Sunday, January 16, 2011

        Chili, Cheese, and Curling

        As of late there have been so many blogs about football playoffs and the food people serve while watching the games. While we do get to watch football games North of the border, and many people are oh so interested in the games, and yes, the Superbowl is a highly watched event up here as well, I have to unabashedly admit to being a curling fan.
        Curling may not be as exciting to watch as football, if you do know the ins and outs of the game, it is a very interesting game to watch, trust me. Last night while the Boy was getting ready for bed he actually tried to slowly make his way back into the living room to see how the game was going. Yes, we do watch curling on TV. No, I am not embarrassed to admit that. Really....Honestly.
        The basics of curling:
        • The goal of curling is to deliver a rock down a sheet into the house. The rocks closest to the button get the points....WTF does this mean??
        • It is played on a long strip of ice 146 ft long called a sheet.
        • Each end of the sheet has a play area called the 'house'.
        • The house consists of concentric rings, each named for their diameter.
        • There is the four foot, the eight foot, and the twelve foot ring.
        • The very centre of the house is called the button.
        • Two teams, called 'rinks', each made of 4 players play
        • Each player throws, or delivers by sliding, a 'rock' to the other end of the sheet of ice.
        • Players each throw two rocks for a total of eight rocks per team
        • A rock is a smoothly polished piece of granite weighing in between 38 to 44 lbs a piece with a handle fixed to the top.
        • A curler can control the rock by adjusting the speed, or weight, of the rock as well as by the direction and amount of spin placed on the rock
        • A rock 'curls' as it travels down the ice. That is it has movement from left to right or from right to left.
        • A rock in motion can also be helped by sweeping the ice directly in front of it as it travels.
        • Sweeping reduces the friction between the rock and the ice helping the rock to keep moving straight. Sometimes it seems as though the sweepers are dragging the rock behind them.
        • Sweeping also helps keep the rock from curling too much. (moving left or right)
        • Sweeping is hard work.
        • The rocks closest to the button score points. If there is a rock of another colour placing second closest it does not score, only the first rock scores. On the other hand, if there are 3 rocks of the same colour closest, that team scores 3 points.
          In all honesty, there really is more to curling than meets the eye, and no it isn't just because every curling club has a bar attached to the ice barn....well okay, perhaps that helps with the popularity of the sport. There is an old saying North of the border: "My drinking team has a curling problem" All joking (and drinking) aside, our fair city has many a curling club. It is a game of camaraderie and is a very social outing for those who play. Let me also assure those of you that think you don't get exercise from playing that this can be a strenuous game. If you have ever had trouble with ALL of your muscles the day after an intense workout, then you know people feel after the first game of the season. (Especially the drinking teams!) Between sweeping and the stretching of your body when you deliver a rock...your body can take a beating!
          Read more about the sport by clicking here. It can be confusing. The easiest way to get past the confusion is to get out there and play! Click here to see another neat site about curling. Of course I must add the link to for the Canadian Curling Association Currently the Continental Cup is playing. This is a tournament that pits North America vs the World in curling and is currently being played is St. Albert, Alberta. Today is an absolutely frigid day, perfect for curling making chili and watching curling on TV! The crock pot is a great tool for this dish! Once again, I do not have a standard chili recipe. It is a bit different every time I make it. Continental Cup Curling Chili Ingredients - chili is one of those wonderful things that can use so many different combinations of veggies. Only have half of a pepper? use it! Mushrooms need to be used? Throw 'em in! Want to use tofu instead? Grate up some firm tofu and use it!
          • Ground beef (or turkey, chicken, bison.....any ground meat....but stewing meat also works wonders)
          • large onion, diced
          • green pepper, diced
          • red pepper, diced
          • yellow pepper, diced
          • celery, with leafy green parts, diced
          • jalapeno, diced (remove veins and seeds to reduce heat, if desired)
          • chili powder or spice mix of your choice
          • frozen corn
          • 28 oz can crushed tomatoes
          • 28 oz can diced tomatoes (use low salt if you can find it)
          • can of beans in tomato sauce
          • can of kidney beans, drained and rinsed (today I used white kidney beans but I was looking for the soy beans.)
          • can of black beans, drained and rinsed
          • a healthy pinch of dried chilies
          • Anything else in your fridge you can think of.... I have added diced potatoes before.
          • This is a great opportunity to empty your fridge of all those items left over from other recipes!
          Brown the ground beef breaking it up into small pieces as it cooks.
          Transfer the cooked meat to the slow cooker Give the veggies a quick saute in some melted coconut oil (or olive oil), then transfer to crock pot
          Open the cans of beans and tomatoes and add them to the crock pot
          Add chili powder to suit your tastes Stir it up, put on the lid and turn it on to high.
          The wonderful thing here is if you are not cooking it now, but you are making this the evening before so you can plug and go in the morning then simply put the crock in fridge until morning. Just remember to turn the crock pot on AND plug it in in the morning! Let the crock pot work its magic for a good 6 hours or so. Taste and adjust seasonings before serving. Serve with garnishes such as sour cream, grated cheese, and chopped green onions.

          Fresh pretzel rolls go well with chili.
          Corn chips go well with chill too!
          So do hot dogs.


          The Boy's chili cheese dogs

          Now it is time to kick back with a spicy bowl of chili and watch some curling! (Or any sport really)  It is just too darned cold outside for anything else!

          Tuesday, December 14, 2010

          Warm up with Slow Cooker Pot Roast and Broccoli Cheddar Soup


          For tonight's dinner I had some inspiration from a few different sources.  First of all, it is freakin' cold here right now.  Sure, -24 isn't really all that cold but when you factor in something the Canadians like to call 'windchill', it actually feels like -35.  WHAT?  REALLY?  That sounds awful you say?  It can be really awful because in weather like this your exposed skin can freeze in as little as 10 minutes, but we adjust, we know it is going to happen so we dress for the weather, bundle up then meet the ladies for swimming....yes, I said swimming.  We all bundle up and put our toques on after..it's all good!  Second, while talking with my friend on the phone yesterday (and promising each other we would meet at the pool later) she talked about putting a roast in the slow cooker.....YES!!  Great idea!
          Tuesdays are busy so the slow cooker would be perfect.  This one is really almost too easy to talk about.  After aquafit with my ladies, I stopped at the store and picked up a blade roast which is a cheaper cut of meat but perfect for slow cooking all day, low and slow!
          Third, I also happened to have the television tuned into Food Network Monday after work...which is pretty much the only channel that the telly is tuned to when I am home.  5 Ingredient fix was on and she was making a broccoli soup!  After walking to and from work in -35 celsius weather on Monday....soup was sounding awesome.  I really wanted a broccoli cheddar soup though.  You know me well enough by now to know that if I can't add bacon, I will add cheese!  (I am sure I can come up with a recipe to incorporated bacon into a broccoli cheddar soup....hmmmm idea for future post!!)
          So here is my cold weather slow cooker pot roast & broccoli cheddar soup!!

          Easiest ever Slow Cooker Pot Roast
          •  1 blade roast
          • 2 small or 1 medium onion
          • 1 envelope onion soup mix
          •  3/4 cup water
          • salt and pepper
          Slice onions and toss in to the bottom of the slow cooker.

          Sprinkle salt and pepper all over the roast and place roast on the top of the onions.

          Sprinkle the evelope of onion soup mix all over the roast.

          Add the 3/4 cup of water to the bottom of the slow cooker.

          Turn the slow cooker on to low and go to work!  (make sure the slow cooker is plugged in first!!)

          When you get home numerous hours (7-8) later, remove the fully cooked roast to a plate and cover with foil.  Turn the slow cooker to high and replace the lid.

          Mix a slurry of flour (or the thickener of your choice) with some water.  Pour into the liquid left in the pot and stir vigorously.  Replace the lid to let the gravy thicken.
          Slice up the roast and serve!

          Broccoli Cheddar Soup
          Printable version

          • 4 shallots, roughly chopped 
          • 2 stalks broccoli, washed and roughly chopped into smallish pieces (didn’t measure but there were 2 good size trees) 
          • 2 tbsp Olive oil 
          • 1 litre veggie stock (or chicken) 
          • 1 ½ cups shredded old cheddar 
          • 4 tbsp flour (mixed with some stock or water to thicken the soup)
           Heat the pot to medium and add the olive oil to the pan.

          Over medium heat, sauté the shallots until translucent.  Add a pinch of salt and a grinding of pepper.

          Toss the broccoli pieces into the pot and cook for a couple of minutes.

          Pour in the veggie stock and cook until the broccoli is tender.

          Using a stick or immersion blender, blend the soup right in the pot.  I like leaving it a bit chunky but if you prefer a more smooth soup then use the blender and blend the soup in batches returning to the pot when done.

          In a separate bowl, mix the flour and a little bit of stock or water together until smooth.  Add to the hot soup and stir.  This will help to thicken the soup.

          Add the cheese to the soup and stir until melted.  Serve with extra cheese or a dallop of sour cream...or what ever floats your boat!


          Saturday, October 23, 2010

          Slowin' it down with the slow cooker

          Slow cooker pulled pork
          Click here for a printable version


           First we need to make the dry rub.  This dry rub is very versatile as you can change up the mixture of seasonings to suit your taste.  This rub is adapted slightly from Alton Brown's version which can be found in his book "Good Eats the early Years".  He changed it somewhat from the show he originally aired.  As a ratio, the rub is basically 6:1:1:1. (All in tbsp)
          • 6 tbsp light brown sugar, firmly packed
          • 1 tbsp kosher salt
          • 1 tbsp chilli powder (sometimes I use paprika instead)
          • 1 tbsp of any mixture of spices (this is where you can really alter the mixture to suit your taste):
            • for example: 
            • ½ tsp cayenne
            • ½ tsp old bay
            • ½ tsp garlic powder
            • ½ tsp onion powder
            • ½ tsp ground black pepper
            • ½ tsp dried thyme      
            • (as long as you combine 3 tsp of spices, you will get the last 1 in your ratio)
          Mix until everything is well blended and rub all over:
          • 1 pork shoulder roast.  (I will buy whichever pork shoulder or blade roast is on sale, sometimes the one with the bone in and the nice layer of fat still wrapped around and sometimes the boneless one.)
          Place in the slow cooker

          Turn cooker on to low for 6-8 hours or on high for 4 -6 hours.  Times vary greatly and depend on the size of the roast and the size of the slow cooker. (Make sure slow cooker is also plugged in!!!)
           
          • Shred the pork.  You will know the pork is ready because it will fall apart completely when you try to take it out of the slow cooker. 
          • Sort through the pork with some tongs or forks, shred it and take out any fat or gristle, or bone left behind.   
          • There will be some yummy juices in the slow cooker. Strain out any sediments a nd return the juice to the slow cooker.  (I like to use a large pot as the handles on the side make it easy to pour the liquid back into the slow cooker.)
          • Add the pork back to the slow cooker so it can bath in the yummy, liquidy goodness. 
           
          • I like to shred the pork in the pot I just had the juices in because then I am re using a pot.  Remember to add the pulled pork back to the pot to soak up those juices! 
          • Mix pork with a bar b q sauce of your choice.
          • Serve on a bun.  (tonight I used the honey seed buns from an earlier post)
          Pulled pork goes well with coleslaw.  In fact the boys like to put coleslaw on the sandwiches with the pulled pork!

          As a bonus, here is the coleslaw recipe:

          In a large bowl put:
          • 2/3 cup mayo (use your favourite)
          • 1 tbsp sugar (or honey)
          • 2 tbsp vinegar (I used white rice vinegar as it was the first bottle I found in the cupboard)
          • salt and pepper to taste
          Mix the dressing and taste.  Adjust seasonings as needed then add to the bowl:
          • a 1 pound bag of  your favourite ready to use coleslaw mix
          Mix well and put in the fridge until ready to use.