Showing posts with label summer. Show all posts

Wednesday, September 12, 2012

Garden Bounty: Holding onto Summer

After being teased with 2 months off during the summer, I am back into the swing of things (I know feel sorry for me now)...things being getting up at an unGodly hour, making lunches, and enforcing homework.....SIGH....summer can't last forever. As the last days of my summer break drew closer, I continued prepping for the zombie apocalypse winter. The Boy and I even made perogies for the freezer!

I started working on this post a while back but just haven't found the time.

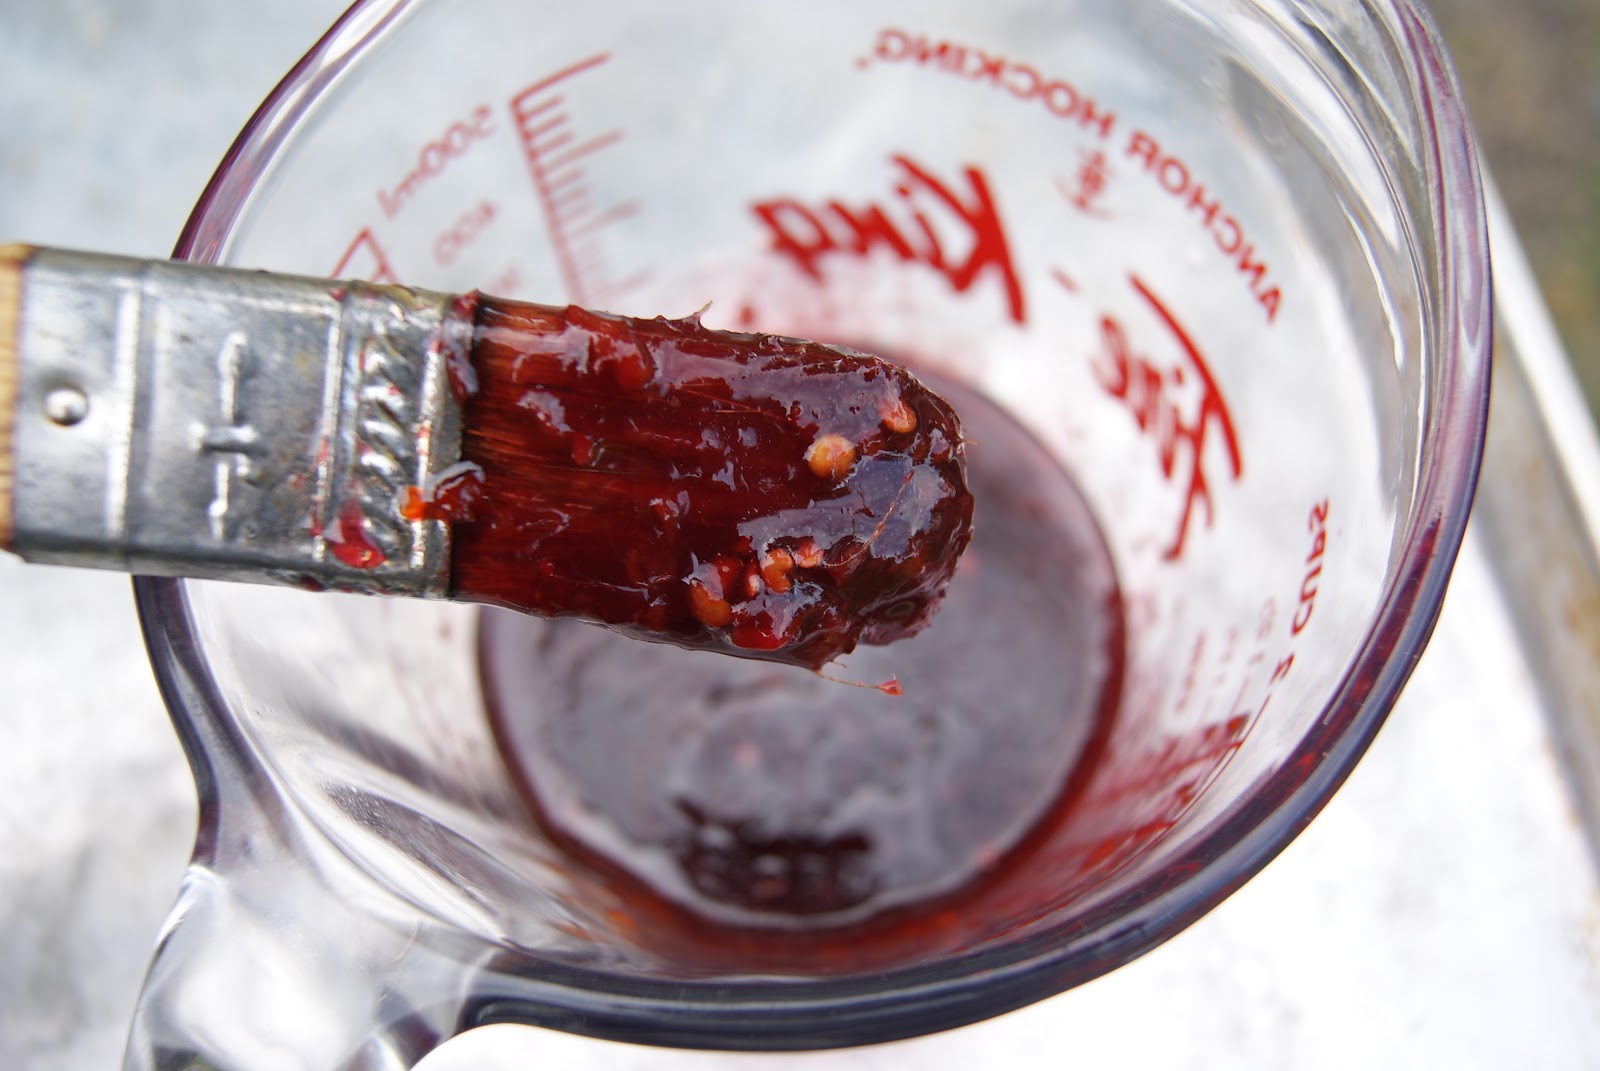
The other day I made tomato sauce with the intent to jar it up and save it for later use. I wound up boiling the sauce down too much and it became quite thick. At first I thought what the hell? Then I tasted it and thought...Oh my!! I had inadvertently made tomato jam instead!! How divine!! I had actually been scouring resources looking for a tomato jam recipe but so many of them had so much sugar in them, which I didn't want. The
sauce recipe I followed was one I found on Pinterest from America's Test kitchen. It is simple, without too many ingredients and cooks down nicely. I have even made this twice, the second time cooking it down further on purpose and it turned out just as tasty!

Beautiful luscious jars of tomato jam!!


The original recipe calls to peel the tomatoes but I didn't do that. I washed the tomatoes, cored them and put them through the food processor. Other than that, I followed the recipe. (oh except for the fact that I didn't process that many tomatoes, I cut the recipe into fourths and did 1/4 of the amount...I just don't have the space for 4 pots of sauce and the water canner on my stove!)

Some of the tomatoes are from my garden and some I bought from the Farmers' market. Many of the farmers had bins labeled 'canning tomatoes'. These are just over ripe and extra juicy tomatoes and are cheaper than the others. Only $1/pound!!

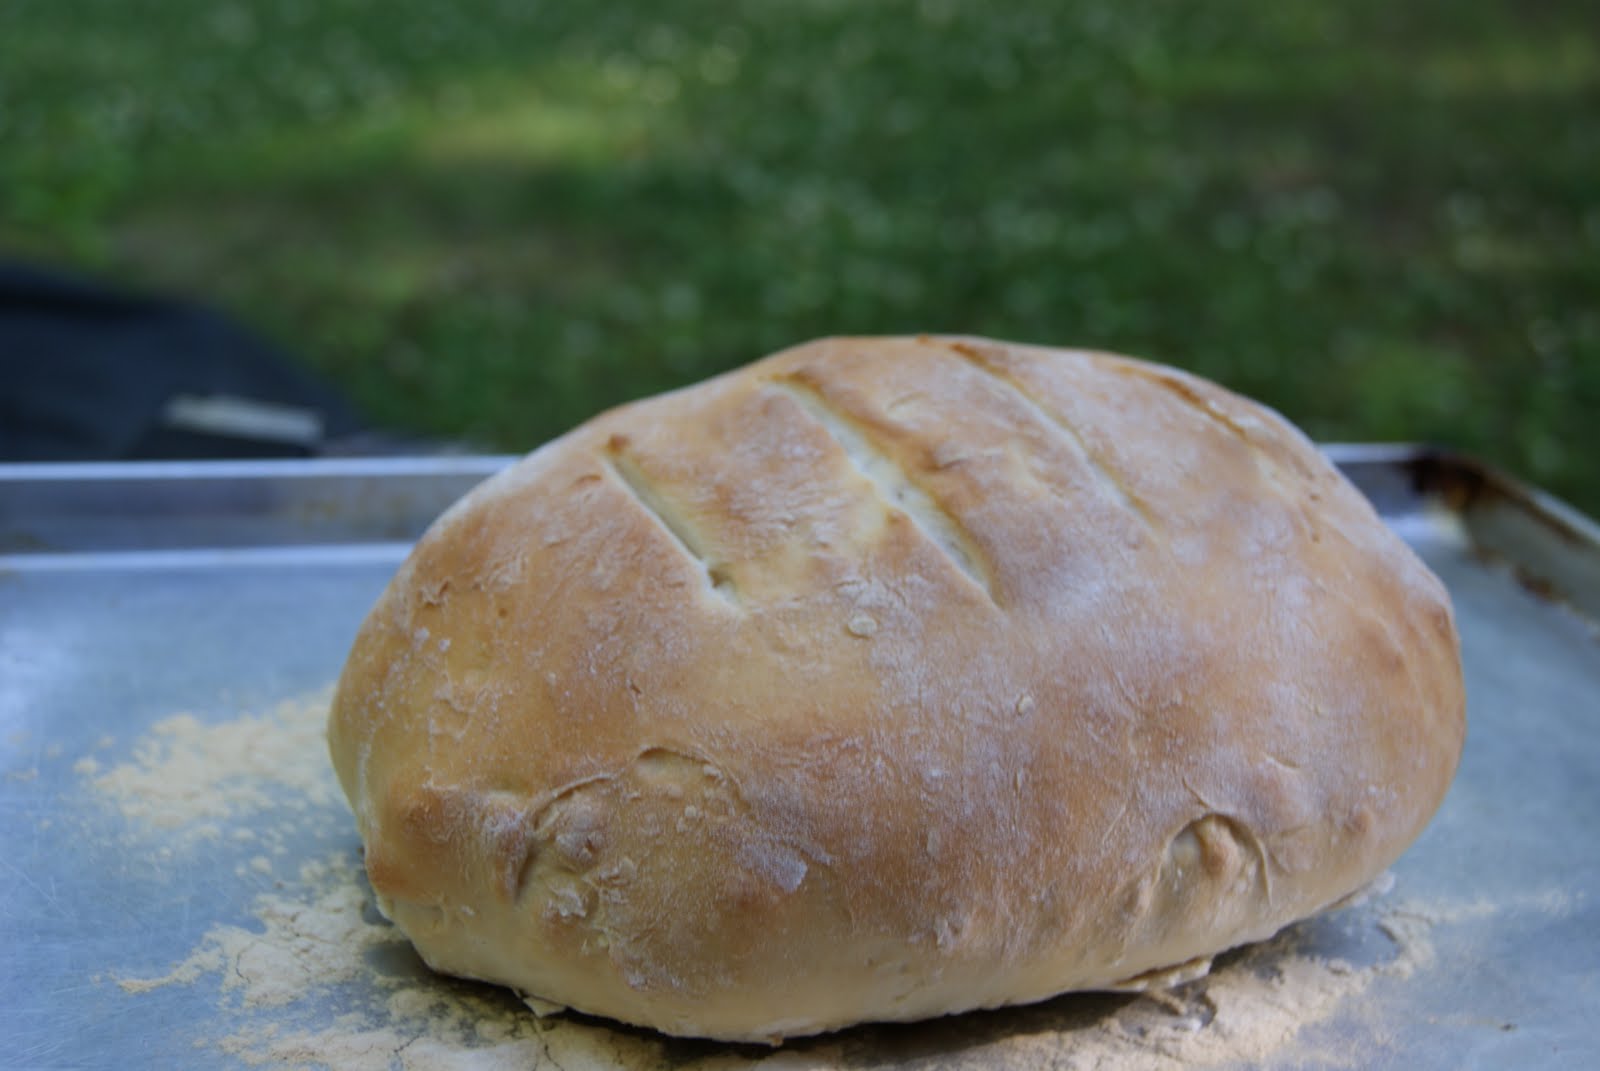
We have used the jam to eat plain with bread, as a base for pizza bread, in sandwiches, as a dip for chicken, paired with ricotta or basil or both....the possibilities are endless.  So far the Boy's favourite sammy has been a waffle and grilled chicken breast with tomato jam...this of course is his own creation!


I fear not having anymore ripe tomatos on the plants but I'm sure cracking open a jar such as this mid winter will remind me of the summer bounty we were so fortunate to have this summer.

Until next time, stay warm and eat well.

Thursday, August 9, 2012

Summer Sipping, Blueberries, and Chicken


Summer is flying by and I am still doing my darndest to keep up with the cooking and baking, picture taking and blogging.  Truth be told, I am taking tons of photos but I am failing at the writing the part....I even took my laptop to the back yard to write but there are so many darn distractions in the yard...you know, the garden, butterflies, naps....that sort of thing....
The distraction of the first ripening tomato in the garden!!!
 I am still busy making my own lemon and ginger syrups for tasty summer bevvies (and for some marinades and dressings) but lately  I have tried a new syrup. Blueberry syrup!!! I did some research online for this one and came up with my own concoction that follows the recipe I follow for the lemon syrup. A simple syrup of equal parts sugar and water with the berries tossed in. This one seemed to work for me.


Blueberry syrup

4 cups blueberries (fresh or frozen)
1 1/2 cups water
1 1/2 cups sugar
1 lemon's worth of lemon juice

Put everything in a pot and let it come to a boil. Cook until the berries are popping. I gave the berries a bit of a mashing with a potato masher just to get all the juice out.

Allow everything to cool in the pot then pass through a strainer.  I stirred and mashed the berries in the strainer a bit more then transferred the mashed berries to a jar for use on toast....instant jam!


Store the berry syrup in the fridge.

I found this one required a bit more than 1/3 cup of syrup per can on club soda. It makes a nice fruity soda with a gorgeous colour.

Another use for this syrup:

BBQ sauce!!!!!

Mix equal parts chili paste and syrup and brush onto meats on the grill. I used this on chicken tonight and it was absolutely divine, a nice sweetness with heat on the back of the tongue!
I used Sambal oelek for this one.
Until next time, stay warm and eat well!! (and have a drink!)

Sunday, July 29, 2012

PhDs, Books & Lemonade, Oh My!


Oh Summer, you seem to pass by so quickly. Before we know it, it is almost August. Yikes!! We have been busy. My sister defended her PhD thesis last week so we had to have a BBQ and a cake.  A Yoda cake to be exact....She will be a Jedi Master following fall convocation. This is a big deal in our Prairie dwelling family of Jedi nerds.
I still need to practice the Yoda cake, but always fun!
 Things have calmed down around the Little Kitchen and I have even been able to get back to reading one of my favourite books. Many of you probably figured out that I have long been a fan of Little House on the Prairie (both the books and the tv show). I know, who'd a thunk it?

I bought this book last year when we were in St. Louis, MO and I even read through it last summer and enjoyed it. All this book has done has re sparked my interest in the Little House On The Prairie books to the point where I would like to read them again. This book has recipes that Ma Wilder used (or similar to ones she would have used).

 
That's right, The Little House Cookbook by Barbara M. Walker has become a favorite. Not so much for it's recipes but for some of the descriptions of the frontier life and the simple living (that was actually labour intensive).  Walker also uses excerpts from the Laura Ingalls Wilder's books where she describes in great detail the foods, the smells, and the feelings of the food. From the times the family nearly starved all the way to the richer times, Laura's life revolved around family and food.

I just like this book. I keep wanting to try some of the recipes from it. I am thinking the pickled beets would be great since I have a garden full of beets. I will work on that in the next while.

In the meantime, I am still making ginger syrup but have also started making lemon syrup for lemonade...oh and am I in love with lemon syrup...(especially with a shot of rum or gin or vodka in it....)


With many thanks to Pinterest for helping me find this one. The recipe actually hails from the Anne of Green Gables Cookbook (perhaps another one I should pick up...) but I found it on the Simply So Good Blog.  Perhaps I was drawn to this recipe over others due to its traditional roots.

It really is simple:

1 1/2 cups sugar
1 1/2 cups water
1 1/2 cups lemon juice (fresh squeezed please)
zest from one lemon

Boil the sugar and water for about 5 minutes. Add the zest and lemon juice and allow to cool.  Transfer to a jar or other suitable storage vessel.

This works well using 1/3 cup syrup to 1 can of club soda or the equivalent amount of cold water. (Don't forget that shot of rum).

Adding some frozen fruit is fabulous as well...I like frozen blueberries but fresh strawberries muddled in the bottom....raspberries....blackberries....you get the idea!

Frozen blueberries

Fresh strawberries
We also got a fabulous haul from our CSA this week....


Check out other fabulous recipes at the Melt in Your Mouth Mondays Link up!

Until next time, stay warm keep cool and eat well.

Friday, June 29, 2012

Canada Day Eats Part 6: The Final Frontier

Hi Everyone. Such a big day today!! The last day of school for the summer a guest spot on a television show, and the Boy is having all 4 of his impacted wisdom teeth extracted today....not too sure if I will be able to top that for the rest of the summer. I just may need a vacation from my summer vacation!

I will post the link to the show when it is available!  And now the link is available!!! Just click on the link labeled "Canada Day Eats" on the right side of the screen.

All week I have been posting my test recipes for a Canada Day celebration to gear up for my spot on CTVmorning live Friday morning.  The Boy and Hubby have had the oh so difficult job of tasting all the food and everything has passed inspection. As I posted this week, I made sure to link it to this post so that everything was on one page to make it easy for people to find.

So here it is, after a week of brainstorming, writing, cooking, tweaking, and rewriting, here is the menu, with the links:

Planning ahead - Things to think about when planning a BBQ/outdoor party.

Bison Cheese sliders on bannock   Printable recipe here

Beer marinated steak skewers   Printable recipe

Grilled potato wedge poutine

Wild rice salad    Printable Recipe

Ketchup chips (because let's face it, these are truly Canadian!)

Maple Cream Cookies     Printable recipe

Bacon Maple Cheesecakes    Printable recipe

Red & White Vanilla cupcakes   Printable recipe

Various drinks to keep people quenched.  Go for a selction of Canadian, local beers, sodas, and juices.


There is one last recipe that I haven't posted yet so I am going to add it here. Keep in mind that this wild rice salad can really be anything you want. Use whatever veggies you have on hand and whatever vinagrette tickles your fancy. You are never bound directly to the recipe. If you want more feta or more dressing then you should do just that!

Wild Rice Salad  

For this salad, I used a wild and brown rice mix I found at the store but if you have straight wild rice and want to use just wild rice, go wild and do that.

1 cup rice/wild rice (that's the uncooked rice measurement)

Cook rice according to package directions then set it aside to cool.

While the rice is cooling chop up your favourite assortment of veggies.  Today I used:

½ red bell pepper
½ yellow bell pepper
¼  purple onion
A handful of bean sprouts
A handful cherry or grape tomatoes, cut in half
A small bunch of parsley or any herb you like

To this I added:

½ cup crumbled feta cheese
½ cup chopped sundried tomatoes
¼ cup balsamic dressing (Feel free to use whatever vinaigrette style dressing you like, it doesn’t have to be balsamic.  Greek, Italian, red wine vinegar....)

I hope you all enjoy your Canada day, no matter what you decide to do or cook up. Happy 145th to everyone!!

Until next time, stay warm and eat well!

Monday, July 18, 2011

Too Hot To Bake Bread??? Bah!

The weather has been hot and steamy here on the prairies! I am not going to complain about the heat because we spend all winter complaining about the cold. We deserve weather like this, really we do! We endure the deep dark depths of a prairie winter to get these glorious long, hot, sultry days of summer.  We spent the weekend at the Little Cabin on the dock.  We had our sun brellas out, our sunblock on, and our books in hand.  When we got too hot, we jumped into the water to cool off.  I mean, really cool off.  You do have to brace yourself for the cold but after the heat it is just so gloriously refreshing.

I so wanted to bake some fresh bread at the Little Cabin but I dare not turn the oven on for fear of heating the place up even more!  The heat and humidity make for perfect bread rising conditions....hmmmm.... What to do, what to do.....


Fresh BBQ Bread (you can do this with any bread recipe you want. I just had all purpose flour at the cabin)

Printable recipe
  • 1 1/4 cups warm water
  • 1 pkg active dry yeast
  • 2 tbsp honey
  • 3 tbsp olive oil
  • 3 - 4 cups flour
  • 1/2 tsp salt
Combine the honey and the water in a bowl, stirring to mix and dissolve the honey.  Add the yeast and give it about 10 minutes to get all foamy and ready to go. Then add the olive oil.


Add 1 cup of flour and mix with a wooden spoon.  Now add the salt and another cup off flour.


Keep adding the flour 1 cup at a time until you can mix no more.


Now knead the dough by hand for a few minutes until the dough is soft and elastic.


Place the ball of dough back in the bowl, cover with a clean towel to rise until double in size. (anywhere from 45 to 60 minutes, or sooner if hot and humid!)

Punch the dough down and form it into an oblong loaf.

Now you can either use a baking sheet or tin foil that has been doubled up.  Either way, dust the surface with flour to keep it from sticking to the baking surface.

Baking sheet
Double layer of foil - use a board to slide the foil on and off the grill
 Cover with a clean towel and allow it to rise until double.

Preheat the BBQ on high for about 10 minutes.  Depending on your BBQ you have a few options.  This BBQ has four burners so I turned off the middle 2, left the outside 2 on and placed the bread in the middle, on the burners that are off.  We are using indirect heat to bake the bread.


Bake for about 15 minutes, lift the lid to peek after 10 minutes but remember that when you lift the lid, you let ALL the heat out and it will take a couple of minutes for the heat to build back up again.


Until next time, stay cool and eat well.

    Sunday, July 17, 2011

    Little Cabin in The Woods - Ribalicious

    Before the summer started, Hubby and I were pondering what we would do for meals while at the lake. The budget is tighter during the summer as I am not working, and that means no $$.  Our lovely friends at HMG Meats and Deli (For those in Winnipeg, HMG Meats and Deli is at 642 Leila Avenue, 339-8406)
    came out with some amazing deals on freezer packs of meat....and I mean amazing.  We bought one of these packs with the the cabin in mind.  The only thing we need to pick up at the store before heading out to the woods is our fruit and veggies! It really has been working out quite well.  One of our feasts at the lake was ribs.....done on the BBQ......drool.......

    You may remember the BBQ disaster on Christmas....turns out it actually was too cold for the propane. I have heard that next time we should keep the tank covered.  Apparently propane can actually get too cold to burn...you would think I would have known that, being a prairie dweller....


    I used the Alton Brown Dry rub which is essentially a ratio, the rub is basically 6:1:1:1. (All in tbsp)
    The day before you plan to cook your ribs, prepare the rub.  In a bowl combine:

    • 6 tbsp light brown sugar, firmly packed
    • 1 tbsp kosher salt
    • 1 tbsp chilli powder (sometimes I use paprika instead)
    • 1 tbsp of any mixture of spices (this is where you can really alter the mixture to suit your taste):
      • for example: 
      • ½ tsp cayenne
      • ½ tsp old bay
      • ½ tsp garlic powder
      • ½ tsp onion powder
      • ½ tsp ground black pepper
      • ½ tsp dried thyme      
      • (as long as you combine 3 tsp of spices, you will get the last 1 in your ratio)

    Prepare the rub by mixing everything together.

    If the skin type film on the back of the ribs hasn't been removed, remove it by slipping a knife under the skin, do your darnedest to get a grip and pull it off.
    There it is....gently and firmly pull that off!
    Keep pulling...

    Sprinkle on the rub and well, rub it all in.....
     

    Wrap each rack (tee hee) in foil and let it rest in the fridge for a few hours or overnight.

    Open one end of the foil and add some liquid. You can use beer, juice, wine, broth or stock or even water.

    Slow cook in the oven for a few hours (at 250F) or on a low, indirect heat on the BBQ.


    Once cooked, slather on the BBQ sauce of  your choice and slap 'em on the grill to crisp up the ribs.....
    Meat and carbs.......

    Enjoy!

    Until next time, stay warm and eat well!

    Monday, July 11, 2011

    Nacho Lunch: Busy Summer Days

    Even though the Boy and I are officially on holidays, it seems as though we have been busier than ever!  Between catching up on medical appointments and baseball playoffs it seems like we haven't been home much!  City playoffs are going on so we didn't get to the cabin  but that's okay we got to watch the team blow 2 games, 2 players and 1 coach get ejected, one big win and one oh so tense come from behind win....whew...it was a busy weekend.  Not to much to report food wise....well okay that's a complete lie I have oodles of pictures of tasty food ready but I just have to find the time to write the posts.


    Today for lunch the boy and I used some left over grocery store rotisserie chicken to make some super duper chicken nachos! Yeah! That's right, we had nachos for lunch and it was delish!!

    Line a baking sheet with parchment, pour on some multi grain chips, top with chopped peppers, onion, tomatoes, chicken, cheese, and anything else you feel like having (hot peppers, olives......)


    Here's to making more time for writing!


    Until next time, stay warm and eat well!

    Wednesday, July 6, 2011

    A Canada Day Weekend With Canadian Beef!

    Remember to stop to smell the flowers!!
     OK, so life gets busy sometimes and I didn't actually get to grill this fabulous steak until Canada Day, which unfortunately was after the end of the Who Rules the Grill contest. I even wrote the post last week and got all ready to grill, take photos and post... Oh well, I wound up popping this steak into the freezer.  The great part was that as the steak thawed in the fridge, it continued to soak up some tasty, tasty marinade!!


    So without further ado, I give to my a little too late grilled steak sammies:

    Pop quiz, what do you do when the package of Canadian beef you bought comes with 2 flank steaks? What do you do? What do you do? I will tell you what you do, you enter the Who Rules the Grill contest being hosted by the wonderful people at Canadian Beef.   The other day I made a tasty chipotle lime steak salads, they were so yummy and hit the spot after a couple of ball games.  Last night I tossed together a soya sauce based marinade and stored the flank steak in the fridge overnight.


    Gingered Flank Steak

    1 flank steak
    1 tbsp hoisin sauce
    1/4 cup low sodium soya sauce
    1 tsp sesame oil
    1 1/2 tsp ginger powder (you can also use fresh grated ginger)
    3 green onions, roughly chopped
    1 large zip top baggie

    See?  Canadian beef!!!!
    And a nice looking piece of Canadian beef too!!!
    Place all your ingredients but the flank steak into the zip top baggie and mash it all up with your hands.


    Add in the flank steak, squeeze out all the air and seal it.  Mash/mix it all up with your hands to ensure the entire steak is coated in tasty goodness.


    Store it in the fridge until you get home from work.


    Take the bag o'steak out of the fridge and set it aside to come to room temperature while you prep other items such as salad fixin's, onions and mushrooms! (You gotta have sauteed mushrooms and onions on your sammie!)


    One neat time saving item I found at the store was this package of Texas style garlic toast....all ready to toast or grill!  SCORE!!

    It came with 2 loaves of 8 slices...perfect for grilled steak sammies!!


    Pre heat the BBQ and get it smokin' hot.

    Also get the mushrooms and onions working in the saute pan! (A little butter, a little time, some stirring every now and then......and voila!!)


    Slap your steak on the grill, reduce the heat to medium and let it cook for 5 minutes before giving it a quarter turn to the side (gets you some great grill marks!)  Cook for another 2 minutes before flipping.

    Flip your steak over (using tongs) and let it cook once again for 5 minutes before giving it another quarter turn.  Cook for another 2 minutes.


    Take the Flank off the grill and place on a clean platter or plate and cover with foil.  Let it rest until the garlic toast is done.

    Now place  your garlic toast on the hot grill.  Make sure you watch the bread closely as it will burn quickly.


    Slice the steak thinly across the grain, stack on a slice of garlic toast with mushrooms and onions.....devour.  (a slice of melty cheese also goes well....)

    That's right, the boy had 2 steak sammies and beans.....
    Of course I should share some of my other photos from the long weekend.  I mean whats a long weekend without going to the cabin, relaxing, and playing around with the camera??


    Every Canada Day long weekend,  they release a bird that has been at the the wildlife rehabilitation centre.  In the past they have released bald eagles, golden eagles, horned owls...the list goes on.  This year they released a broad winged hawk.  The pictures of the hawk taking off didn't turn out because it flew so fast.


    Hubby reading in the hammock....this really is the sweet life!


    The daisy solo shot

     Pretty flowers
     Those spiders spin webs on the dock so darn quickly!!

    I was so excited to find ripe strawberries in my garden when I got home!

    Until next time, stay warm and eat well!