Monday, February 27, 2012

Wholey Chicken Wings Batman!

Chicken wings are a favourite in the Little Kitchen.  I make chicken wings more often than I write about.  If I actually wrote about chicken wings as often as the boys actually eat chicken wings then this blog would be called "Little Wing on the Prairie".  I kid you not....wings are no joking matter.


We are making the effort to be more healthy lately so when it came time to dredge the wings in flour, I reached for the whole wheat flour instead. The boys claim that these wings were the crispiest wings ever...even better than the other wing recipes I've posted about such as this post, this post, or this post.  Just to make sure it wasn't a fluke, I made these wings again last night with the same crispy baked goodness.  This is another one of those recipes where I didn't really measure too closely on this one.


Crispy Baked Chicken Wings - printable recipe
Big ole package o' wings
  • 1 cup whole wheat flour
  • 1 tbsp dry mustard powder
  • 1 tbsp garlic powder
  • 1 tbsp onion powder
  • 1 tsp kosher salt
  • 1/2 tsp black peper
  • (If you have it on hand, 1 tbsp smoked paprika goes well with this mixture too!)
  • 1 pkg chicken wings and drumettes (This was a Costco size package)
Pre heat the oven to 400 degrees.

Line 2 baking sheets with a sheet of foil and a sheet of parchment paper. I find the wings get crispier on parchment then they do if you use a silpat or silicone sheet liner.

In a large bowl, combine the dry ingredients until well blended.


Rinse the chicken wings with cold water and drain.


Dump the wings into the flour and stir to coat all of the wings. Use your hands or a fork...what ever works to get each wing coated.


Shake the excess flour off the wings.


Spread the wings out on the sheets.  If the wings are too crowded together, they will not crisp properly so make sure to give each of them their space.


Bake for 25 minutes then flip the wings over and rotate the pans.


Bake for another 25 minutes.


Once these wings are done you can douse them with your favourite hot sauce.  (Or any sauce you like)

I opted to toss some of the wings with some Hawaiian black lava sea salt and pepper for the most amazing salt and pepper wings EVER! (If only I had a lemon to zest and add to the salt and pepper....mmmmmm)


 Tasty, tasty, tasty...

Until next time, stay warm and eat well!

Saturday, February 25, 2012

Bacon Love

Do you do anything for the Oscars? I don't normally make anything extra for Oscar night, mostly because the Boy usually has a baseball practice that night...and guess what....the Boy has a baseball practice on Oscar night! At times, I think I should do more to observe these sorts of things but in reality, that's not going to happen so I do what I can. 

As I was browsing through blogville and all things internet, I started seeing all sorts of ideas and menus. I had all sorts of ideas milling about in my head (some of them were even good ones). Oscar night is a star studded event so I was thinking about making something that was also star studded.  Star studded with bacon of course!

Bacon peanut brittle came to mind so I started to browse the wild world of the internet and found many different recipes and you know what I discovered? I discovered that you can take any peanut brittle recipe and add bacon to it.  I don't have a tried and true recipe for brittle so I used the recipe found here at My Man's Belly with only a couple of adaptations.


Bacon Peanut Brittle
 Printable recipe here

Make sure you have a candy thermometer for this one. You will need it.  Also, gather all of your ingredients into bowls before the sugar is done boiling so you can add it all in quickly and pour the molten hot mass onto the cookie sheet.

Gather up the following into their own separate bowls:
  • 1 lb bacon, cooked, drained, and chopped into small pieces
  • 1 cup roasted, peanuts. (I used unsalted but salted would work here to)
  • 1/2 tbsp baking soda
  • 1/2 tbsp vanilla (I will use a full tablespoon next time)
  • 2 tbsp butter
  • 1 tsp salt

Affix the candy thermometer to the side of a large pot and add to the pot:
  • 2 cups white sugar
  • 3/4 cup corn syrup
  • 3/4 cup water

Prepare a cookie sheet with either a silpat or silicone liner or butter it generously and set it aside so it is ready to use when it comes time to pour out melty, hot, molten sugary goodness onto it.

Place the pot on the element and turn the heat to medium.  Stir the mixture until the sugar dissolves, then set the spoon aside until it is time to stir in the other ingredients.

Stay in the kitchen during the boiling of the sugar. It can burn so quickly. Don't even run to the bathroom to pee quickly or duck into the other room to check the score on the Jets game!!! (This means you Mrs Kimball!)

This can take a while but do not turn up the heat on the stove, it will be tempting but burnt sugar is gross and messy so don't!
When the temperature reaches 290 degrees or the hard crack stage, remove the pot from the heat. This is important because even if you turn the heat off on an electric stove, the element stays hot and you can burn the sugar.

When 290 degrees has been reached, quickly dump in the peanuts, bacon pieces, and butter.  Stir quickly to incorporate.  Now just as quickly, dump in the vanilla, salt, and baking soda.  It will bubble up so be careful. Stir until it stops foaming and quickly  (carefully too) pour the molten hot mass onto your prepared cookie sheet and let it spread out.  Do not use a spatula or the spoon to smooth it out because it will deflate the brittle.


Allow the brittle to cool completely before breaking it into pieces.


Savour it slowly....enjoy it.....every bacony piece.

Until next time, stay warm and eat well!

Tuesday, February 21, 2012

Growing Up Too Fast

Warning....this post is a little sappy because my baby is growing up quicker than I'd like....

Consider yourself warned!

Strange Exciting things are happening in the Little Kitchen!! The Boy has earned his learner's permit....he has even been behind the wheel of the car!! A few of his friends have their licenses already and let me tell you, I have a mini panic attack every damn time I hear "so and so said he'll pick me up" or "so and so drove us to the mall for lunch today" (I didn't even know he had money!).  As a mom, it does rattle the nerves. You worry about their safety, their where abouts, the choices they make with their new found independence, have I done my job properly......(see, just thinking about it put me on the verge of a nervous breakdown).

My own mom never let me drive when I was learning so I already knew that I didn't want to be like that.  I took him to get his permit and then took him to an empty parking lot to practice driving around....then I let him venture out on the street and drive us to the mall for dinner. He did such a fabulous job, you know, for his first time behind the wheel and all.

This all really makes me think back to all the little steps of 'letting go' as a parent.  Things like letting him walk to school on his own for the first time, riding his bike around the neighbourhood with his buddies (without me following them around), and sending him to the IGA to pick up a couple of ingredients for dinner on his own are all in the back of my mind these days.  Until he gets his actual license, he needs to have a trusted adult in the passenger seat but I will hold on tightly and do my best to let go when the time comes....if I have to....

Let's get to the food now, shall we?

Since we've been busy, I have been trying to cook up a a big batch of something tasty on the weekend and using it during the week.  This week I got an email from the Canadian Parent website with a slow cooker recipe for Beef Stroganoff that looked so simple and straight forward, I gave it a shot.  Here's the link to the site.  I won't post the recipe here but please go to the website and check it out. There are some pretty neat slow cooker ideas there.
Pile stewing beef, onions, mushrooms, and beef broth into the slow cooker
Reheat in a large skillet on the stove
Boil your pasta
Roast asparagus at 400 for 10 to 15 minutes (brush with olive oil and sprinkle with salt and pepper.

Guess what, everyone loved it. It smelled soooooo go while cooking but we actually didn't eat it until the next day but it heated up so nicely.  I heated the beef on the stove while boiling the pasta and roasting some asparagus! It really was a tasty meal!

Until next time, stay warm and eat well.  (also, drive safe!)

Monday, February 20, 2012

Things I tried in Hawaii

Wow, I am a lame brain and still trying to get back into the swing of things....in fact I should have posted what I made for dinner tonight, but I didn't...I am working on that, dinner was delish!

I didn't actually bake anything for Valentine's day like I did last year. I did however think this would be a time to share something I tried while I was in Hawaii not too long ago.  While the temperature is warmer this week, it dipped way down again other week. Two Fridays ago it was -40 Celsius with the windchill....brrrrr....That is a good 70 degrees colder than it was when I was in Hawaii! (I want to go back!!!!)  One day while wandering through one of the many ABC stores, not sure of what I wanted to snack on, I happened upon this small heating/keep stuff warm unit.  Inside were these little curious bundles...I just had to try one.  Turns out that if you take a piece of Spam, dip it in teriyaki sauce, pair it with some sticky rice, and wrap it in nori, you get a tasty little fast sushi style snack!!
Seriously, this was quite tasty!

I will work on that dinner post for tomorrow!

Until next time, stay warm and eat well!

Sunday, February 12, 2012

Just Stuff It!! Pretzel Sammies

It is Saturday Sunday today! Hooray! I was supposed to vacuum but I haven't done that yet.  What I did do was make some pretzel bites and pretzel sammies.  Spring training is upon us and that has me thinking of pretzels!! I used a good old stand by recipe that I have posted before because it was tasty and lets face it, sometimes it is just relaxing working with a recipe you  know works and works well.  I made the pretzel bite using this recipe here.  It can also be found at this link. For the sammies, I did switch out 2 cups of all purpose flour for whole wheat this time without affecting the texture or the taste.  These sammies were an absolute hit!!
Ham and Havarti pretzel sammies

Pretzel Sammies
For the pretzel dough:
·         2 cups warm water
·         2 tbsp light brown sugar
·         1 pkg active dry yeast (2 ¼ tsp)
·         ½ cup butter, melted
·         3 cups all purpose flour
·         2 cups whole wheat flour
·         3 tsp salt

Hot water bath
·         6 cups water
·         ¼ cup baking soda
Egg wash
·         1 egg
·         1 tsp water

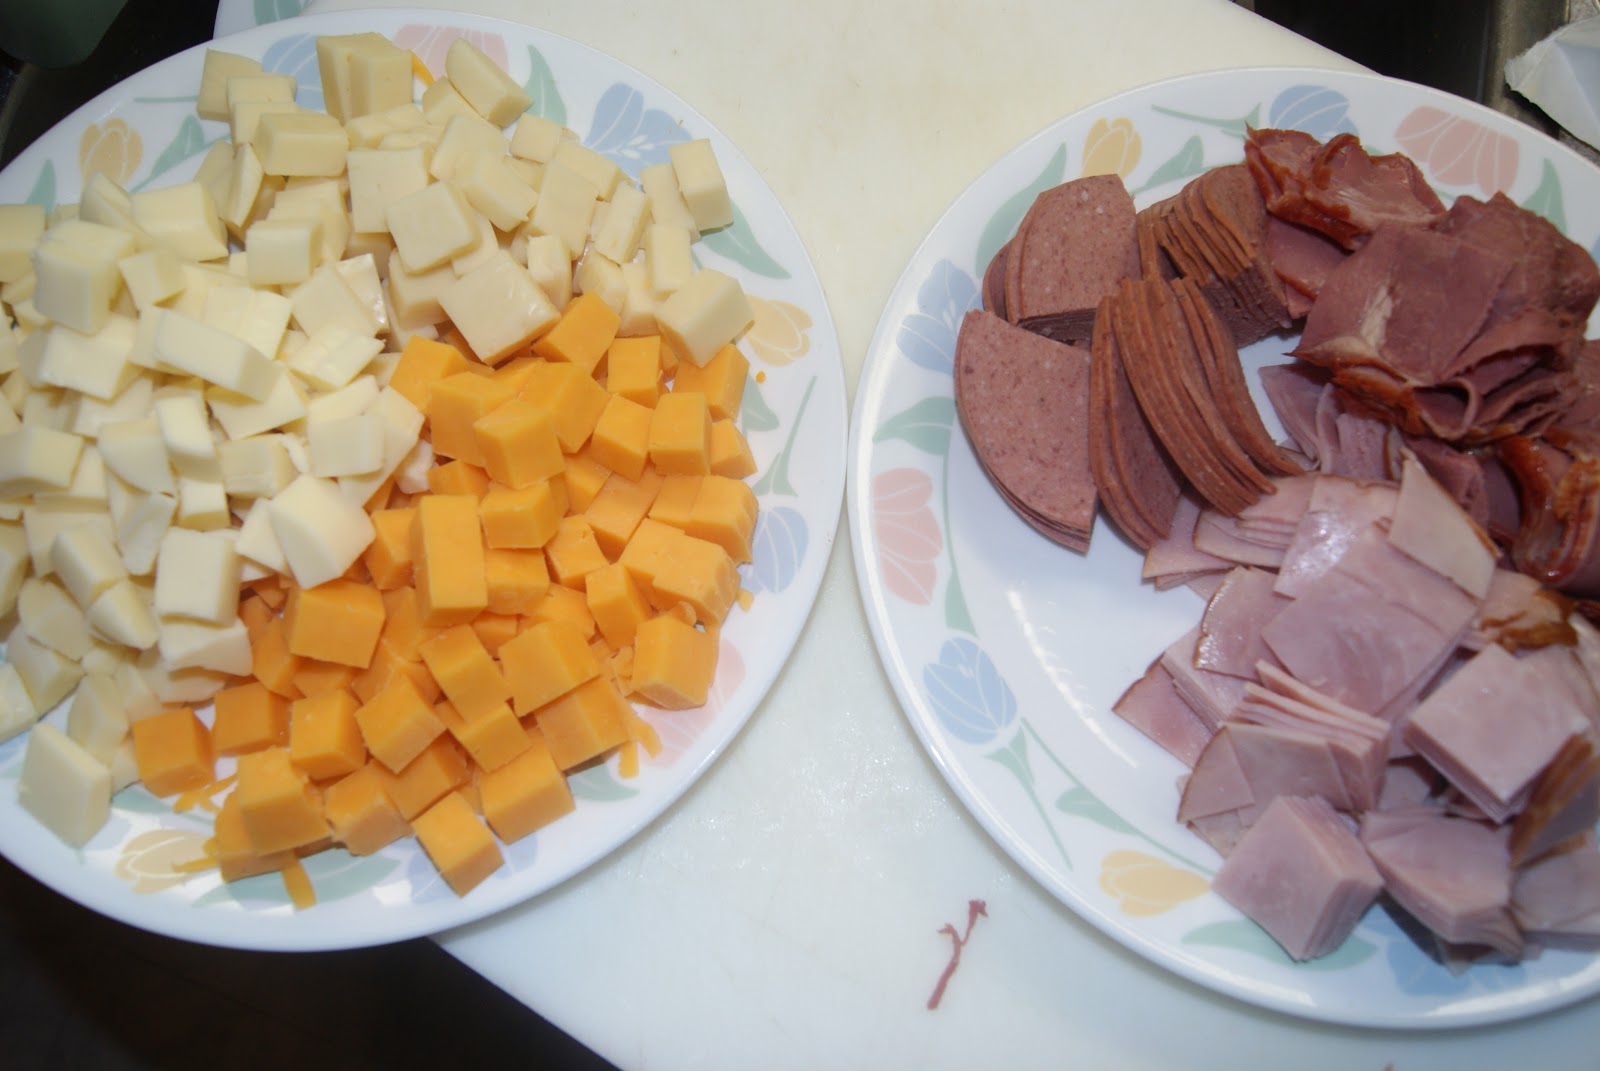
For the fillings, go with your favourite combinations of meats and cheeses.  Today I went with ham and Havarti, salami and provolone, as well as pastrami and cheddar.

Combine the warm water, yeast, and brown sugar.  Set aside for about 5 minutes and let it get all foamy.

Add the melted butter, the flour, and the salt.

With the dough hook, mix everything.  The dough will come together.  If the dough is sticky, add a bit more flour.

Knead the dough for about 5 minutes.

Place the dough in a lightly oiled bowl, cover with a tea towel and set it in a warm spot to rise until double in size, about an hour.

While the dough is rising, cut the cheese into cubes and the meat into more usable portions.

Divide the dough into equal 15 portions. I used a scale and was able to get 15 portions of dough that were roughly 3 oz each.

Form each piece of dough into a ball and cover them with a clean tea towel while you work with a few pieces at a time.

Flatten each dough piece into a flat circle and start piling on the toppings alternating cubes of cheese and pieces of meat.  Pile the fillings on until you think it won’t close.

Pull the dough up around the filling and start pinching to seal all the sandwichy goodness up inside.

Put a large pot of water on the stove to boil.  Once it is boiling, reduce the heat slightly to a high simmer and slowly add ¼ cup of baking soda...it will bubble up so add it slowly!

Simmer the sammies in the hot baking soda water bath for about 1 minute flipping over after 30seconds.  Transfer to a baking sheet, brush with an egg wash.

If you like, sprinkle with coarse salt after the egg wash.  Although if you aren’t eating these right away, then skip the salt as it will just melt away in storage.  If you are making more than 1 kind, use a piece of the meat to lay on top of the sammies to help identify them.

Bake at 425F for about 15 minutes until golden brown.
Until next time, stay warm and eat well!